Danby DR3009WGLP Product Manual - Page 8
Operating Instructions Cont'd
 |
View all Danby DR3009WGLP manuals
Add to My Manuals
Save this manual to your list of manuals |
Page 8 highlights
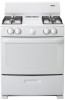
OPERATING INSTRUCTIONS (cont'd) USING YOUR RANGE (cont'd) Removable Oven Bottom: First remove the racks from the oven. The oven bottom lifts from the rear. Grasp each side of the oven bottom and lift upward from the rear until the bottom is clear. Lift it to remove from the front. NOTE: If the oven bottom is replaced incorrectly it may warp and cause undesireable baking results. Economy Broiler: Your range may be equipped with this optional broiler. The outward appearance of the range will be the same. To open the broiler door, lift handle up slightly to release the door catch and then lower the door. In the broiler section there are two positions of stamped-in oven rack guides and a broiler pan and grill. When you want to broil, take one of the oven racks and insert it into the rack guide position. Next, place the broiler pan and grill on the oven rack for broiling. The oven bottom has a porcelain enamel finish. To Broiling: make cleaning easier, protect the oven bottom from Preheat the broiler area and broil pan for a few excessive spillovers. This is particularly important minutes. No definite time can be given for broiling when baking a fruit pie or other foods with high acid meats because of varying thickness, amounts of fat, and content. Hot fruit fillings or foods that are acidic in personal taste. Be careful when handling hot broiler content, such as milk, tomato or sauerkraut, and sauces pans; be careful of hot grease. Serious injury can result with vinegar or lemon juice, may cause pitting and due to spillage of hot grease. Never leave a dirty broil damage to the porcelain enamel surface. To protect the pan in place; always clean it and return it to the burner oven bottom surface, place a piece of aluminum foil assembly. Unauthorized broil pan substitutes should slightly larger than the baking dish on the rack below to never be used. Excess fat should be trimmed to reduce catch any boilovers. It should not completely cover the the possibility of flame up. The meat could be ruined or rack as this would cause uneven heat in the oven. fire could occur causing loss of property and bodily Aluminum foil should not be placed on the oven injury. When broiling fatty meats, the lowest broil must bottom. If a spillover does occur on the oven bottom, be used; however, we recommend the lowest position at allow the oven to cool first. You can clean the bottom all times. Always broil with the oven door closed. When with soap and water, a mild abrasive cleaner, soap-filled broiling is completed, turn the dial to OFF and remove abrasive pads, or an oven cleaner (following package the broil pan temporarily for cleaning. directions). Do not use broiler area for storage of cookware. Broiler Compartment: The broiler pan is held in place by a wire broiler rack. To open the broiler, gently lift up and pull forward on the drop down broiler door. Pull the broiler pan forward. It will reach a temporary stop position. Continue to pull forward and the broiler pan will pull out to expose the entire broiler grill surface. Remove the broiler pan from the broiler rack by lifting up on Air Circulation in the Oven: • To cook food evenly, hot air must be able to circulate. • For best air circulation and baking results allow two inches of space around bake ware and be sure pans and bake ware do not touch each other, the oven door, sides or back of the oven cavity. • The hot air must circulate around the pans and bake ware in the oven for even heat to reach around the food. the front of the broiler pan so it will clear the wire rack. Then pull forward slightly and use both hands to lift the NO. OF PANS POSITION ON RACK pan free of the rack. To return the pan to the broiler rack, pull the wire rack out to the stop position. Insert 1 Center of rack the pan into the recessed section of the broiler rack. Slide the pan in place under the pan retainers. Push the 2 Side by side or slightly staggered pan to the rear of the broiler compartment. Close the broiler door. 7
-
 1
1 -
2
-
 3
3 -
 4
4 -
 5
5 -
 6
6 -
 7
7 -
 8
8 -
 9
9 -
 10
10 -
 11
11 -
 12
12 -
 13
13 -
14
-
15
-
16
-
17
-
18
-
19
-
20
-
21
-
22
-
23
-
24
-
25
-
26
-
27
-
28
-
29
-
30
-
31
-
32
-
33
-
34
-
35
 |
 |
