DeLonghi ECAM23450SL Owner Manual - Page 13
Making Drinks With Milk
 |
View all DeLonghi ECAM23450SL manuals
Add to My Manuals
Save this manual to your list of manuals |
Page 13 highlights
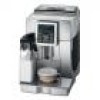
Making coffee using pre-ground coffee lid and hot water nozzle as described in Important! • Never add pre-ground coffee when the machine is off or it could spread through the inside of the machine and dirty it. This could damage the appliance. • Never use more than 1 level measure or it could dirty the inside of the coffee maker or block the funnel. the sections "Cleaning the milk frother with the CLEAN button" on page 15 and "Cleaning the milk container" on page 17. 3. Make sure the milk intake tube is correctly inserted in the bottom of the milk container lid (fig. 16). 4. Place the lid back on the milk container. 5. Remove the hot water spout from the nozzle (fig. 17). 6. Attach the milk container to the nozzle and Please note! If you use pre-ground coffee, you can only make one cup of coffee at a time. 1. Press the button (fig. 6) until "Pre- ground" is displayed. 2. Make sure the funnel is not blocked, then add one level measure of pre-ground coffee (fig. 13). push as far as it will go (fig. 18). The machine emits a beep. 7. Place a sufficiently large cup under the coffee and frothed milk spouts. Adjust the length of the milk spout. To move it nearer the cup, simply pull it downwards (fig. 19). 8. Follow the instructions below for each function. 3. Place a cup under the coffee spouts. 4. Press the 1 cup coffee button (fig. 8). 5. Preparation begins. The amount of coffee selected is displayed together with a progress bar which gradually fills as preparation progresses. Making cappuccino or macchiato 1. After attaching the milk container, turn the froth adjustment knob on the milk container lid between position 2 and 3 (fig. 20). 2. Press the CAPPUCCINO button on the control MAKING DRINKS WITH MILK panel. "CAPPUCCINO" is displayed, together with a progress bar which fills gradually Please note! as preparation proceeds. If the froth is not To avoid milk with poor froth or large bubbles, always clean the milk lid and hot water nozzle satisfactory, turn the froth adjustment knob towards 2 (= less froth) or towards 3 as described in the section "Cleaning the milk (= more froth) (fig. 20). container" on pages 15 and 17. 3. After delivering the frothed milk, the machine Filling and attaching the milk container 1. Remove the lid (fig. 14); 2. Fill the milk container with a sufficient automatically makes the coffee. Please note! • If during delivery you want to stop making quantity of milk, not exceeding the MAX level milk or coffee, press the CAPPUCCINO marked on the container (fig. 15). Each mark button twice. on the side of the container corresponds to 3.4 oz / 100 ml of milk. • At the end of delivery, to increase the quantity of coffee in the cup, just press (within 3 seconds) the CAPPUCCINO button. Please note! • For a denser more even froth, we recommend using skim or 2% milk at refrigerator temperature (about • Do not leave the milk container out of the refrigerator for longer than strictly necessary. The warmer the milk (41°F/5°C ideal), the poorer the froth will be. 41°F/5°C). • To avoid producing milk with poor froth or large bubbles, always clean the milk Making frothed milk (without coffee) Proceed as described in the previous paragraph 14
-
 1
1 -
2
-
3
-
4
-
5
-
6
-
7
-
 8
8 -
 9
9 -
 10
10 -
 11
11 -
 12
12 -
 13
13 -
 14
14 -
 15
15 -
 16
16 -
 17
17 -
 18
18 -
19
-
20
-
21
-
22
-
23
 |
 |
