Dell 1125 Mono Laser MFP User's Guide - Page 30
Replacement Parts
 |
View all Dell 1125 Mono Laser MFP manuals
Add to My Manuals
Save this manual to your list of manuals |
Page 30 highlights
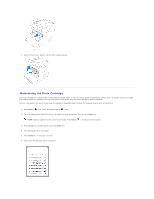
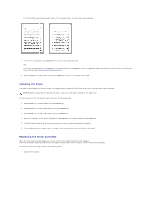
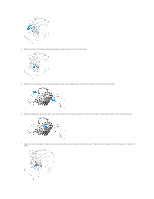
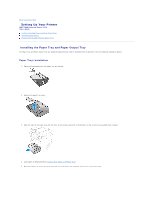
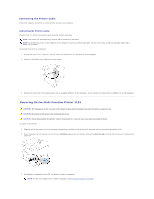
6. Close the front cover. Ensure that the cover closes securely. Once the drum cartridge is installed, reset the drum counter as described below. Resetting the Drum Counter After replacing the drum cartridge, the drum counter must be reset to accurately reflect the life span of the replacement. To reset the drum counter, perform the following steps. 1. Press Scroll () to select Setup and press Select (P). 2. Press Scroll () to select Maintenance and press Select (P). 3. Press Scroll () to select Reset Drum Cnt and press Select (P). 4. Press Scroll () to select Yes and press Select (P). 5. The LCD displays Saved and the counter is reset to zero. Replacement Parts Through normal MFP operation all parts of the printer are subject to wear and tear. This section provides information and procedures to replace worn or malfunctioning parts. CAUTION: It is strongly recommended that these items are installed by a trained service professional. To purchase replacement parts, contact Dell™ Replacing the Paper Tray If the paper tray jams constantly, fails to register inserted paper, or feeds multiple pages simultaneously, perform the following steps to replace the unit. 1. Remove the paper tray cover and any remaining paper. NOTE: You may need some force to remove the paper tray.
-
 1
1 -
2
-
3
-
4
-
5
-
6
-
7
-
8
-
9
-
10
-
11
-
12
-
13
-
14
-
15
-
16
-
17
-
18
-
19
-
20
-
21
-
22
-
23
-
24
-
 25
25 -
 26
26 -
 27
27 -
 28
28 -
 29
29 -
 30
30 -
 31
31 -
 32
32 -
 33
33 -
 34
34 -
 35
35 -
36
-
37
-
38
-
39
-
40
-
41
-
42
-
43
-
44
-
45
-
46
-
47
-
48
-
49
-
50
-
51
-
52
-
53
-
54
-
55
-
56
-
57
-
58
-
59
-
60
-
61
-
62
-
63
-
64
-
65
-
66
-
67
-
68
-
69
-
70
-
71
-
72
-
73
-
74
-
75
-
76
-
77
-
78
-
79
-
80
-
81
-
82
-
83
-
84
-
85
-
86
-
87
-
88
-
89
-
90
-
91
-
92
-
93
-
94
-
95
-
96
-
97
-
98
-
99
-
100
-
101
-
102
-
103
-
104
-
105
-
106
-
107
-
108
-
109
-
110
-
111
 |
 |
