Dell 510D Service Manual - Page 22
Set the keyboard aside.
 |
View all Dell 510D manuals
Add to My Manuals
Save this manual to your list of manuals |
Page 22 highlights
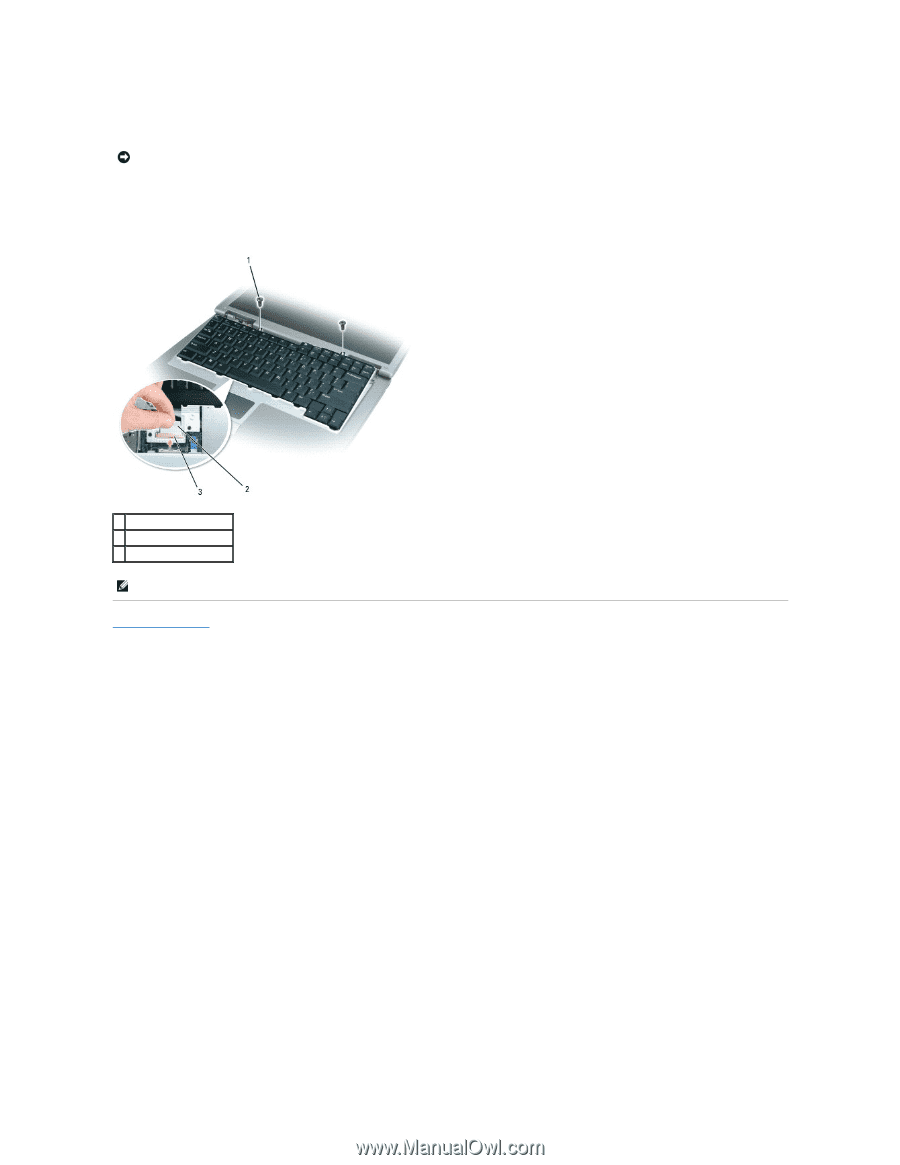
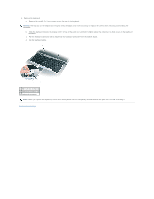
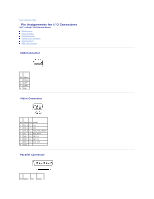
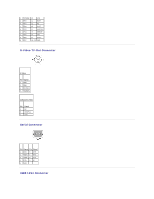
4. Remove the keyboard: a. Remove the two M2.5 x 5-mm screws across the top of the keyboard. NOTICE: The keycaps on the keyboard are fragile, easily dislodged, and time-consuming to replace. Be careful when removing and handling the keyboard. b. Slide the keyboard towards the display until it is free of the palm rest and hold it slightly above the computer, to allow access to the keyboard connector. c. Pull the keyboard connector tab to disconnect the keyboard connector from the system board. d. Set the keyboard aside. 1 M2.5 x 5-mm screws (2) 2 keyboard connector tab 3 keyboard connector NOTE: When you replace the keyboard, ensure that the keyboard tabs are completely secured beneath the palm rest to avoid scratching it. Back to Contents Page
-
 1
1 -
2
-
3
-
4
-
5
-
6
-
7
-
8
-
9
-
10
-
11
-
12
-
13
-
14
-
15
-
16
-
 17
17 -
 18
18 -
 19
19 -
 20
20 -
 21
21 -
 22
22 -
 23
23 -
 24
24 -
 25
25 -
 26
26 -
 27
27 -
28
-
29
-
30
-
31
-
32
-
33
-
34
-
35
-
36
-
37
-
38
-
39
-
40
-
41
-
42
 |
 |