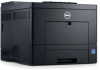
Dell C2660dn Dell Color Laser Printer Users Guide - Page 71
Windows Vista or Windows Vista 64-bit Edition, Ready to Print - default password
 |
View all Dell C2660dn manuals
Add to My Manuals
Save this manual to your list of manuals |
Page 71 highlights
4 Select the printer you want to install from the printer list, and then click Next. If the target printer is not displayed on the list, click Refresh to refresh the list or click Add Printer to add a printer to the list manually. You may specify the IP address and port name at this point. If you have installed this printer on the server computer, select the I am setting up this printer on a server check box. NOTE: When using AutoIP, 0.0.0.0 is displayed in the installer. Before you can continue, you must enter a valid IP address. NOTE: In some cases, Windows Security Alert is displayed in this step when you use Windows Vista, Windows Vista 64 bit Edition, Windows Server 2008, Windows Server 2008 64-bit Edition, Windows Server 2008 R2, Windows 7, Windows 7 64 bit Edition, Windows 8, Windows 8 64-bit Edition, Windows Server 2012. In this case, select Unblock (Allow access for Windows Server 2008 R2 and Windows 7), and then continue the procedure. 5 Specify the printer settings, and then click Next. a Enter the printer name. b If you want to set the printer as the default printer, select the Set this printer as default check box. c If you want to install the PostScript Level3 Compatible printer driver, select the PostScript Level3 Compatible Driver check box. d If you want other users on the network to access the printer, click Advanced check box and select Share this printer with other computers on the network, and then enter a share name that users can identify. e If you want to restrict color printing, select the appropriate Dell™ ColorTrack option. Enter the password when Color-Password Enabled is selected for Dell ColorTrack. 6 Select the software and documentation you want to install, and then click Install. If you want to change the installation destination, click Browse and specify a new location. 7 If you agree to the terms of the Environmental Information Notice, select Use duplex printing check box, and click Install to continue the installation. 8 Click Finish to exit the wizard when the Ready to Print! screen appears. If you want to verify installation, click Print Test Page before clicking Finish. For installing XML Paper Specification (XPS) printer driver NOTE: XPS driver is supported on the following operating systems: Windows Vista, Windows Vista 64-bit Edition, Windows Server 2008, Windows Server 2008 64-bit Edition, Windows Server 2008 R2, Windows 7, Windows 7 64-bit Edition, Windows 8, Windows 8 64-bit Edition, and Windows Server 2012. Windows Vista or Windows Vista 64-bit Edition 1 Extract the following zip file to your desired location. D:\Drivers\XPS\Win_7Vista\XPS-V3_C2660.zip (where D is the drive letter of the optical drive) 2 Click Start→ Control Panel→ Hardware and Sound→ Printers. 3 Click Add a printer. 4 Click Add a network, wireless or Bluetooth printer. 5 Select printer or click The printer that I want isn't listed. 6 Select Add a printer using a TCP/IP address or host name, and then click Next. 7 Select TCP/IP Device from Device type, and enter the IP address for Hostname or IP address, and then click Next. If the User Account Control dialog box appears, click Continue. NOTE: If you are an administrator on the computer, click Continue; otherwise, contact your administrator to continue the desired action. Installing Printer Drivers on Windows® Computers 69
-
 1
1 -
2
-
3
-
4
-
5
-
6
-
7
-
8
-
9
-
10
-
11
-
12
-
13
-
14
-
15
-
16
-
17
-
18
-
19
-
20
-
21
-
22
-
23
-
24
-
25
-
26
-
27
-
28
-
29
-
30
-
31
-
32
-
33
-
34
-
35
-
36
-
37
-
38
-
39
-
40
-
41
-
42
-
43
-
44
-
45
-
46
-
47
-
48
-
49
-
50
-
51
-
52
-
53
-
54
-
55
-
56
-
57
-
58
-
59
-
60
-
61
-
62
-
63
-
64
-
65
-
 66
66 -
 67
67 -
 68
68 -
 69
69 -
 70
70 -
 71
71 -
 72
72 -
 73
73 -
 74
74 -
 75
75 -
 76
76 -
77
-
78
-
79
-
80
-
81
-
82
-
83
-
84
-
85
-
86
-
87
-
88
-
89
-
90
-
91
-
92
-
93
-
94
-
95
-
96
-
97
-
98
-
99
-
100
-
101
-
102
-
103
-
104
-
105
-
106
-
107
-
108
-
109
-
110
-
111
-
112
-
113
-
114
-
115
-
116
-
117
-
118
-
119
-
120
-
121
-
122
-
123
-
124
-
125
-
126
-
127
-
128
-
129
-
130
-
131
-
132
-
133
-
134
-
135
-
136
-
137
-
138
-
139
-
140
-
141
-
142
-
143
-
144
-
145
-
146
-
147
-
148
-
149
-
150
-
151
-
152
-
153
-
154
-
155
-
156
-
157
-
158
-
159
-
160
-
161
-
162
-
163
-
164
-
165
-
166
-
167
-
168
-
169
-
170
-
171
-
172
-
173
-
174
-
175
-
176
-
177
-
178
-
179
-
180
-
181
-
182
-
183
-
184
-
185
-
186
-
187
-
188
-
189
-
190
-
191
-
192
-
193
-
194
-
195
-
196
-
197
-
198
-
199
-
200
-
201
-
202
-
203
-
204
-
205
-
206
-
207
-
208
-
209
-
210
-
211
-
212
-
213
-
214
-
215
-
216
-
217
-
218
-
219
-
220
-
221
-
222
-
223
-
224
-
225
-
226
-
227
-
228
-
229
-
230
-
231
-
232
-
233
-
234
-
235
-
236
-
237
-
238
-
239
-
240
-
241
-
242
-
243
-
244
-
245
-
246
-
247
-
248
-
249
-
250
-
251
-
252
-
253
-
254
-
255
-
256
-
257
-
258
-
259
-
260
-
261
-
262
-
263
-
264
-
265
-
266
-
267
-
268
-
269
-
270
-
271
-
272
-
273
-
274
-
275
-
276
-
277
-
278
-
279
-
280
-
281
-
282
-
283
-
284
-
285
-
286
-
287
-
288
-
289
-
290
-
291
-
292
-
293
-
294
-
295
-
296
-
297
-
298
-
299
-
300
-
301
-
302
-
303
-
304
-
305
-
306
-
307
-
308
-
309
-
310
-
311
-
312
-
313
-
314
-
315
-
316
-
317
-
318
-
319
-
320
-
321
-
322
-
323
-
324
-
325
-
326
-
327
-
328
-
329
-
330
-
331
-
332
-
333
-
334
-
335
-
336
-
337
-
338
-
339
-
340
-
341
-
342
-
343
-
344
-
345
-
346
-
347
-
348
-
349
-
350
-
351
-
352
-
353
-
354
-
355
-
356
-
357
-
358
-
359
-
360
-
361
 |
 |