Dell D620 User Guide - Page 51
Adding and Replacing Parts - latitude hard drive
 |
UPC - 837654219218
View all Dell D620 manuals
Add to My Manuals
Save this manual to your list of manuals |
Page 51 highlights
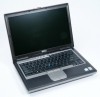
Back to Contents Page Adding and Replacing Parts Dell™ Latitude™ D620 User's Guide Before You Begin Hinge Cover Keyboard Internal Card With Bluetooth® Wireless Technology Coin-Cell Battery Memory Wireless Local Area Network (WLAN) Card Mobile Broadband Card Subscriber Identity Module (SIM) Card Hard Drive Media Bay Before You Begin This chapter provides procedures for removing and installing the components in your computer. Unless otherwise noted, each procedure assumes that the following conditions exist: l You have performed the steps in Turning Off Your Computer and Before Working Inside Your Computer. l You have read the safety information in your Dell™ Product Information Guide. l A component can be replaced or-if purchased separately-installed by performing the removal procedure in reverse order. Recommended Tools The procedures in this document may require the following tools: l Small flat-blade screwdriver l Phillips screwdriver l Small plastic scribe l Flash BIOS update program CD Turning Off Your Computer NOTICE: To avoid losing data, save and close any open files and exit any open programs before you turn off your computer. 1. Shut down the operating system: a. Save and close any open files, exit any open programs, click Start® Shut Down® Shut down® OK. The computer turns off after the operating system shutdown process finishes. 2. Ensure that the computer and any attached devices are turned off. If your computer and attached devices did not automatically turn off when you shut down your operating system, press and hold the power button for 4 seconds. Before Working Inside Your Computer Use the following safety guidelines to help protect your computer from potential damage and to help ensure your own personal safety. CAUTION: Before you begin any of the procedures in this section, follow the safety instructions in the Product Information Guide. CAUTION: Handle components and cards with care. Do not touch the components or contacts on a card. Hold a card by its edges or by its metal mounting bracket. Hold a component such as a processor by its edges, not by its pins. NOTICE: Only a certified service technician should perform repairs on your computer. Damage due to servicing that is not authorized by Dell is not covered by your warranty. NOTICE: When you disconnect a cable, pull on its connector or on its pull-tab, not on the cable itself. Some cables have a connector with locking tabs; if you are disconnecting this type of cable, press in on the locking tabs before you disconnect the cable. As you pull connectors apart, keep them evenly aligned to avoid bending any connector pins. Also, before you connect a cable, ensure that both connectors are correctly oriented and aligned. NOTICE: To avoid damaging the computer, perform the following steps before you begin working inside the computer. 1. Ensure that the work surface is flat and clean to prevent the computer cover from being scratched.
-
 1
1 -
2
-
3
-
4
-
5
-
6
-
7
-
8
-
9
-
10
-
11
-
12
-
13
-
14
-
15
-
16
-
17
-
18
-
19
-
20
-
21
-
22
-
23
-
24
-
25
-
26
-
27
-
28
-
29
-
30
-
31
-
32
-
33
-
34
-
35
-
36
-
37
-
38
-
39
-
40
-
41
-
42
-
43
-
44
-
45
-
 46
46 -
 47
47 -
 48
48 -
 49
49 -
 50
50 -
 51
51 -
 52
52 -
 53
53 -
 54
54 -
 55
55 -
 56
56 -
57
-
58
-
59
-
60
-
61
-
62
-
63
-
64
-
65
-
66
-
67
-
68
-
69
-
70
-
71
-
72
-
73
-
74
-
75
-
76
-
77
-
78
-
79
-
80
-
81
-
82
-
83
-
84
-
85
-
86
-
87
-
88
-
89
-
90
-
91
-
92
-
93
-
94
-
95
-
96
-
97
-
98
-
99
-
100
-
101
-
102
 |
 |
