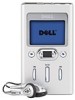
Dell DJ User's Guide - Page 20
Transferring Music to the Dell DJ, Transferring Music Tracks Using Musicmatch® to Your Dell DJ - explorer download
 |
View all Dell DJ manuals
Add to My Manuals
Save this manual to your list of manuals |
Page 20 highlights
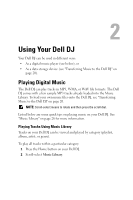
www.dell.com | support.dell.com Transferring Music to the Dell DJ With Musicmatch®, you can transfer music tracks from your personal music library to the Dell DJ. Musicmatch has the capability to 'rip' or convert music CDs to digital music files on your computer. See the Musicmatch Help tutorial to create digital music files from your music CDs. With Dell DJ Explorer, you can organize and transfer music tracks, voice recordings and data files between your computer and the Dell DJ using familiar Microsoft® Windows® methods such as copy-and-paste and dragand-drop. NOTE: Before transferring data files or music tracks, you must first connect your Dell DJ to your computer using the included USB synchronization cable or cradle. NOTE: Dell DJ Explorer will not transfer out of the Dell DJ files that are copyright protected by Digital Rights Management (DRM). Transferring Music Tracks Using Musicmatch® to Your Dell DJ Dell DJ software powered by Musicmatch® makes buying and enjoying digital music easy by providing a simple graphical interface between your computer and the Dell DJ, as well as access to the Musicmatch Downloads service. Some of the basic features of Musicmatch are covered below, but for complete instructions on how to use the Musicmatch software, click Start→ Programs→ Musicmatch → Musicmatch Jukebox. Click Help in Musicmatch (see "Finding Information" on page 5). Transferring Music Tracks from Musicmatch Library 1 Connect the Dell DJ to your computer using the included USB synchronization cable or cradle. 2 Start Musicmatch by clicking Start→ Programs→ Musicmatch → Musicmatch Jukebox. The Musicmatch main window appears. 3 Click View→ Portable Device Manager. Using Drag-and-Drop or Copy-and-Paste: 1 Follow steps 1 through 3 above. Using Yo ur Dell DJ 20
-
 1
1 -
2
-
3
-
4
-
5
-
6
-
7
-
8
-
9
-
10
-
11
-
12
-
13
-
14
-
 15
15 -
 16
16 -
 17
17 -
 18
18 -
 19
19 -
 20
20 -
 21
21 -
 22
22 -
 23
23 -
 24
24 -
 25
25 -
26
-
27
-
28
-
29
-
30
-
31
-
32
-
33
-
34
-
35
-
36
-
37
-
38
-
39
-
40
-
41
-
42
-
43
-
44
-
45
-
46
-
47
-
48
-
49
-
50
-
51
-
52
-
53
-
54
-
55
 |
 |
