Dell Dimension 2100 System Reference - Page 54
Lower 3.5-Inch Floppy Drive
 |
View all Dell Dimension 2100 manuals
Add to My Manuals
Save this manual to your list of manuals |
Page 54 highlights
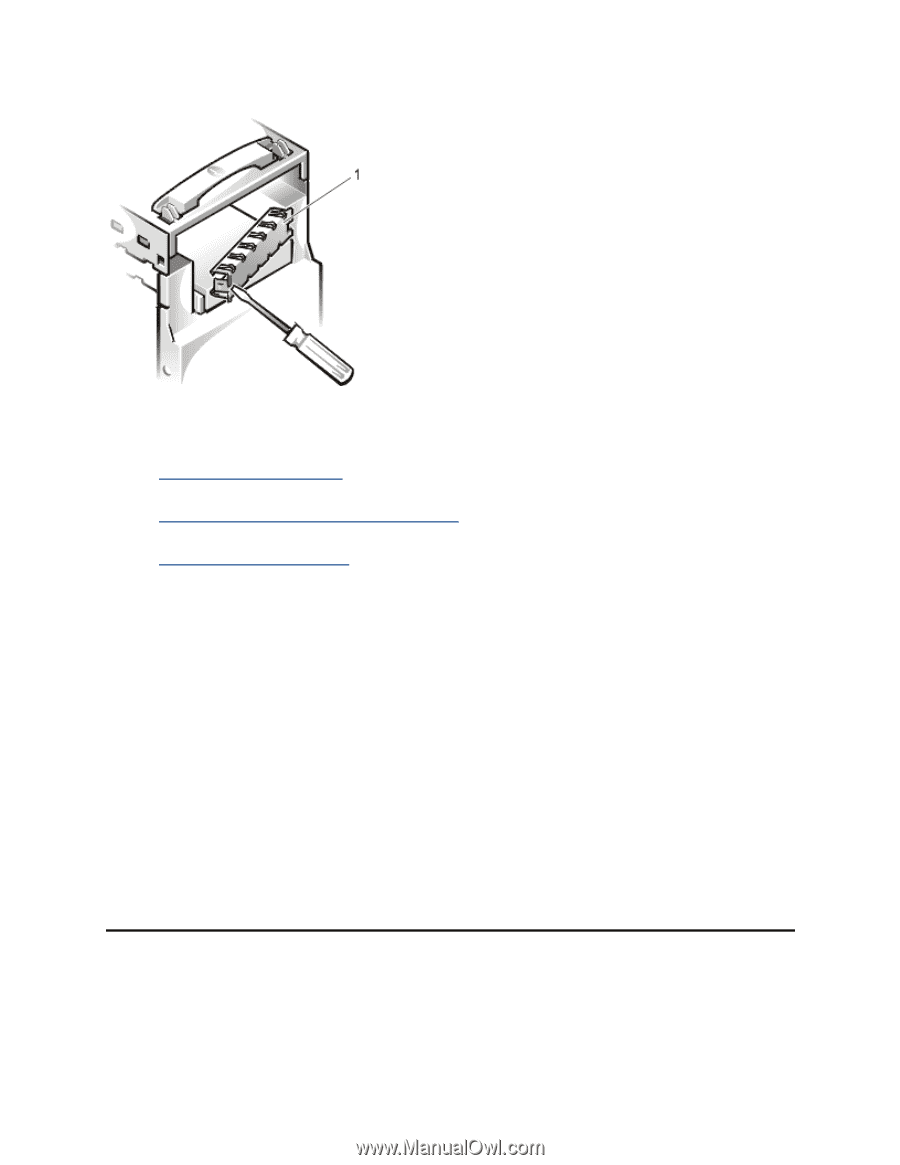
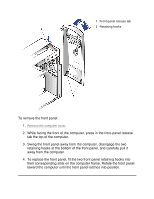
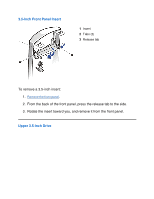
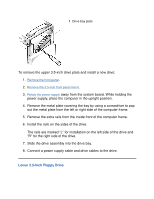
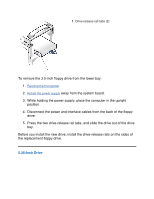
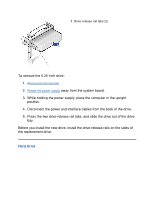
1 Drive bay plate To remove the upper 3.5-inch drive plate and install a new drive: 1. Remove the front panel. 2. Remove the 3.5-inch front panel insert. 3. Rotate the power supply away from the system board. While holding the power supply, place the computer in the upright position. 4. Remove the metal plate covering the bay by using a screwdriver to pop out the metal plate from the left or right side of the computer frame. 5. Remove the extra rails from the inside front of the computer frame. 6. Install the rails on the sides of the drive. The rails are marked "L" for installation on the left side of the drive and "R" for the right side of the drive. 7. Slide the drive assembly into the drive bay. 8. Connect a power supply cable and drive cables to the drive. Lower 3.5-Inch Floppy Drive
-
 1
1 -
2
-
3
-
4
-
5
-
6
-
7
-
8
-
9
-
10
-
11
-
12
-
13
-
14
-
15
-
16
-
17
-
18
-
19
-
20
-
21
-
22
-
23
-
24
-
25
-
26
-
27
-
28
-
29
-
30
-
31
-
32
-
33
-
34
-
35
-
36
-
37
-
38
-
39
-
40
-
41
-
42
-
43
-
44
-
45
-
46
-
47
-
48
-
 49
49 -
 50
50 -
 51
51 -
 52
52 -
 53
53 -
 54
54 -
 55
55 -
 56
56 -
 57
57 -
 58
58 -
 59
59 -
60
-
61
-
62
-
63
-
64
-
65
-
66
-
67
-
68
-
69
-
70
 |
 |