Dell Dimension E521 Owner's Manual - Page 15
Setting Up a Printer, Printer Cable, Connecting a Printer - manual
 |
View all Dell Dimension E521 manuals
Add to My Manuals
Save this manual to your list of manuals |
Page 15 highlights
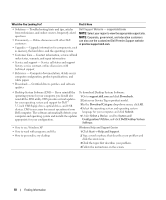
8 side surround connector 9 center/subwoofer connector 10 USB 2.0 connectors (4) 11 VGA video connector Use the silver connector to provide enhanced surround audio for computers with 7.1 speakers. On computers with a sound card, the microphone connector is on the card. Use the yellow connector to attach a speaker to a Low Frequency Effects (LFE) audio channel. Use the back USB connectors for devices that typically remain connected, such as printers and keyboards. It is recommended that you use the front USB connectors for devices that you connect occasionally, such as joysticks or cameras. Connect the monitor's VGA cable to the VGA connector on the computer. On computers with a video card, use the connector on the card. Setting Up a Printer NOTICE: Complete the operating system setup before you connect a printer to the computer. See the documentation that came with the printer for setup information, including how to: • Obtain and install updated drivers. • Connect the printer to the computer. • Load paper and install the toner or ink cartridge. For technical assistance, refer to the printer owner's manual or contact the printer manufacturer. Printer Cable Your printer connects to your computer with a USB cable. Your printer may not come with a printer cable, so if you purchase a cable separately, ensure that it is compatible with your printer. If you purchased a printer cable at the same time you purchased your computer, the cable may arrive in the computer box. Connecting a Printer NOTE: You can connect USB devices while the computer is turned on. 1 Complete the operating system setup if you have not already done so. 2 Attach the USB printer cable to the USB connectors on the computer and the printer. The USB connectors fit only one way. Setting Up and Using Your Computer 15
-
 1
1 -
2
-
3
-
4
-
5
-
6
-
7
-
8
-
9
-
 10
10 -
 11
11 -
 12
12 -
 13
13 -
 14
14 -
 15
15 -
 16
16 -
 17
17 -
 18
18 -
 19
19 -
 20
20 -
21
-
22
-
23
-
24
-
25
-
26
-
27
-
28
-
29
-
30
-
31
-
32
-
33
-
34
-
35
-
36
-
37
-
38
-
39
-
40
-
41
-
42
-
43
-
44
-
45
-
46
-
47
-
48
-
49
-
50
-
51
-
52
-
53
-
54
-
55
-
56
-
57
-
58
-
59
-
60
-
61
-
62
-
63
-
64
-
65
-
66
-
67
-
68
-
69
-
70
-
71
-
72
-
73
-
74
-
75
-
76
-
77
-
78
-
79
-
80
-
81
-
82
-
83
-
84
-
85
-
86
-
87
-
88
-
89
-
90
-
91
-
92
-
93
-
94
-
95
-
96
-
97
-
98
-
99
-
100
-
101
-
102
-
103
-
104
-
105
-
106
-
107
-
108
-
109
-
110
-
111
-
112
-
113
-
114
-
115
-
116
-
117
-
118
-
119
-
120
-
121
-
122
-
123
-
124
-
125
-
126
-
127
-
128
-
129
-
130
-
131
-
132
-
133
-
134
-
135
-
136
-
137
-
138
-
139
-
140
-
141
-
142
-
143
-
144
-
145
-
146
-
147
-
148
-
149
-
150
-
151
-
152
-
153
-
154
-
155
-
156
-
157
-
158
 |
 |
