Dell Inspiron Chromebook 11 3181 2-in-1 Inspiron 3181 2-in-1 Setup and Specifi - Page 5
Set up your Chromebook, to complete
 |
View all Dell Inspiron Chromebook 11 3181 2-in-1 manuals
Add to My Manuals
Save this manual to your list of manuals |
Page 5 highlights
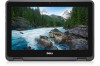
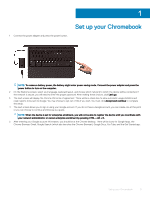
1 1 Connect the power adapter and press the power button. Set up your Chromebook NOTE: To conserve battery power, the battery might enter power saving mode. Connect the power adapter and press the power button to turn on the computer. 2 On the Welcome screen, select your language, keyboard layout, and choose which network to which the device will be connected. If the network is secure, you will need to enter the proper password. After making these choices, click Let's go. 3 The next screen will display the Chrome OS terms of agreement. There will be a check box to allow automatic usage statistics and crash reports to be sent to Google. You may choose to opt out of this if you wish. You must click Accept and continue to complete the setup. 4 The next screen allows you to sign in using your Google account. If you do not have a Google account, you can create one at this point or you can choose to continue and browse as a guest. NOTE: When the device is set for enterprise enrollment, you will not be able to register the device until you coordinate with your network administrator or cancel enterprise enrollment by pressing CTRL + Alt + E. 5 After entering your Google account information, you should be at the Chrome desktop. There will be icons for Google Apps, the Chrome Browser, Gmail, Google Search (which also launches the Chrome Browser), Google Docs, You Tube, and the Get Started app. Set up your Chromebook 5
-
 1
1 -
 2
2 -
 3
3 -
 4
4 -
 5
5 -
 6
6 -
 7
7 -
 8
8 -
 9
9 -
 10
10 -
 11
11 -
12
-
13
-
14
-
15
-
16
-
17
-
18
-
19
-
20
-
21
-
22
-
23
-
24
 |
 |
