Dell OptiPlex N User's Guide (.pdf) - Page 12
esponding to Error Messages, urning Off the System, sing the Optional Stand for, Vertical - optiplex not booting
 |
View all Dell OptiPlex N manuals
Add to My Manuals
Save this manual to your list of manuals |
Page 12 highlights
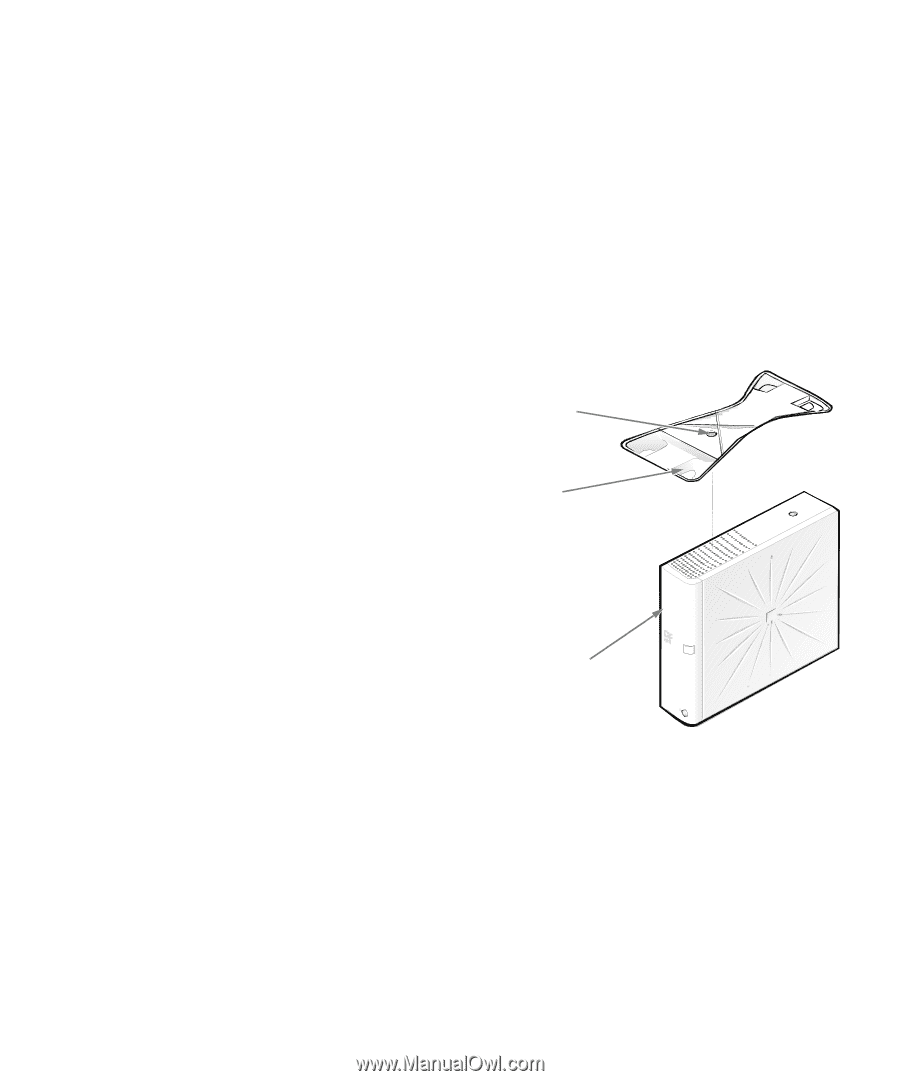
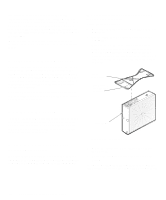
and install software such as the operating system, application programs, drivers, and utilities. While it is downloading and installing the software from the server, you may be required to enter data or press keys. Therefore, you should contact your network administrator for any special instructions before turning on your system for the first time. When you turn on your system after the software is installed, your system should come up in the appropriate mode. Responding to Error Messages Each time you turn on your computer system, the system compares the hardware installed in the system to the hardware listed in the system configuration information stored in nonvolatile random-access memory (NVRAM) on the system board. If the system detects a discrepancy, it generates error messages that identify the incorrect configuration settings. If an error message appears on the screen while the system is booting, make a note of the message. Then contact your network administrator. time, it is easiest to attach before you set up your computer and connect any cables. Attach the stand as follows: 1. Turn the computer onto its right side as shown in Figure 1-1. 2. Fit the stand onto what was the left side of the computer. Align the front edge of the stand with the groove between the front bezel and the computer cover. Move the stand until the locator pins fit into the holes in the side of the computer. Then align the captive thumbscrew in the stand with the screw hole in the cover. captive thumbscrew locator pins (2) (on underside of stand) Turning Off the System To turn off your system, press and release the power button. If the system does not turn off when you press the power button, the system may be hung. Press and hold the power button until the system turns off completely (this may take several seconds). Using the Optional Stand for Vertical Orientation An optional stand is available for your system that you can attach to the computer to give it a vertical orientation. Although you can attach (and remove) the stand at any front bezel Figure 1-1. Optional Stand 3. When the stand is in place, tighten the captive thumbscrew. 4. Rotate the computer so that the stand is at the bottom. To remove the stand, turn the computer over so that the stand is at the top, loosen the captive thumbscrew, and lift 1-2 Dell OptiPlex N Systems User's Guide
-
 1
1 -
2
-
3
-
4
-
5
-
6
-
 7
7 -
 8
8 -
 9
9 -
 10
10 -
 11
11 -
 12
12 -
 13
13 -
 14
14 -
 15
15 -
 16
16 -
 17
17 -
18
-
19
-
20
-
21
-
22
-
23
-
24
-
25
-
26
-
27
-
28
-
29
-
30
 |
 |