Dell OptiPlex VDI Blaster Edition User Manual
Dell OptiPlex VDI Blaster Edition Manual
 |
View all Dell OptiPlex VDI Blaster Edition manuals
Add to My Manuals
Save this manual to your list of manuals |
Dell OptiPlex VDI Blaster Edition manual content summary:
- Dell OptiPlex VDI Blaster Edition | User Manual - Page 1
Devon IT Echo Management Console Dell Edition Administration Guide - Dell OptiPlex VDI Blaster Edition | User Manual - Page 2
that helps you make better use of your computer. CAUTION: A CAUTION indicates potential damage to hardware or loss of data if instructions are not followed. WARNING: A WARNING indicates a potential for property damage, personal injury, or death. Information in this publication is subject to - Dell OptiPlex VDI Blaster Edition | User Manual - Page 3
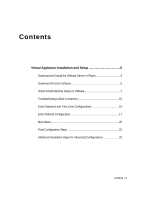
and Setup 6 Download and Install the VMware Server or Player 6 Download the Echo Software 6 Install Virtual Machine Setup on VMware 7 Troubleshooting a Bad Connection 15 Echo Password and Time Zone Configurations 16 Echo Network Configuration 17 Main Menu 20 Final Configuration Steps 22 - Dell OptiPlex VDI Blaster Edition | User Manual - Page 4
Learning Echo Basics 27 Terminology 27 Accessing the Echo Web-Based Interface 28 The Echo Administration Screen 29 Searches 31 Thin Client Management 33 Echo Agent Updates 33 Custom Icons 34 Shadowing 36 Echo Cloning Overview 37 Cloning Connections 38 Cloning Thin Client Settings 41 - Dell OptiPlex VDI Blaster Edition | User Manual - Page 5
Maintenance 62 Backing up Your Server 62 Server Restore 64 Appliance Upgrades 65 Getting Help 66 Contacting Dell 66 Contents | 5 - Dell OptiPlex VDI Blaster Edition | User Manual - Page 6
use Mozilla Firefox for all Echo Administrator processes. This administration manual outlines how to install, setup, and run Devon IT Echo installing VMware, please visit vmware.com. Download the Echo Software Visit support.dell.com to locate and download the latest Devon IT Echo Management Console - Dell OptiPlex VDI Blaster Edition | User Manual - Page 7
Install Virtual Machine Setup on VMware VMware Server 2.0 This section describes the steps for setting up the virtual machine on VMware Server version 2.0. 1 Open your VMware Infrastructure Access Page. 2 From the toolbar, select Virtual Machine->Add Virtual Machine to Inventory. 3 Beginning with - Dell OptiPlex VDI Blaster Edition | User Manual - Page 8
VMware Server 1.0.x This section describes how to set up the virtual machine on VMware Server versions 1.0.0 through 1.0.8. 1 Choose Open Existing Virtual Machine. 2 Choose File->Open and browse to find the echo-x.xx.vmx file on your machine. 3 The virtual machine default name is echo-x.xx. This is - Dell OptiPlex VDI Blaster Edition | User Manual - Page 9
VMware Player These are the steps for starting an Echo virtual machine on VMware Player. 1 Launch VMware Player on your system. Click the Open icon. 2 Open the echo-x.xx.vmx file located in the Echo folder. Virtual Appliance Installation & Setup | 9 - Dell OptiPlex VDI Blaster Edition | User Manual - Page 10
3 Your virtual appliance will immediately begin booting. VMware ESX These are the steps for starting an Echo virtual machine on VMware ESX. 1 Launch VMware Converter Stand Alone. 2 Select VMware Workstation or other VMware Virtual Machine->Browse. 10 | Virtual Appliance Installation & Setup - Dell OptiPlex VDI Blaster Edition | User Manual - Page 11
3 Browse to the location of the extracted Echo appliance folder and select the echo- .vmx file. Select Next. 4 Enter the credentials for an account that has administrator access to the ESX/vSphere server on which the Echo appliance is to be installed. Virtual Appliance Installation & Setup | - Dell OptiPlex VDI Blaster Edition | User Manual - Page 12
5 Select the appropriate destination for the Echo appliance on your ESX/vSphere server. 6 Select the appropriate datastore where the Echo appliance will be stored. The Echo appliance will consume approximately 8 GB of hard disk space. 12 | Virtual Appliance Installation & Setup - Dell OptiPlex VDI Blaster Edition | User Manual - Page 13
7 Verify that the settings are correct. Virtual Appliance Installation & Setup | 13 - Dell OptiPlex VDI Blaster Edition | User Manual - Page 14
8 Verify that the settings are correct and click Finish. The appliance will now be converted to your ESX/vSphere server. The process will take approximately 5-10 minutes. NOTE: Make sure that this is a newly downloaded appliance and not one that has been opened and run within VMware Player/Server/ - Dell OptiPlex VDI Blaster Edition | User Manual - Page 15
Troubleshooting a Bad Connection Make sure that your Echo appliance has network connectivity and that traffic can flow to and from the appliance. You can typically switch - Dell OptiPlex VDI Blaster Edition | User Manual - Page 16
Echo Password and Time Zone Configurations 1 Turn on the Virtual Machine. 2 After the bootup process is complete, you will be presented with the Setting Password window. 3 Enter a new password for the bwadmin account. This password will be necessary to log into Echo. 4 Once a password has been - Dell OptiPlex VDI Blaster Edition | User Manual - Page 17
5 The next menu allows you to set the time zone for the Echo Virtual Appliance. Select your geographic area from the list and press . 6 A list of cities will appear. Select a nearby city located in your time zone and press . Echo Network Configuration DHCP Configuration (Default) The - Dell OptiPlex VDI Blaster Edition | User Manual - Page 18
is required, select No Changes and press to continue. Static IP Configuration If DHCP is not available on your LAN, then you must manually set a static IP address for the Echo server. Select the option Change eth0... from the Networking menu. 1 On the next screen named Configuring eth0 - Dell OptiPlex VDI Blaster Edition | User Manual - Page 19
Editing DNS for Static IP Configuration When using a static address, you need to edit the Echo server's resolv.conf file. This file contains the IP address to your DNS server(s) as well as domain search paths. 1 From the main menu, select Reconfigure Networks. 2 Select DNS view/editresolv.conf. 3 - Dell OptiPlex VDI Blaster Edition | User Manual - Page 20
The Main Menu Once you have completed the initial setup process, the Main Menu screen will be your starting point for all future Echo modifications. 20 | Virtual Appliance Installation & Setup - Dell OptiPlex VDI Blaster Edition | User Manual - Page 21
the Echo server from another machine Access the Networking menu to: Modify Static Network settings Enable/disable DHCP Manually edit the local DNS file (resolv.conf) Manually edit the /etc/network/interfaces file The default database is SQLite. You may choose to configure the external database - Dell OptiPlex VDI Blaster Edition | User Manual - Page 22
Final Configuration Steps DNS Configuration On your DNS server, create an entry for ws-broker.. that points to the IP address of the Echo™ virtual machine. This allows the terminals to find the Echo server automatically. Where is your domain name and is the top - Dell OptiPlex VDI Blaster Edition | User Manual - Page 23
Alternative Configuration for Environments Without DNS If you don't have access to a DNS server, you can add the IP address of the server to your thin client by following these steps. Follow these steps on each thin client you want to manage with Echo. 1 In the System Tray, double-click on the Echo - Dell OptiPlex VDI Blaster Edition | User Manual - Page 24
Firewall Ports Table 1-2. What Ports Need to be Open for Echo Functionality Port Protocol Components Purpose 80 TCP 443 TCP 5500 & TCP 5999 50000 TCP Echo Server Echo Server Echo Server Echo Server, Hosts, and Terminals HTTP - Standard web port for the Echo Web UI HTTPS - Secure (SSL) - Dell OptiPlex VDI Blaster Edition | User Manual - Page 25
Additional Installation Steps for Advanced Configurations NOTE: Please read the next two sections only if you are deploying more than one Echo Thin Manage Virtual Appliance in the same environment. If this does not apply to your environment, skip to Chapter 2, "Learning Echo Basics." Configure Devon - Dell OptiPlex VDI Blaster Edition | User Manual - Page 26
12 When you return to the mssql/ODBC configuration menu, configure the database name, IP address, port, and username for your mssql database. 13 When finished, choose Keep Current Settings to accept your settings and return to the Main Menu. 14 Select Restart Echo from the Main Menu to activate the - Dell OptiPlex VDI Blaster Edition | User Manual - Page 27
2 2 Learning Echo Basics Terminology You should familiarize yourself with the following list of terms, as they are used throughout this document. Terminal-This is the device in front of the user, to which their screen, keyboard and mouse are attached. Session-This is a network connection between - Dell OptiPlex VDI Blaster Edition | User Manual - Page 28
Accessing the Echo Web-Based Interface 1 Using the latest version of Mozilla Firefox, type the following URL into the address http:// and press . 2 On the Welcome to Echo window, click the image labeled Go to the Web Based Administration Tool. 3 Enter - Dell OptiPlex VDI Blaster Edition | User Manual - Page 29
Screen is divided into two sections. The left-hand side displays your inventory tables. The Terminals Table Dell terminals and desktop access devices have a service called the Echo Agent that communicates with the Echo Thin Manage server. The Echo Agent announces its presence to the Echo server by - Dell OptiPlex VDI Blaster Edition | User Manual - Page 30
The Sessions Table When a PC-over-IP (PCoIP) network connection is established between a terminal and a host, details about that connection is reported in the Sessions table. NOTE: If your environment only consists of thin client terminals, then you will only see a Terminals table. The Hosts and the - Dell OptiPlex VDI Blaster Edition | User Manual - Page 31
The Context Menu Right-clicking a row in any of the inventory tables displays a Context Menu with various actions that can be performed on that object. A context menu item that has an arrow beside it indicates that sub-menu options are available for this action. Slide your mouse pointer across the - Dell OptiPlex VDI Blaster Edition | User Manual - Page 32
Management Echo Agent Updates The Echo Agent is a service that runs on terminal devices and communicates with the Echo using the Echo Administrator User Interface. Where to Download the Latest Echo Agent Visit support.dell.com to locate and download the latest Devon IT Echo Agent software used - Dell OptiPlex VDI Blaster Edition | User Manual - Page 33
3 Click the OK button to begin the update. 4 After a few seconds you will receive the message Echo agent request sent. 5 The new agent begins installing itself on the actual device. This may take 30-60 seconds. Once this installation has finished and the new agent heartbeats back to the Echo server, - Dell OptiPlex VDI Blaster Edition | User Manual - Page 34
4 Select the Browse... button to launch a window that will allow you to explore your local machine to find an image to upload. Highlight the image and select Open. 5 Click the OK button at the top of the side panel. You will receive a Success message when completed. How to Customize a Desktop Icon - Dell OptiPlex VDI Blaster Edition | User Manual - Page 35
3 The screen shot to the right will appear. Below the Name and Description fields will be a dropdown menu entitled Icon. 4 Choose the icon from the dropdown menu. It should have the same nickname as the one given by the Administrator during upload. 5 A preview of the image appears below the drop - Dell OptiPlex VDI Blaster Edition | User Manual - Page 36
Shadowing To help a user with their terminal, you may activate the Shadowing feature from the Echo Thin Manage Web Interface. Shadowing provides an interactive desktop session between the Echo Administrator and terminal end-user and is an excellent tool for assisting a user with their device in real - Dell OptiPlex VDI Blaster Edition | User Manual - Page 37
Echo Cloning Overview There are three types of clones you can create with Echo - Connections, Terminal Settings, and Disk Images. Connections-Terminals have the ability to connect to remote servers utilizing various types of protocols. The RDP protocol is used to connect to Microsoft Windows - Dell OptiPlex VDI Blaster Edition | User Manual - Page 38
VMware-The connection settings and configurations for the VMware View client. Firefox-The local web browser and its starting URL. How to Clone Connections 1 From the table of inventoried Terminals, right-click the terminal you want to clone, and select Connections->Clone from Terminal. 2 The - Dell OptiPlex VDI Blaster Edition | User Manual - Page 39
Applying Connections to a Thin Client 1 From the table of inventoried Terminals, right-click the terminal you want to apply settings to. Select Connections->Apply to Terminal. 2 In the list of Connections, select which connections you want to apply. To select multiple connections, hold down the < - Dell OptiPlex VDI Blaster Edition | User Manual - Page 40
When you apply connections to thin clients, the actual ICA and RDP files are saved under C:\Devon IT\Citrix and C:\Devon IT\rDesktop, respectively. Shortcuts to these files are automatically created on the User and Administrator desktops. The end-user can simply double-click these shortcuts to - Dell OptiPlex VDI Blaster Edition | User Manual - Page 41
Cloning Thin Client Settings Echo allows you to clone the following thin client settings: Display-The screen resolution, color depth, and refresh rate of the primary display device. Input-The keyboard and mouse settings. Password-Configuration settings for the DeTOS Control Panel password ( - Dell OptiPlex VDI Blaster Edition | User Manual - Page 42
3 Click the OK button. After a few seconds you will receive a Success message. 4 From the top of the page, select Admin->Thin Client Settings to open a new screen displaying the current inventory of thin client settings. You will see your recently cloned settings entry now listed in the table. - Dell OptiPlex VDI Blaster Edition | User Manual - Page 43
4 In the list of modules, select which settings module you want to apply. To select multiple modules, hold down the key while clicking other module names, or use the key to select a range of modules. You must select at least one module - even if it is the only one available. 5 Click - Dell OptiPlex VDI Blaster Edition | User Manual - Page 44
Locales and Keyboard Input You can set the locale and keyboard input for your thin client by changing your settings. 1 Select Control Panel->System->Input/Time. 2 Select Locale. Select your desired locale. 3 Select Keyboard. Select your desired keyboard input. NOTE: Adjustments to the setting will - Dell OptiPlex VDI Blaster Edition | User Manual - Page 45
Cloning the Settings Once the unit has been configured, select the thin client that has been configured from the Echo web UI. 1 Right-click on the line item to launch the Context Menu. Select Thin Client Settings->Clone from Terminal. 2 Select Locale. Select your desired locale. 3 In the Details - Dell OptiPlex VDI Blaster Edition | User Manual - Page 46
Setting the Language in WES7 Follow these steps to change your display language in WES7. 1 Click on the Control Panel. Under Clock, Language, and Region click Change Display Language. 46 | Thin Client Management - Dell OptiPlex VDI Blaster Edition | User Manual - Page 47
2 In the Keyboards and Languages tab, choose your display language from the drop-down menu. Select Change Keyboards...Select Add. 3 Choose your language and keyboard settings and click OK. Thin Client Management | 47 - Dell OptiPlex VDI Blaster Edition | User Manual - Page 48
4 The new keyboard layout will appear in the Installed services section. To make it your default setting, select it from the drop-down menu. 5 In the Formats tab, choose your language and country from the - Dell OptiPlex VDI Blaster Edition | User Manual - Page 49
9 In the Administrative tab, select Copy Settings. Select both check boxes to ensure that all accounts, including the system account, is set to your desired language and input configuration. Click OK. 10 When prompted to restart, click Restart now. When the device reboots it will be configured to - Dell OptiPlex VDI Blaster Edition | User Manual - Page 50
Setting the Language in WES2009 Follow these steps to change your display language in WES2009. 1 Click on the Control Panel. Double-click the icon Regional and Language Options. 2 In the Regional Options tab, change both drop-down menus to the language and location and you want to display. 50 | Thin - Dell OptiPlex VDI Blaster Edition | User Manual - Page 51
3 In the Languages tab, select the display language you want. 4 In the Advanced tab, select your desired language in the drop-down menu. If you want this language to apply to all users and the welcome screen, check box for Apply all settings to the current user account and to the default user - Dell OptiPlex VDI Blaster Edition | User Manual - Page 52
5 Return to the Languages tab and click Details... 6 In the Settings tab, click Add to add a new keyboard layout and input method. Select the input language and keyboard layout and click OK. 7 To make the new language the default setting, select it from the drop- down menu at the top. 8 When - Dell OptiPlex VDI Blaster Edition | User Manual - Page 53
specific detail such as model, name, IP Address, or Operating System. Select Terminals - Manually select terminals by name. Terminals-Choosing Select Terminals allows the Echo Admin to manually choose terminals in this box. Connections-Assign cloned connections to this profile by selecting one - Dell OptiPlex VDI Blaster Edition | User Manual - Page 54
3 Click the OK button to create this profile. You will receive a Success message once it finished. 4 You will see your new profile entry now listed in the profile inventory table on the left-hand side of the screen. 54 | Thin Client Management - Dell OptiPlex VDI Blaster Edition | User Manual - Page 55
connections and settings the next time the terminal is rebooted. However, if you would like the changes to take effect immediately, then you may manually apply the profile by following the steps below. 1 From the table of inventoried Terminals, right-click the terminal you want to apply settings to - Dell OptiPlex VDI Blaster Edition | User Manual - Page 56
Disk Image Cloning Echo allows you to perform full disk image cloning of your terminals, utilizing FTP, CIFS, or NFS protocols. How to Clone the Entire Disk Image 1 From the table of inventoried Terminals, right-click the terminal you want to clone, and select Disk Image->Clone from Terminal. 2 The - Dell OptiPlex VDI Blaster Edition | User Manual - Page 57
Username-If required, enter the username of an account that has permissions to read and write to the image repository you specified in the Image Location field above. Password-If required, enter the password needed for the Username specified above. 3 Click the OK button to begin the cloning - Dell OptiPlex VDI Blaster Edition | User Manual - Page 58
4 From the top of the page, select Admin->Select Disk Images to open a new screen displaying the current inventory of disk images. You will see your recently cloned disk image now listed in the table. Applying a Disk Image to a Thin Client NOTE: When applying disk images to your thin clients, be - Dell OptiPlex VDI Blaster Edition | User Manual - Page 59
3 Click the OK button to begin the re-imaging process. The terminal will reboot and begin re-imaging its flash media with the selected image. This re-imaging process may take 20-40 minutes, depending on the size of the image and network traffic. During this time, there is no agent to heartbeat into - Dell OptiPlex VDI Blaster Edition | User Manual - Page 60
images will be recognizable by the part1 found in the file name. How to Add a Disk Image 1 Once you have downloaded the disk image from support.dell.com, copy that image over to your FTP server or NFS shared directory. 2 From the Echo Administration Screen, select Admin->Select Disk Images to - Dell OptiPlex VDI Blaster Edition | User Manual - Page 61
message. In the Disk Image Inventory table you will now see your recently added disk image. See section titled, "Applying a Disk Image to a Terminal," for instructions on how to apply the disk image to your thin clients. Thin Client Management | 61 - Dell OptiPlex VDI Blaster Edition | User Manual - Page 62
4 4 Maintenance Backing Up Your Server You can backup your server from the main Administrator menu. Sometimes, this is referred to as a 'Hotcopy' since the backup happens while the system is running. There is no need to stop or suspend the Echo server for the backup. To execute a Hotcopy, do the - Dell OptiPlex VDI Blaster Edition | User Manual - Page 63
3 The result of the Hotcopy will create a binary (.BIN) backup file that will be downloaded to your local machine. Click Save File and make a note of where you save this file, as you will need it in the future to perform a restore. Maintenance | 63 - Dell OptiPlex VDI Blaster Edition | User Manual - Page 64
Server Restore A restore deletes all existing configuration and data on your Echo Server and overwrite it with the information contained in a previously created Hotcopy backup file. To perform a Restore, do the following: 1 On the Echo Web Interface, select Admin->Restore Server Configuration. 2 - Dell OptiPlex VDI Blaster Edition | User Manual - Page 65
Server" for details on this step. 2 Step 2- Upgradea. Shutdown the Echo Appliance Server (Select option 8, Halt Machine, from the Main Menu). b.Visit support.dell.com to locate and download the latest Devon IT Echo Management Console Dell Edition appliance. c. Extract the contents and point your - Dell OptiPlex VDI Blaster Edition | User Manual - Page 66
. 2 Click your country/region at the bottom of the page. For a full listing of country/region click All. 3 Click All Support from Support menu. 4 Select the appropriate service or support link based on your need. 5 Choose the method of contacting Dell that is convenient for you. 66 | Getting Help
-
 1
1 -
 2
2 -
 3
3 -
 4
4 -
 5
5 -
 6
6 -
 7
7 -
8
-
9
-
10
-
11
-
12
-
13
-
14
-
15
-
16
-
17
-
18
-
19
-
20
-
21
-
22
-
23
-
24
-
25
-
26
-
27
-
28
-
29
-
30
-
31
-
32
-
33
-
34
-
35
-
36
-
37
-
38
-
39
-
40
-
41
-
42
-
43
-
44
-
45
-
46
-
47
-
48
-
49
-
50
-
51
-
52
-
53
-
54
-
55
-
56
-
57
-
58
-
59
-
60
-
61
-
62
-
63
-
64
-
65
-
66
 |
 |

Devon IT Echo
Management
Console
Dell Edition
Administration
Guide