Dell OptiPlex XE2 Owner's Manual - Mini Tower - Page 13
Installing the Expansion Card, Memory Module Guidelines, Removing the Memory
 |
View all Dell OptiPlex XE2 manuals
Add to My Manuals
Save this manual to your list of manuals |
Page 13 highlights
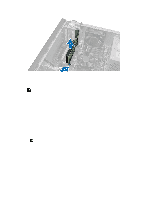
Installing the Expansion Card 1. Insert the expansion card into it's connector on the system board and press down until it is securely in place. NOTE: If your computer has a powered expansion card perform step 2, else move to step 3. 2. Insert the expansion card into it's connector on the system board and press down until it is securely in place. Connect the power cable from the card. 3. Rotate the release tab on the card-retention latch downward. 4. Install the cover. 5. Follow the procedures in After Working Inside Your Computer. Memory Module Guidelines To ensure optimal performance of your computer, observe the following general guidelines when configuring your system memory: • Memory modules of different sizes can be mixed (for example, 2 GB and 4 GB). But, all populated channels must have identical configurations. • Memory modules must be installed beginning with the first socket. NOTE: The memory sockets in your computer may be labeled differently depending on the hardware configuration. For example, A1, A2 or 1,2,3. • If the quad-rank memory modules are mixed with single or dual-rank modules, the quad-rank modules must be installed in the sockets with the white release levers. • If memory modules with different speeds are installed, they operate at the speed of the slowest installed memory modules. Removing the Memory 1. Follow the procedures in Before Working Inside Your Computer. 2. Remove the cover. 13
-
 1
1 -
2
-
3
-
4
-
5
-
6
-
7
-
 8
8 -
 9
9 -
 10
10 -
 11
11 -
 12
12 -
 13
13 -
 14
14 -
 15
15 -
 16
16 -
 17
17 -
 18
18 -
19
-
20
-
21
-
22
-
23
-
24
-
25
-
26
-
27
-
28
-
29
-
30
-
31
-
32
-
33
-
34
-
35
-
36
-
37
-
38
-
39
-
40
-
41
-
42
-
43
-
44
-
45
-
46
-
47
-
48
-
49
-
50
-
51
-
52
-
53
-
54
-
55
-
56
-
57
-
58
-
59
 |
 |
