Dell PowerApp 120 Five-Volt Riser Board Installation - Page 4
V Riser Board Installation, Riser Board Removal
 |
View all Dell PowerApp 120 manuals
Add to My Manuals
Save this manual to your list of manuals |
Page 4 highlights
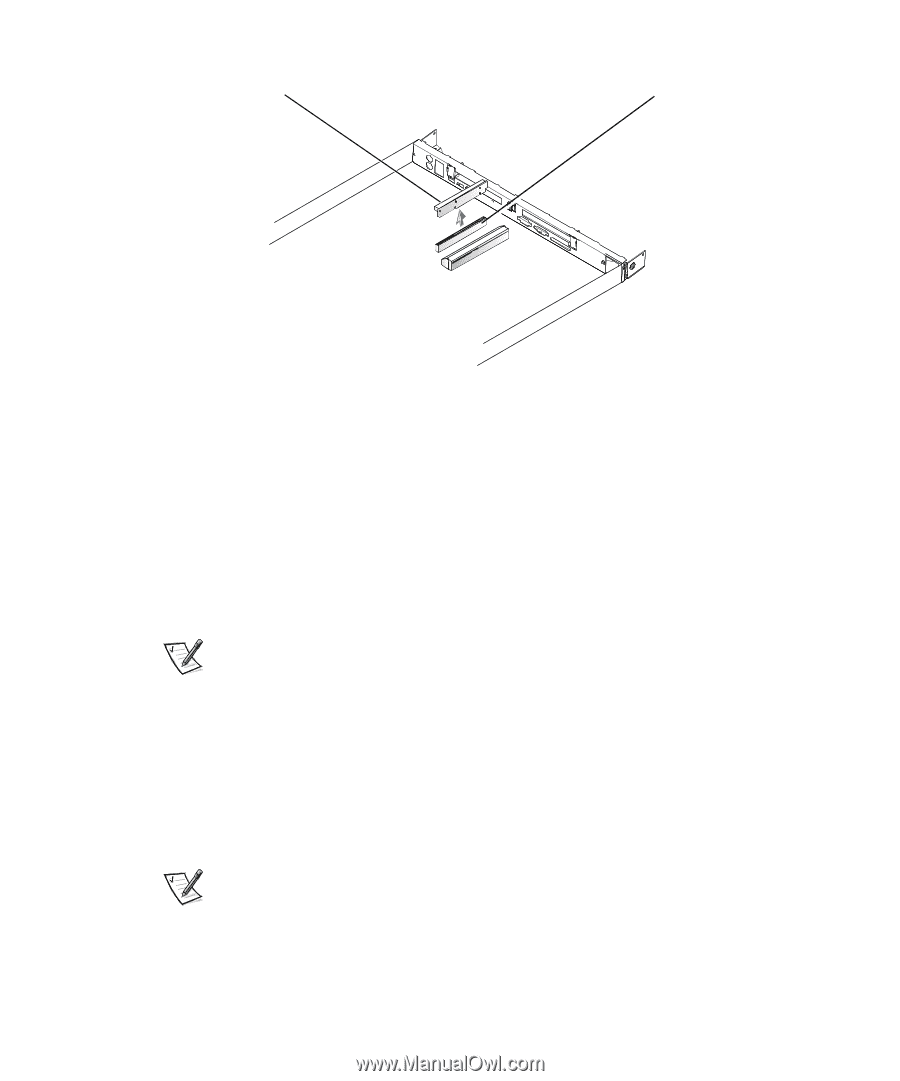
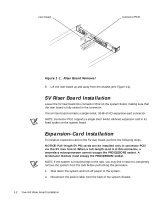
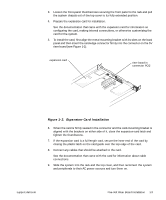
riser board connector PCI2 Figure 1-1. Riser Board Removal 6. Lift the riser board up and away from the chassis (see Figure 1-1). 5V Riser Board Installation Lower the 5V riser board into connector PCI2 on the system board, making sure that the riser board is fully seated in the connector. The 5V riser board contains a single 64-bit, 33-MHz PCI expansion-card connector. NOTE: Connector PCI1 supports a single short 64-bit, 66-MHz expansion card in its fixed socket on the system board. Expansion-Card Installation To install an expansion card on the 5V riser board, perform the following steps. NOTICE: Full-length 5V PCI cards can be installed only in connector PCI2 via the 5V riser board. When a full-length card is in this connector, a secondary microprocessor cannot occupy the PROCESSOR2 socket. A terminator module must occupy the PROCESSOR2 socket. NOTE: If the system is mounted high in the rack, you may find it easier to completely remove the system from the rack before performing this procedure. 1. Shut down the system and turn off power to the system. 2. Disconnect the power cable from the back of the system chassis. 1-2 Five-Volt Riser Board Installation
-
 1
1 -
 2
2 -
 3
3 -
 4
4 -
 5
5 -
 6
6
 |
 |