Dell PowerApp 120 Five-Volt Riser Board Installation - Page 5
Expansion-Card Installation, If the expansion card is a full-length card
 |
View all Dell PowerApp 120 manuals
Add to My Manuals
Save this manual to your list of manuals |
Page 5 highlights
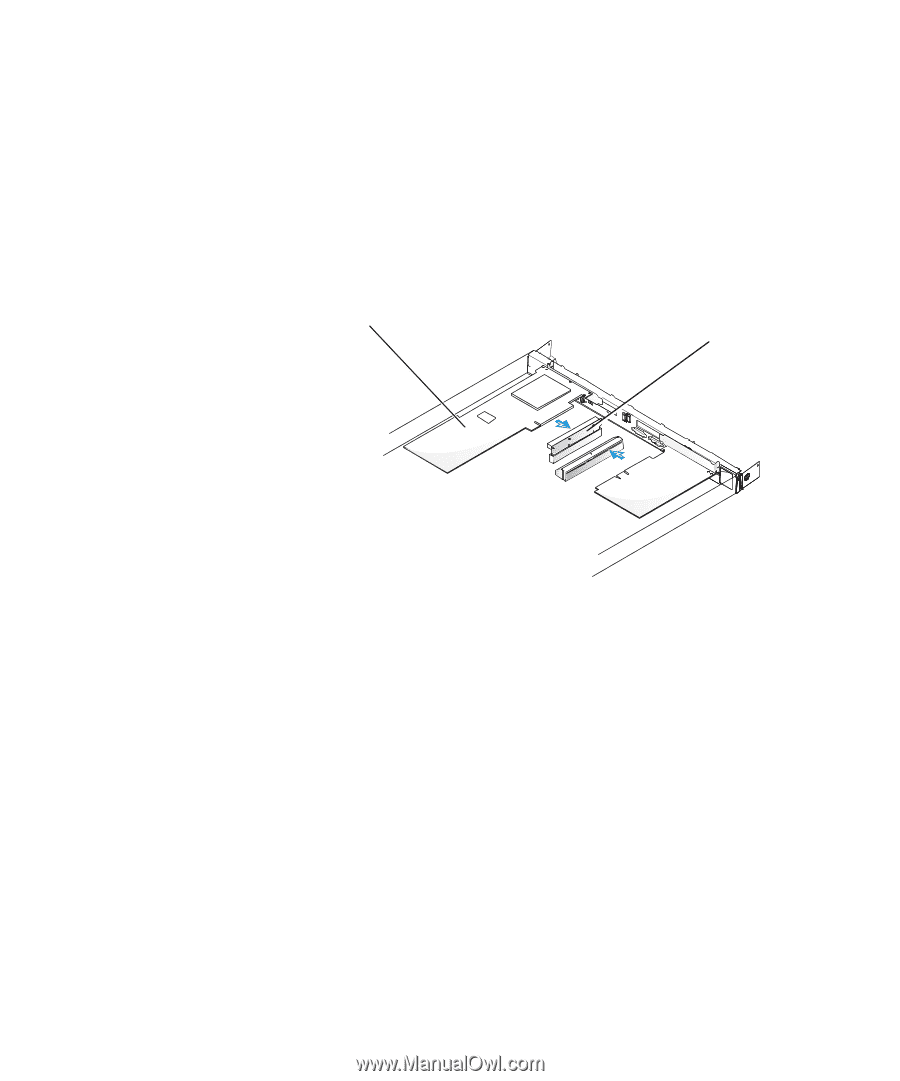
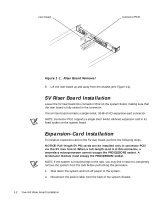
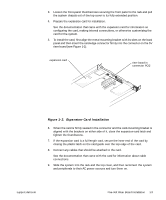
3. Loosen the front-panel thumbscrews securing the front panel to the rack and pull the system chassis out of the top cover to its fully extended position. 4. Prepare the expansion card for installation. See the documentation that came with the expansion card for information on configuring the card, making internal connections, or otherwise customizing the card for the system. 5. To install the card, first align the metal mounting bracket with its slots on the back panel and then insert the card-edge connector firmly into the connector on the 5V riser board (see Figure 1-2). expansion card riser board in connector PCI2 TM Figure 1-2. Expansion-Card Installation 6. When the card is firmly seated in the connector and the card-mounting bracket is aligned with the brackets on either side of it, close the expansion-card latch and tighten the thumbscrew. 7. If the expansion card is a full-length card, secure the inner end of the card by closing the plastic latch on the card guide over the top edge of the card. 8. Connect any cables that should be attached to the card. See the documentation that came with the card for information about cable connections. 9. Slide the system into the rack and the top cover, and then reconnect the system and peripherals to their AC power sources and turn them on. support.dell.com Five-Volt Riser Board Installation 1-3
-
 1
1 -
 2
2 -
 3
3 -
 4
4 -
 5
5 -
 6
6
 |
 |