Dell PowerConnect 5524P Getting Started Guide - Page 7
Installing the Switch
 |
View all Dell PowerConnect 5524P manuals
Add to My Manuals
Save this manual to your list of manuals |
Page 7 highlights
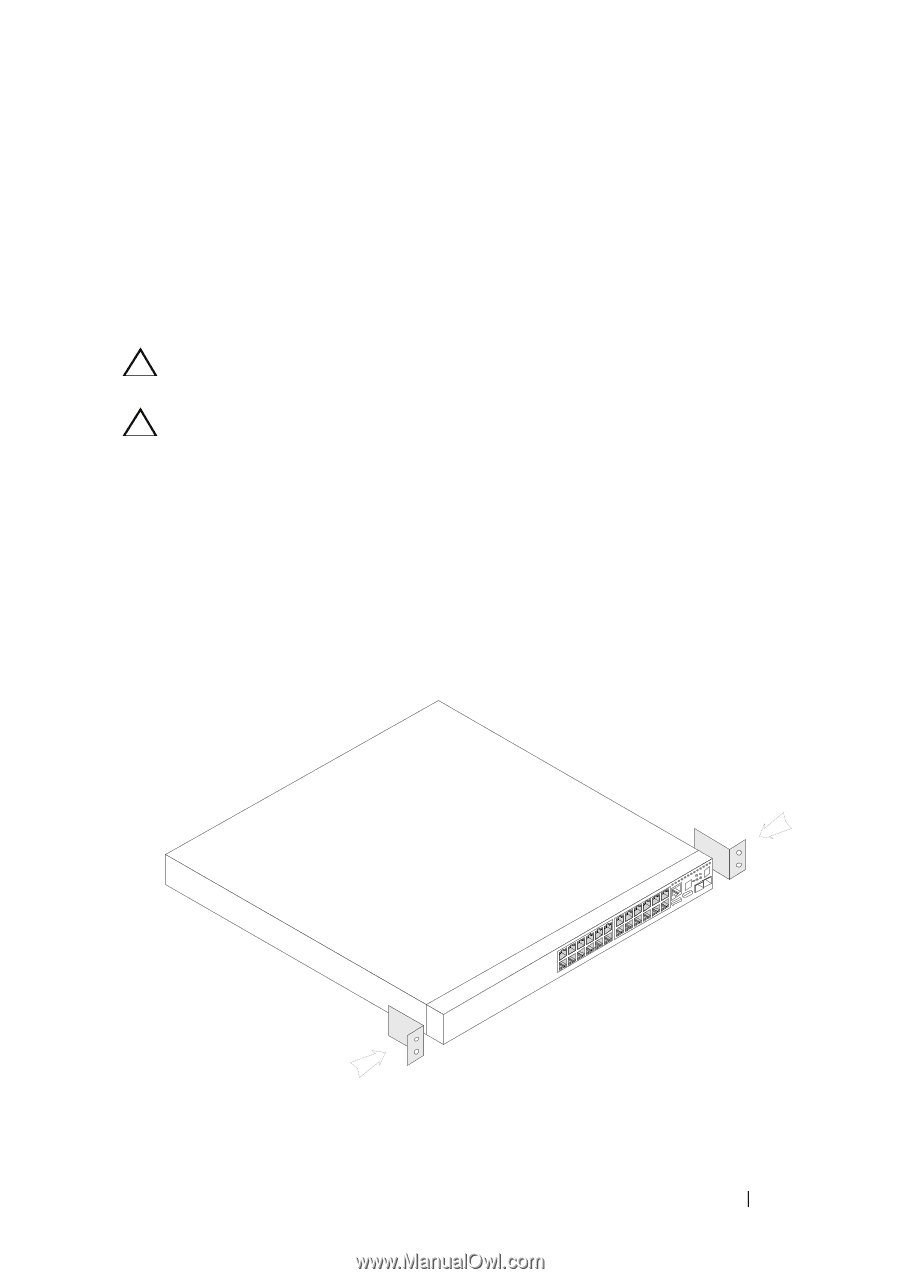
Installing the Switch The PowerConnect 5500 Series switches can be: • Installed on a rack • Placed on a flat surface Installing in a Rack CAUTION: Disconnect all cables from the unit before mounting the switch in a rack or cabinet. CAUTION: When mounting multiple switches into a rack, mount the switches from the bottom up. To install the switch in a rack: 1 Place the supplied rack-mounting bracket on one side of the switch, ensuring that the mounting holes on the switch line up to the mounting holes on the rack-mounting bracket. Figure 1-1 illustrates where to mount the brackets. Figure 1-1. Bracket Installation for Rack Mounting 2 Insert the supplied screws into the rack-mounting holes and tighten with a screwdriver. Installation 7
-
 1
1 -
 2
2 -
 3
3 -
 4
4 -
 5
5 -
 6
6 -
 7
7 -
 8
8 -
 9
9 -
 10
10 -
 11
11 -
 12
12 -
13
-
14
-
15
-
16
-
17
-
18
-
19
-
20
 |
 |
Installation
7
Installing the Switch
The PowerConnect 5500 Series switches can be:
•
Installed o
n a rack
•
Placed on a flat surface
Installing in a Rack
CAUTION:
Disconnect all cables from the unit before mounting the switch in a
rack or cabinet.
CAUTION:
When mounting multiple switches into a rack, mount the switches
from the bottom up.
To install the switch in a rack:
1
Place the supplied rack-mounting bracket on one side of the switch,
ensuring that the mounting holes on the switch line up to the mounting
holes on the rack-mounting bracket.
Figure 1-1 illustrates where to mount the brackets.
Figure 1-1.
Bracket Installation for Rack Mounting
2
Insert the supplied screws into the rack-mounting holes and tighten with a
screwdriver.