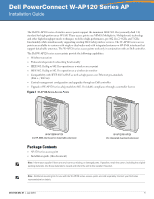
Dell PowerConnect W-AP124 Dell PowerConnect W-AP120 Series AP Installation Gui - Page 2
Before You Begin
 |
View all Dell PowerConnect W-AP124 manuals
Add to My Manuals
Save this manual to your list of manuals |
Page 2 highlights
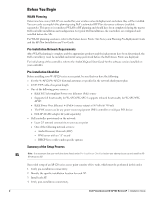
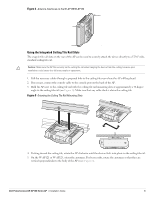
Before You Begin WLAN Planning Determine how many Dell APs are needed for your wireless network deployment and where they will be installed. You can easily accomplish this planning using Dell's automated RF Plan site-survey software (available separately). This process is considered WLAN or RF planning and should have been completed during the master Dell controller installation and configuration. In typical Dell installations, the controllers are configured and installed before the APs. For WLAN planning assistance, refer to the Indoor Access Points: Site Survey and Planning Pre-Deployment Guide and the RF Plan Installation and User Guide. Pre-Installation Network Requirements After WLAN planning is complete and the appropriate products and their placement have been determined, the Dell controller(s) must be installed and initial setup performed before the Dell Access Points are deployed. For initial setup of the controller, refer to the ArubaOS Quick Start Guide for the software version installed on your controller. Pre-Installation Checklist Before installing your W-AP120 series access point, be sure that you have the following: z For the W-AP120/W-AP124: External antennas as specified in the network deployment plan z CAT5 UTP cable of required length z One of the following power sources: „ IEEE 802.3af-compliant Power over Ethernet (PoE) source „ Supports full functionality for W-AP120/W-AP121; supports reduced functionality for W-AP124/W- AP125 „ IEEE Power Over Ethernet + (PoE+) source output at 56 Volts @ 350 mA „ The POE source can be any power source equipment (PSE) controller or midspan PSE device „ Dell AP AC-DC adapter kit (sold separately) z Dell controller provisioned on the network: „ Layer 2/3 network connectivity to your access point „ One of the following network services: z Aruba Discovery Protocol (ADP) z DNS server with an "A" record z DHCP Server with vendor-specific options Summary of the Setup Process Note: It is important that you verify the items listed under Pre-Installation Checklist before you attempt to set up and install an WAP120 series AP. Successful setup of an AP-120 series access point consists of five tasks, which must be performed in this order: 1. Verify pre-installation connectivity. 2. Identify the specific installation location for each AP. 3. Install each AP. 4. Verify post-installation connectivity. 2 Dell PowerConnect W-AP120 Series AP | Installation Guide
-
 1
1 -
 2
2 -
 3
3 -
 4
4 -
 5
5 -
 6
6 -
 7
7 -
 8
8 -
9
-
10
-
11
-
12
-
13
-
14
-
15
-
16
-
17
-
18
-
19
-
20
-
21
-
22
-
23
-
24
-
25
-
26
-
27
-
28
-
29
-
30
-
31
-
32
-
33
-
34
-
35
-
36
-
37
-
38
-
39
-
40
-
41
-
42
-
43
-
44
-
45
-
46
-
47
-
48
-
49
-
50
-
51
-
52
-
53
-
54
-
55
-
56
-
57
-
58
-
59
-
60
-
61
-
62
-
63
-
64
-
65
-
66
-
67
-
68
-
69
-
70
-
71
-
72
-
73
-
74
-
75
-
76
-
77
-
78
-
79
-
80
-
81
-
82
-
83
-
84
-
85
-
86
-
87
-
88
-
89
-
90
-
91
-
92
-
93
-
94
-
95
-
96
-
97
-
98
-
99
-
100
-
101
-
102
-
103
-
104
-
105
-
106
-
107
-
108
-
109
-
110
-
111
-
112
-
113
-
114
-
115
-
116
-
117
-
118
-
119
-
120
-
121
-
122
-
123
-
124
-
125
-
126
-
127
-
128
-
129
-
130
-
131
-
132
-
133
-
134
-
135
-
136
-
137
-
138
-
139
-
140
-
141
-
142
-
143
-
144
-
145
-
146
-
147
-
148
-
149
-
150
-
151
-
152
-
153
-
154
-
155
-
156
-
157
-
158
 |
 |