Dell PowerEdge R960 Secured Component Verification Version 1.5 1.5.1 1.6 1.7 a - Page 21
Running SCV on Windows Server 2019 and 2022
 |
View all Dell PowerEdge R960 manuals
Add to My Manuals
Save this manual to your list of manuals |
Page 21 highlights
Figure 18. Installing SCVApp 6. After the installation is complete, click Finish to exit the InstallShield Wizard. Figure 19. SCVApp installation complete Running SCV on Windows Server 2019 and 2022 1. Open the command prompt and navigate to the SCVTools directory/folder. 2. Run the scv validatesysteminventory command to start the validation process. NOTE: While running SCV on the host, ensure that the USB NIC IP Address in iDRAC is set to the default IP Address. Also, ensure that the first three octets of the IP address are '169.254.1.' . Secured Component Verification on Windows Server 2019 and 2022 21
-
 1
1 -
2
-
3
-
4
-
5
-
6
-
7
-
8
-
9
-
10
-
11
-
12
-
13
-
14
-
15
-
 16
16 -
 17
17 -
 18
18 -
 19
19 -
 20
20 -
 21
21 -
 22
22 -
 23
23 -
 24
24 -
 25
25 -
 26
26 -
27
-
28
-
29
-
30
-
31
 |
 |

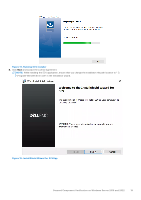
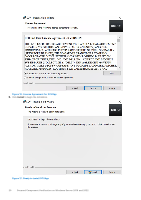
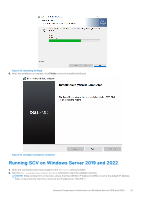
Figure 18. Installing SCVApp
6.
After the installation is complete, click
Finish
to exit the InstallShield Wizard.
Figure 19. SCVApp installation complete
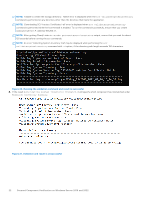
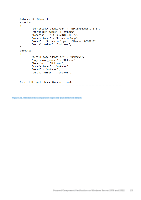
Running SCV on Windows Server 2019 and 2022
1.
Open the command prompt and navigate to the
SCVTools
directory/folder.
2.
Run the
scv validatesysteminventory
command to start the validation process.
NOTE:
While running SCV on the host, ensure that the USB NIC IP Address in iDRAC is set to the default IP Address.
Also, ensure that the first three octets of the IP address are '169.254.1.' .
Secured Component Verification on Windows Server 2019 and 2022
21