Dell Precision Tower 7910 Dell Precision Tower 7910 Owners Manual
Dell Precision Tower 7910 Manual
 |
View all Dell Precision Tower 7910 manuals
Add to My Manuals
Save this manual to your list of manuals |
Dell Precision Tower 7910 manual content summary:
- Dell Precision Tower 7910 | Dell Precision Tower 7910 Owners Manual - Page 1
Dell Precision Tower 7910 Owner's Manual Regulatory Model: D02X Regulatory Type: D02X003 - Dell Precision Tower 7910 | Dell Precision Tower 7910 Owners Manual - Page 2
potential damage to hardware or loss of data and tells you how to avoid the problem. WARNING: A WARNING indicates a potential for property damage, personal injury, or death. Copyright © 2014 Dell Inc. All rights reserved. This product is protected by U.S. and international copyright and intellectual - Dell Precision Tower 7910 | Dell Precision Tower 7910 Owners Manual - Page 3
Components 9 Recommended Tools...9 System Overview...9 Removing the Power Supply Unit (PSU 12 Installing the Power Supply Unit (PSU 13 Removing the Front Cover...13 Installing the Front Cover...14 Removing the Hard Drive...14 Installing the Hard Drive...17 Removing the Left Cover...17 Installing - Dell Precision Tower 7910 | Dell Precision Tower 7910 Owners Manual - Page 4
the Hard-Drive Fan...45 Installing the Hard-Drive Fan...47 Removing the Power Supply Unit (PSU) Card 47 Installing the Power Supply Unit (PSU) Card 48 Removing the System Board...48 Installing the System Board...50 System Board Components...51 3 Additional Information 53 Memory Module Guidelines - Dell Precision Tower 7910 | Dell Precision Tower 7910 Owners Manual - Page 5
Errors That Do Not Halt Your Computer 71 Errors That Soft Halt Your Computer 71 7 Technical Specifications 73 8 Contacting Dell 79 - Dell Precision Tower 7910 | Dell Precision Tower 7910 Owners Manual - Page 6
all power sources troubleshooting and simple repairs as authorized in your product documentation, or as directed by the online or telephone service and support team. Damage due to servicing that is not authorized by Dell is not covered by your warranty. Read and follow the safety instructions - Dell Precision Tower 7910 | Dell Precision Tower 7910 Owners Manual - Page 7
devices from their electrical outlets. 5. Press and hold the power button while the computer is unplugged to ground the system board programs before you turn off your computer. 1. Shut down the operating system: • In Windows 8.1: - Using a touch-enabled device: a. Swipe in from the right edge of the - Dell Precision Tower 7910 | Dell Precision Tower 7910 Owners Manual - Page 8
devices did not automatically turn off when you shut down your operating system, press and hold the power button for about 6 seconds to turn them off. After Working Inside Your Computer After you complete . 5. If required, verify that the computer works correctly by running the Dell Diagnostics. 8 - Dell Precision Tower 7910 | Dell Precision Tower 7910 Owners Manual - Page 9
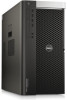
-tip screwdriver • #2 Phillips screwdriver • #1 Phillips screwdriver • Small plastic scribe For how-to videos, documentation, and troubleshooting solutions, scan this QR code, or click here:http://www.Dell.com/QRL/Workstation/T7910 System Overview Figure 1. Front and Back View of T7910 Computer 9 - Dell Precision Tower 7910 | Dell Precision Tower 7910 Owners Manual - Page 10
connector 8. headphone connector 9. optical-drive eject button (optional) 10. optical drive (optional) 11. line-in/microphone connector 12. serial connector 13. power supply unit (PSU) release latch 14. power cable connector 15. hard-drive access cover release latch 16. USB 3.0 connectors 17 - Dell Precision Tower 7910 | Dell Precision Tower 7910 Owners Manual - Page 11
Figure 2. Inside View of T7910 Computer 1. processor heatsink with integrated fan 3. optical drive 5. system board 7. intrusion switch 2. memory shroud 4. front bezel 6. graphics card 11 - Dell Precision Tower 7910 | Dell Precision Tower 7910 Owners Manual - Page 12
Figure 3. Inside View of T7910 Computer 1. system fans 2. speaker 3. PCI retention latch 4. power-supply unit 5. PCI retention latch Removing the Power Supply Unit (PSU) 1. Follow the procedures in Before Working Inside Your Computer. 2. If the PSU is locked, remove the screw to unlock the PSU. For - Dell Precision Tower 7910 | Dell Precision Tower 7910 Owners Manual - Page 13
Installing the Power Supply Unit (PSU) 1. Hold the PSU handle and push the unit into its Lock. 1. Follow the procedures in Before Working Inside Your Computer. 2. Press down on the front cover release latch. 3. Keep the latch pushed down, and pull the front cover in an outward direction to remove - Dell Precision Tower 7910 | Dell Precision Tower 7910 Owners Manual - Page 14
on the computer. 2. Press down on the front cover till it clicks into place. 3. Follow the procedures in After Working Inside Your Computer. Removing the Hard Drive 1. Follow the procedures inBefore Working Inside Your Computer. 2. Remove the front cover. 3. Pull the clasp of the - Dell Precision Tower 7910 | Dell Precision Tower 7910 Owners Manual - Page 15
5. If a second hard drive is installed, Pull the clasp of the second hard-drive bracket in an outward direction. 6. Slide the second hard-drive bracket in an outward direction to remove it from the computer. 15 - Dell Precision Tower 7910 | Dell Precision Tower 7910 Owners Manual - Page 16
the hard-drive bracket on both sides to loosen the hard drive. 8. Lift the hard drive in an upward direction to remove it from the hard-drive bracket. 9. If a 2.5 inch hard drive is installed , Push the retention clips in an outward direction and lift up the drive to remove it from the 3.5 inch hard - Dell Precision Tower 7910 | Dell Precision Tower 7910 Owners Manual - Page 17
into its compartment and close the hard-drive bracket clasp. 4. Install the front cover. 5. Follow the procedures in After Working Inside Your Computer. Removing the Left Cover 1. Follow the procedures in Before Working Inside Your Computer. 2. Pull up the cover release latch on the side of the - Dell Precision Tower 7910 | Dell Precision Tower 7910 Owners Manual - Page 18
Follow the procedures in Before Working Inside Your Computer. 2. Remove: a. left cover b. memory shroud 3. Perform the following steps as shown in the illustration: a. Press the intrusion switch release latch and disconnect the connector from the system board [1,2]. b. Unroute the intrusion switch - Dell Precision Tower 7910 | Dell Precision Tower 7910 Owners Manual - Page 19
on the chassis. 2. Route the intrusion-switch cable around the chassis clips and install the connector to the system board. 3. Install: a. memory shroud b. left cover 4. Follow the procedures in After Working Inside Your Computer. Removing the PCI Card 1. Follow the procedures in Before Working - Dell Precision Tower 7910 | Dell Precision Tower 7910 Owners Manual - Page 20
the PCI card to the card slot. 3. Install the left cover. 4. Follow the procedures in After Working Inside Your Computer. Removing the Slimline Optical Drive 1. Follow the procedures in Before Working Inside Your Computer. 2. Remove the left cover. 3. Disconnect the data cable from the back of the - Dell Precision Tower 7910 | Dell Precision Tower 7910 Owners Manual - Page 21
4. Disconnect the power cable from the back of the optical drive. 5. Pull up the blue release tab to release the latches that secure the optical drive. 21 - Dell Precision Tower 7910 | Dell Precision Tower 7910 Owners Manual - Page 22
6. Slide the optical drive out of its compartment and lift it up to remove it from the computer. 7. Flex the optical-drive bracket latches in an outward direction to loosen the optical drive from the bracket. 8. Lift the optical drive and remove it from the bracket. 22 - Dell Precision Tower 7910 | Dell Precision Tower 7910 Owners Manual - Page 23
Working Inside Your Computer. 2. Remove: a. left cover b. optical drive 3. Press down on the blue retaining tabs on each side of the memory shroud and lift the memory shroud upwards. 4. Press down on the release latch on the other side of the memory shroud module to release it from the chassis. 23 - Dell Precision Tower 7910 | Dell Precision Tower 7910 Owners Manual - Page 24
5. Press down on the release latch on the memory shroud base and lift it upwards to remove it from the computer. 6. Repeat the steps to remove the second memory shroud module and memory shroud base from the computer. Installing the Memory Shroud 1. Install the memory shroud base inside the computer - Dell Precision Tower 7910 | Dell Precision Tower 7910 Owners Manual - Page 25
1. Follow the procedures in Before Working Inside Your Computer. 2. Remove: a. left cover b. optical drive c. memory shroud 3. Press down on the memory-securing clips on each side of the memory module, and lift the memory module upwards to remove it from the computer. NOTE: Tilting of DIMM during - Dell Precision Tower 7910 | Dell Precision Tower 7910 Owners Manual - Page 26
slot on the system board. 2. Press the coin-cell battery downward until the release latch springs back into place and secures it. 3. Install: a. PCIe card Before Working Inside Your Computer. 2. Remove: a. left cover b. memory shroud (center) 3. Disconnect the heatsink fan cable from the system - Dell Precision Tower 7910 | Dell Precision Tower 7910 Owners Manual - Page 27
to secure the heatsink to the system board. NOTE: Misalignment of screws can damage the system. 3. Connect the heatsink cable to the system board. 4. Install: a. memory shroud (center) b. left cover 5. Follow the procedures in After Working Inside Your Computer. 27 - Dell Precision Tower 7910 | Dell Precision Tower 7910 Owners Manual - Page 28
the HeatSink Fan 1. Follow the procedures in Before Working Inside Your Computer. 2. Remove: a. left cover b. heatsink c. memory shroud (center) 3. Push the grommets outward to release the heatsink fan from the assembly. 4. Remove the heatsink fan from the heatsink assembly. Installing the Heatsink - Dell Precision Tower 7910 | Dell Precision Tower 7910 Owners Manual - Page 29
Unthread the cable from the latch [1]. b. Press and slide the latch out to release the PCIe card retention [2]. c. Lift and remove the PCIe card retention out of the . 2. Remove: a. left cover b. optical drive c. PCIe card retention d. memory shroud 3. Remove the screws that secure the optical - Dell Precision Tower 7910 | Dell Precision Tower 7910 Owners Manual - Page 30
4. Push the PCIe card retention in the direction indicated to unhinge it from the system-fan module. 5. Lift the PCIe card retention in an upward direction to remove it from the computer. 6. Remove the graphics-card cable from the latch. 30 - Dell Precision Tower 7910 | Dell Precision Tower 7910 Owners Manual - Page 31
7. Route the system-fan cable through the opening in the system-fan module. 8. Perform the following steps as shown in the illustration: a. Disconnect the system-fan and internal speaker cable connectors from the system board [1,2]. 31 - Dell Precision Tower 7910 | Dell Precision Tower 7910 Owners Manual - Page 32
9. Perform the following steps as shown in the illustration: a. Remove the screws that secure the system-fan assembly to the chassis [1]. b. Lift and remove the system-fan assembly from the chassis [2]. 32 - Dell Precision Tower 7910 | Dell Precision Tower 7910 Owners Manual - Page 33
10. Insert the fan cable through the opening to release the system-fan module. 11. Remove the grommets that secure the system fan , lift up the fan and remove it from the fan assembly. 33 - Dell Precision Tower 7910 | Dell Precision Tower 7910 Owners Manual - Page 34
until they are secured to the system-fan module. 7. Install the screws that secure the optical-drive bracket to the chassis. 8. Install: a. memory shroud b. PCIe card retention c. optical drive d. left cover 9. Follow the procedures in After Working Inside Your Computer. Removing the I/O Panel and - Dell Precision Tower 7910 | Dell Precision Tower 7910 Owners Manual - Page 35
the screws that secure the I/O panel assembly to the computer chassis. 5. Pull the I/O panel assembly in a direction opposite to the computer to release its edge from the chassis clip. 6. Slide the opposite edge of the I/O panel assembly outward to disengage the I/O assembly from the chassis. 35 - Dell Precision Tower 7910 | Dell Precision Tower 7910 Owners Manual - Page 36
7. Remove the screws that secure the USB 3.0 module to the I/O panel assembly and remove it from the computer. 8. Remove the screws that secure the I/O panel and remove it from the I/O panel assembly. Installing the I/O Panel and the USB 3.0 Ports 1. Place the I/O panel and install the screws to - Dell Precision Tower 7910 | Dell Precision Tower 7910 Owners Manual - Page 37
b. front cover c. front bezel d. I/O panel 3. Perform the following steps: a. Disconnect the power switch cable from the I/O panel board. b. Press down on the power switch module on the sides to release the power switch from its compartment [1,2]. 4. Remove the power switch from the computer. 37 - Dell Precision Tower 7910 | Dell Precision Tower 7910 Owners Manual - Page 38
-switch module through the opening on the front panel. 3. Press the retention tab to secure the power switch in place. 4. Install: a. I/O panel b. front bezel c. front cover d. left cover 5. Follow the procedures in After Working Inside Your Computer. Removing the Speaker 1. Follow the - Dell Precision Tower 7910 | Dell Precision Tower 7910 Owners Manual - Page 39
4. Perform the following steps: a. Press the speaker latch on both sides to release the speaker from the chassis. b. Lift to remove the speaker from the computer. c. Remove the speaker cable through the opening. Installing the Speaker 1. Install the - Dell Precision Tower 7910 | Dell Precision Tower 7910 Owners Manual - Page 40
Removing the Right Cover 1. Follow the procedures in Before Working Inside Your Computer. 2. Remove the screws that secure the right cover to the chassis. 3. Slide the right cover in the direction indicated to remove it from the computer. 4. Lift the right cover at a 45-degree and remove it from the - Dell Precision Tower 7910 | Dell Precision Tower 7910 Owners Manual - Page 41
5.25-inch Optical Drive 1. Follow the procedures in Before Working Inside Your Computer. 2. Remove: a. right cover 3. Disconnect the data and power cables from the back of the optical drive. 4. Press the release latch and slide the optical drive outward to release it from the drive bay [1, 2]. 41 - Dell Precision Tower 7910 | Dell Precision Tower 7910 Owners Manual - Page 42
the front cover to install the Optical drive. 1. Place the optical drive on the bracket and tighten the screws to secure the optical drive. 2. Slide the optical drive into the drive bay. 3. Connect the power and data cables to the optical drive. 4. Install: a. right cover 5. Follow the procedures in - Dell Precision Tower 7910 | Dell Precision Tower 7910 Owners Manual - Page 43
4. Unroute the HDD thermal-sensor cable from its securing clips on the chassis. 5. Open the latch securing the HDD thermal sensor and remove it from the computer. 43 - Dell Precision Tower 7910 | Dell Precision Tower 7910 Owners Manual - Page 44
and which lever closes first. a. Press down on the first lever holding the processor cover in place and release it sideways from its retention hook [1]. b. Repeat step 'a' to release the second lever from its retention hook [2]. c. Lift up the lever from its retention hook [3]. d. Press down on - Dell Precision Tower 7910 | Dell Precision Tower 7910 Owners Manual - Page 45
step '3' to slide the second lever into the retention hook. 5. Install: a. heatsink b. left cover 6. Follow the procedures in After Working Inside Your Computer. Removing the Hard-Drive Fan 1. Follow the procedures in Before Working Inside Your Computer. 2. Remove: a. left cover 45 - Dell Precision Tower 7910 | Dell Precision Tower 7910 Owners Manual - Page 46
b. right cover 3. Disconnect the hard-drive fan cable from the system board. 4. Route the cable from below the computer chassis as indicated. 5. Remove the screws that secure the hard-drive fan to the computer chassis and remove the fan from the computer. 46 - Dell Precision Tower 7910 | Dell Precision Tower 7910 Owners Manual - Page 47
fan to the system chassis. 2. Route the hard-drive fan cable through the chassis and connect it to its slot on the system board. 3. Install: a. left cover b. right cover 4. Follow the procedures in After Working Inside Your Computer. Removing the Power Supply Unit (PSU) Card 1. Follow the procedures - Dell Precision Tower 7910 | Dell Precision Tower 7910 Owners Manual - Page 48
Installing the Power Supply Unit (PSU) Card 1. Install the screws that secure the PSU card to the the: a. left cover b. optical drive c. optical drive holder d. memory shroud base (s) e. memory shrouds f. heat sink g. PCIe card retention h. PCI card(s) i. memory module (s) j. processor 3. Disconnect - Dell Precision Tower 7910 | Dell Precision Tower 7910 Owners Manual - Page 49
4. Remove the screws that secure the system board to the chassis. 5. Perform the following steps as shown in the illustration: a. Slide the system board towards front direction [1]. b. Tilt the system board [2]. 49 - Dell Precision Tower 7910 | Dell Precision Tower 7910 Owners Manual - Page 50
board in the chassis. 2. Tighten the screws that secure the system board to the chassis. 3. Connect the connectors to the system board. 4. Install the: a. processor b. memory module(s) c. PCIe card retention d. PCI card(s) e. heat sink - Dell Precision Tower 7910 | Dell Precision Tower 7910 Owners Manual - Page 51
g. memory shrouds h. optical drive holder i. optical drive j. left cover 5. Follow the procedures in After Working PCI Express 3.0 x16 card slot (slot 2) 6. intrusion-switch connector 8. processor socket 10. front-panel audio connector 12. PCI Express 3.0 x16 slots (available only when optional - Dell Precision Tower 7910 | Dell Precision Tower 7910 Owners Manual - Page 52
16. HDD2 fan connector 18. system fan connector 20. processor socket 22. remote power connector 24. system fan connector 26. internal speaker connector 28. integrated SAS1 connector 30. CMOS Clear Jumper 32. hard-drive fan connector 34. USB 3.0 connector for front panel 36. front panel connector 38 - Dell Precision Tower 7910 | Dell Precision Tower 7910 Owners Manual - Page 53
modules with different speeds are installed, they operate at the speed of the slowest installed memory modules. NOTE: If all DIMMs are 2133, the CPU ordered may run the memory at a slower speed. Front Panel Chassis Lock The front panel chassis lock allows you to lock the front panel. The lock is - Dell Precision Tower 7910 | Dell Precision Tower 7910 Owners Manual - Page 54
Power Supply Unit (PSU) Lock The PSU lock prevents the removal of the PSU from the chassis. NOTE: To lock or unlock the PSU, always ensure that - Dell Precision Tower 7910 | Dell Precision Tower 7910 Owners Manual - Page 55
Setup enables you to manage your computer hardware and specify BIOS‐level options. From the System Setup, you can: • and boot directly to a specific device (for example: optical drive or hard drive). During the Power-on Self Test (POST), when the Dell logo appears, you can: • Access System Setup by - Dell Precision Tower 7910 | Dell Precision Tower 7910 Owners Manual - Page 56
hardware features of your computer. • System Information • Memory Configuration • Processor Information • Device Information • PCI the computer attempts to find an operating system. • Diskette Drive • USB Storage Device • CD/DVD/CD-RW Drive • Onboard NIC • Internal HDD Boot List Option Allows you - Dell Precision Tower 7910 | Dell Precision Tower 7910 Owners Manual - Page 57
Tower 7910 Drives Description • Enable Legacy Option ROMs (Default) Allows you to set the date and time. The changes to the system date hard-drive controller. The options are: • Disabled • ATA • AHCI (Default) NOTE: SATA is configured to support RAID mode. No SATA operation support in Tower 7910. - Dell Precision Tower 7910 | Dell Precision Tower 7910 Owners Manual - Page 58
SAS RAID Controller (Tower 7910 only) HDD Fans Audio Memory Map IO above 4GB Thunderbolt Miscellaneous devices PCI MMIO Space Size Description • SATA-0 • SATA-1 Default Setting: All drives are enabled. NOTE: If the hard drives are connected to a RAID controller card, the hard drives will - Dell Precision Tower 7910 | Dell Precision Tower 7910 Owners Manual - Page 59
are: • Auto (Default) • SLOT 1 • SLOT 2: VGA Compatible • SLOT 3 • SLOT 4 • SLOT 5 • SLOT 6 ( Tower 5810 and Tower 7810 only) • SLOT1_CPU2: VGA Compatible (Tower 7910 only) • SLOT2_CPU2 (Tower 7910 only) Table 5. Security Option Strong Password Password Configuration Password Bypass Password Change - Dell Precision Tower 7910 | Dell Precision Tower 7910 Owners Manual - Page 60
Disabled (Default) • Enabled Allows you to enable or disable Custom Mode Key Management. • Disabled (Default) Table 7. Performance Option Multi Core Support Description This field specifies whether the processor will have one or all cores enabled. The performance of some applications will improve - Dell Precision Tower 7910 | Dell Precision Tower 7910 Owners Manual - Page 61
This field limits the maximum value the processor Standard CPUID Function will support. • Enable CPUID Limit Default Setting: The option is disabled. Allows and isolate memory errors in system RAM.. Default Setting: Enable Dell Reliable Memory Technology (RMT) Table 8. Power Management Option - Dell Precision Tower 7910 | Dell Precision Tower 7910 Owners Manual - Page 62
High • Low USB Wake Support Allows you to enable USB devices to wake the system from standby. • Enable USB Wake Support Default Setting: The option works when the computer is connected to AC power supply. • Disabled - Does not allow the system to power on by special LAN signals when it receives - Dell Precision Tower 7910 | Dell Precision Tower 7910 Owners Manual - Page 63
option is enabled by default. • Auto Table 10. Virtualization Support Option Description Virtualization This option specifies whether a Virtual the SERR message mechanism be disabled. Table 12. System Logs Option BIOS events Description Displays the system event log and allows you to clear - Dell Precision Tower 7910 | Dell Precision Tower 7910 Owners Manual - Page 64
a power outlet 1. Re-start the computer. 2. Go to dell.com/support. 3. Enter the Service Tag or Express Service Code and click Submit. NOTE: To locate the Service Tag, click Where is my Service Tag? NOTE: If you cannot find your Service Tag, click Detect My Product. Proceed with the instructions on - Dell Precision Tower 7910 | Dell Precision Tower 7910 Owners Manual - Page 65
need not provide the system password to log on to the computer. To enter a system setup, press immediately after a power-on or re-boot. 1. In the System BIOS or System Setup screen, select System Security and press . The System Security screen appears. 2. In the System Security screen - Dell Precision Tower 7910 | Dell Precision Tower 7910 Owners Manual - Page 66
time it boots. 6. Connect the computer to the electrical outlet and power-on the computer. 7. Power-off the computer and disconnect the power cable from the electrical outlet. 8. Remove the cover. 9. Replace the jumper on the pins. 10. Install the cover. 11. Follow the procedures in After Working - Dell Precision Tower 7910 | Dell Precision Tower 7910 Owners Manual - Page 67
ePSA diagnostics before contacting Dell for technical assistance. The purpose of running diagnostics is to test your computer's hardware without requiring additional equipment or risking data loss. If you are unable to fix the problem yourself, service and support personnel can use the diagnostics - Dell Precision Tower 7910 | Dell Precision Tower 7910 Owners Manual - Page 68
indicator of the progress through the Power-On Self Test (POST) process. These LEDs do not indicate the problem that caused the POST routine to functioning Abnormal- System cannot turn on, recommend check motherboard components or replace motherboard. NOTE: Amber LED blinking schemepattern is 2 or - Dell Precision Tower 7910 | Dell Precision Tower 7910 Owners Manual - Page 69
A possible Motherboard, If two or more memory modules Memory, or BIOS checksum failure was detected and the system is now in recovery mode. 2,6 A possible processor failure has Re-seat the processor occurred 2,7 Memory modules are detected, If two or more memory modules but a memory power - Dell Precision Tower 7910 | Dell Precision Tower 7910 Owners Manual - Page 70
2x2 power properly. connector from the power supply unit. 3,5 Memory modules are detected, Ensure that no special but a memory configuration or compatibility error has occurred. requirements for memory module or connector placement exist. Ensure that the memory you are using is supported by - Dell Precision Tower 7910 | Dell Precision Tower 7910 Owners Manual - Page 71
Error Message Error! Non-ECC DIMMs are not supported on this system. Alert! Processor cache size is Memory fan failure. Alert! Right Memory fan failure. Alert! PCI fan failure. Alert! Chipset heat sink not detected. Alert! Hard Drive fan1 failure. Alert! Hard Drive fan2 failure. Alert! Hard Drive - Dell Precision Tower 7910 | Dell Precision Tower 7910 Owners Manual - Page 72
Dell Technical support team to learn about upgrading to a higher wattage power supply. Dell Reliable Memory Technology (RMT) has discovered and isolated errors in system memory. You may continue to work. Memory module replacement is recommended. Please refer to the RMT Event log screen in BIOS - Dell Precision Tower 7910 | Dell Precision Tower 7910 Owners Manual - Page 73
of your computer, go to Help and Support in your Windows operating system and select the option to view information about your computer. Table 19. Processor Feature Specification Type 4, 6, 8, 10, 12, 14, 16 and 18 core Intel Xeon processor. Cache Instruction Cache 32 KB Data Cache • 32 KB - Dell Precision Tower 7910 | Dell Precision Tower 7910 Owners Manual - Page 74
Internal ports Table 26. Drives Feature Tower 7910 Externally accessible: Slimline SATA optical bays 5.25-inch drive bays Specification Realtek ALC3220 USB 3.0, 5 Gbps (3 ports) USB 2.0, 480 Mbps (3 ports) Specification one one: • supports one 5.25-inches device • supports one media card reader 74 - Dell Precision Tower 7910 | Dell Precision Tower 7910 Owners Manual - Page 75
bays can hold four 2.5-inch hard drive with supplied HDD caddy. Internally accessible none Table 27. External Connectors Feature Audio Specification • front panel - mic-in, headphone-out • back panel - line-out, mic in/line In Network Tower 7910 Serial USB Tower 7910 two RJ-45 connector one - Dell Precision Tower 7910 | Dell Precision Tower 7910 Owners Manual - Page 76
with the system board or power supply. blinking amber light - indicates a problem has occurred with the system board. white light - blinking white light indicates that the computer is reading data from, or writing data to the hard drive. green light - A good connection at 10 Mbs exists between the - Dell Precision Tower 7910 | Dell Precision Tower 7910 Owners Manual - Page 77
Hr (at 181 VAC) NOTE: Heat dissipation is calculated by using the power supply wattage rating. Table 31. Physical Feature Height (with feet) Height ( .00 mm (8.51 inches) 525.00 mm (20.67 inches) 16.90 kg (37.26 lb) Specification 10 °C to 35 °C (50 °F to 95 °F) -40 °C to 65 °C (-40 °F to 149 - Dell Precision Tower 7910 | Dell Precision Tower 7910 Owners Manual - Page 78
Feature Storage Altitude: Operating Storage Airborne contaminant level Specification 105 G +/- 5% with pulse duration of 2 msec +/- 10% (equivalent to 127 cm/sec [50 in/sec]) -15.2 m to 3048 m (-50 ft to 10,000 ft) -15.2 m to 10,668 m (-50 ft to 35,000 ft) G1 as defined by ISA-S71.04-1985 78 - Dell Precision Tower 7910 | Dell Precision Tower 7910 Owners Manual - Page 79
options. Availability varies by country and product, and some services may not be available in your area. To contact Dell for sales, technical support, or customer service issues: 1. GO to dell.com/support. 2. Select your support category. 3. Verify your country or region in the Choose a Country
-
 1
1 -
 2
2 -
 3
3 -
 4
4 -
 5
5 -
 6
6 -
 7
7 -
8
-
9
-
10
-
11
-
12
-
13
-
14
-
15
-
16
-
17
-
18
-
19
-
20
-
21
-
22
-
23
-
24
-
25
-
26
-
27
-
28
-
29
-
30
-
31
-
32
-
33
-
34
-
35
-
36
-
37
-
38
-
39
-
40
-
41
-
42
-
43
-
44
-
45
-
46
-
47
-
48
-
49
-
50
-
51
-
52
-
53
-
54
-
55
-
56
-
57
-
58
-
59
-
60
-
61
-
62
-
63
-
64
-
65
-
66
-
67
-
68
-
69
-
70
-
71
-
72
-
73
-
74
-
75
-
76
-
77
-
78
-
79
 |
 |

Dell Precision Tower 7910
Owner's Manual
Regulatory Model: D02X
Regulatory Type: D02X003