Dell ST2220L User's Guide - Page 14
Operating the Monitor - power save mode
 |
View all Dell ST2220L manuals
Add to My Manuals
Save this manual to your list of manuals |
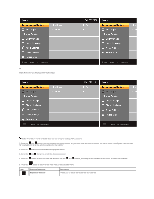
Page 14 highlights
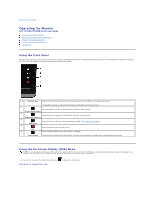
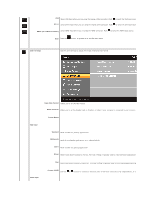
Back to Contents Page Operating the Monitor Dell™ ST2220L/ST2220M monitor User's Guide Using the Front Panel Controls Using the On-Screen Display (OSD) Menu Setting the Maximum Resolution Using the Dell Soundbar (Optional) Using the Tilt Using the Front Panel Use the control buttons on the side of the monitor to adjust the characteristics of the image being displayed. As you use these buttons to adjust the controls, an OSD shows the numeric values of the characteristics as they change. 1-2 Shortcut keys Use this button for direct access to the control menu that you define in the personalize menu. *The default settings are Preset Modes Select and Brightness/Contrast Select. 1 Use this button for different display preset modes on your monitor. Preset Modes Select 2 Use this button to access the "Brightness/Contrast" control menu. Brightness/Contrast 3 Use this button to open the On-Screen Display (OSD). See Using the OSD Menu. OSD Menu 4 Use this button to exit the OSD menu. Exit 5 Use the power button to turn the monitor on and off. Power button The white light indicates that the monitor is on and fully functional. An amber light indicates power save mode. Using the On-Screen Display (OSD) Menu NOTE: If you change the settings and then either proceed to another menu, or exit the OSD menu, the monitor automatically saves the changes. The changes are also saved if you change the settings and then wait for the OSD menu to disappear. 1. Press any key to launch the OSD menu and press Main Menu for Analog (VGA) Input to display the main menu.
-
 1
1 -
2
-
3
-
4
-
5
-
6
-
7
-
8
-
 9
9 -
 10
10 -
 11
11 -
 12
12 -
 13
13 -
 14
14 -
 15
15 -
 16
16 -
 17
17 -
 18
18 -
 19
19 -
20
-
21
-
22
-
23
-
24
-
25
-
26
-
27
-
28
-
29
-
30
-
31
-
32
-
33
 |
 |
