Dell Venue Dell Mobile Sync Manual - Page 61
Creating a Photo & Video Album
 |
View all Dell Venue manuals
Add to My Manuals
Save this manual to your list of manuals |
Page 61 highlights
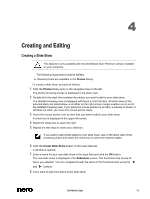
4 2. Choose a template on the left of the Themes tab. An animated preview is shown on the upper right of the tab. 3. If you want to enable the pan-and-zoom effect for slides, select the respective check box. The check box is selected by default. 4. Click the Titles tab. The tab is displayed. 5. Add your desired text for the intro title into the Opening title input field. Other text attributes such as font and alignment are defined by the template and cannot be modified. 6. Add your desired text for the outro text into the Closing title input field. Other text attributes such as font and alignment are defined by the template and cannot be modified. 7. Click the Music and Duration tab. The tab is displayed. 8. If you want to change the display duration of still pictures in your slide show, add the desired duration into the input field. Default duration is 3 seconds. 9. If you want to specify the volume level of the audio added by the template in contrast to the volume level of all other audio tracks which are already available in the timeline (e.g. sound of video file), move the slider in the Volume mixer area. If you do not move the slider, both Video sound and Theme music have the same audio level. If you prefer to mute the theme music, select the check box below. 10. Click the OK button. All changes are added to the slide show. You have personalized your slide show. See also Creating a Slide Show → 59 Personalize Slide Show Window → 38 Creating a Photo & Video Album The following requirement must be fulfilled: ► Desired photos and videos are available in the library. To create a photo and video album, proceed as follows: 1. Click the Create a new album button that is displayed at the right hand side of the Photo & Video Albums entry (in the navigation tree) when you hover over it with your mouse pointer. A window is opened. Dell Mobile Sync 61
-
 1
1 -
2
-
3
-
4
-
5
-
6
-
7
-
8
-
9
-
10
-
11
-
12
-
13
-
14
-
15
-
16
-
17
-
18
-
19
-
20
-
21
-
22
-
23
-
24
-
25
-
26
-
27
-
28
-
29
-
30
-
31
-
32
-
33
-
34
-
35
-
36
-
37
-
38
-
39
-
40
-
41
-
42
-
43
-
44
-
45
-
46
-
47
-
48
-
49
-
50
-
51
-
52
-
53
-
54
-
55
-
 56
56 -
 57
57 -
 58
58 -
 59
59 -
 60
60 -
 61
61 -
 62
62 -
 63
63 -
 64
64 -
 65
65 -
 66
66 -
67
-
68
-
69
-
70
-
71
-
72
-
73
-
74
-
75
 |
 |
