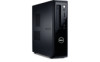
Dell Vostro 260s Owner's Manual (Slim Tower)
Dell Vostro 260s Manual
 |
View all Dell Vostro 260s manuals
Add to My Manuals
Save this manual to your list of manuals |
Dell Vostro 260s manual content summary:
- Dell Vostro 260s | Owner's Manual (Slim Tower) - Page 1
Dell Vostro 260/260s Slim-Tower Owner's Manual Regulatory Model D11D Regulatory Type D11M001 - Dell Vostro 260s | Owner's Manual (Slim Tower) - Page 2
computer. CAUTION: A CAUTION indicates potential damage to hardware or loss of data if instructions Inc. Microsoft®, Windows®, MS-DOS®, Windows Vista®, the Windows Vista start button such mark by Dell Inc. is under license. Wi-Fi® is a registered trademark of Wireless Ethernet Compatibility Alliance, - Dell Vostro 260s | Owner's Manual (Slim Tower) - Page 3
Computer 9 2 Cover...11 Removing The Cover...11 Installing The Cover...12 3 Front Bezel 13 Removing The Front Bezel 13 Installing The Front Bezel 14 4 Expansion Card 15 Removing The Expansion Card 15 Installing The Expansion Card 16 5 Memory...17 Removing The Memory 17 Installing The Memory - Dell Vostro 260s | Owner's Manual (Slim Tower) - Page 4
The Fan...25 Installing The Fan...26 9 Power Supply 27 Removing The Power Supply 27 Installing The Power Supply 29 10 Power Switch 31 Removing The Power Switch 31 Installing The Power Switch 32 11 Input/Output Panel 33 Removing The I/O Panel 33 Installing The I/O Panel 36 12 Processor 37 - Dell Vostro 260s | Owner's Manual (Slim Tower) - Page 5
49 Specifications...49 17 Troubleshooting 55 Diagnostic Power LED Codes 55 Diagnostic Beep Codes 56 Diagnostic Error Messages 57 System Error Messages 63 18 System Setup 65 System Setup Overview 65 System Setup Screens...65 Enter System Setup...66 System Setup Option...67 19 Contacting Dell - Dell Vostro 260s | Owner's Manual (Slim Tower) - Page 6
6 - Dell Vostro 260s | Owner's Manual (Slim Tower) - Page 7
only perform troubleshooting and simple repairs as authorized in your product documentation, or as directed by the online or telephone service and support team. Damage due to servicing that is not authorized by Dell is not covered by your warranty. Read and follow the safety instructions that came - Dell Vostro 260s | Owner's Manual (Slim Tower) - Page 8
screwdriver • Small plastic scribe • Flash BIOS update program media Turning Off Your Computer CAUTION: To avoid losing data, save and close all open files and exit all open programs before you turn off your computer. 1. Shut down the operating system: • In Windows 7: Click Start , then click - Dell Vostro 260s | Owner's Manual (Slim Tower) - Page 9
hold the power button for about 6 seconds to turn them off. After Working Inside Your Computer After you complete any replacement procedure, ensure you connect any external devices, cards, and cables before turning on your computer. 1. Replace the cover. CAUTION: To connect a network cable, first - Dell Vostro 260s | Owner's Manual (Slim Tower) - Page 10
10 - Dell Vostro 260s | Owner's Manual (Slim Tower) - Page 11
2 Cover Removing The Cover 1. Follow the procedures in Before Working Inside Your Computer. 2. Remove the screws that secure the cover to the computer. 3. Slide the computer cover towards the back of the computer. 11 - Dell Vostro 260s | Owner's Manual (Slim Tower) - Page 12
4. Remove the computer cover. Installing The Cover 1. Place the cover on the chassis. 2. Push the cover towards the front of the computer. 3. Replace the screws to secure the cover to the computer. 4. Follow the procedures in After Working Inside Your Computer. 12 - Dell Vostro 260s | Owner's Manual (Slim Tower) - Page 13
Bezel Removing The Front Bezel 1. Follow the procedures in Before Working Inside Your Computer. 2. Remove the cover. 3. Pry the front panel retention clips away from the chassis. 4. Rotate the front bezel away from the computer, to release the hooks on the opposite edge of the bezel from the chassis - Dell Vostro 260s | Owner's Manual (Slim Tower) - Page 14
Installing The Front Bezel 1. Place the hooks on the notches in the computer. 2. Rotate the front bezel towards the computer . 3. Press the front bezel till the tabs snap in to place. 4. Replace the cover. 5. Follow the procedures in After Working Inside Your Computer. 14 - Dell Vostro 260s | Owner's Manual (Slim Tower) - Page 15
4 Expansion Card Removing The Expansion Card 1. Follow the procedures in Before Working Inside Your Computer. 2. Remove the cover. 3. Pull up the release tab on the card-retention latch. 4. Press on the release-lever to release the securing tab from the notch in the card. 15 - Dell Vostro 260s | Owner's Manual (Slim Tower) - Page 16
and remove it from the computer. Installing The Expansion Card 1. Place the expansion card on it's connector. 2. Press down the card-retention till it snaps into place. 3. Secure the expansion card by pushing the card-retention latch till it snaps into place. 4. Replace the cover. 5. Follow the - Dell Vostro 260s | Owner's Manual (Slim Tower) - Page 17
5 Memory Removing The Memory 1. Follow the procedures in Before Working Inside Your Computer. 2. Remove the cover. 3. Press down on the memory retention tabs on each side of the memory module. 4. Lift the memory module out of it's connector on the system board. 17 - Dell Vostro 260s | Owner's Manual (Slim Tower) - Page 18
Installing The Memory 1. Place the memory module into it's connector on the system board. 2. Press the memory module into the socket till it snaps into place. 3. Replace the cover. 4. Follow the procedures in After Working Inside Your Computer. 18 - Dell Vostro 260s | Owner's Manual (Slim Tower) - Page 19
6 Optical Drive Removing The Optical Drive 1. Follow the procedures in Before Working Inside Your Computer. 2. Remove the cover. 3. Disconnect the data cable and power cable from the optical drive. 4. Pull the optical-drive release latch and then push the optical drive towards the front of the - Dell Vostro 260s | Owner's Manual (Slim Tower) - Page 20
Installing The Optical Drive 1. Push the optical drive into the computer till it snaps into place. 2. Connect the data cable and power cable to the optical drive. 3. Replace the cover. 4. Follow the procedures in After Working Inside Your Computer. 20 - Dell Vostro 260s | Owner's Manual (Slim Tower) - Page 21
7 Hard Drive Removing The Hard Drive 1. Follow the procedures in Before Working Inside Your Computer. 2. Remove the cover. 3. Disconnect the SATA cable and power cable from the hard drive. 4. Remove the screws that secure the hard drive to the computer. 21 - Dell Vostro 260s | Owner's Manual (Slim Tower) - Page 22
5. Remove the hard drive from the computer. 6. Remove the screws that secure the bracket to the hard drive. 22 - Dell Vostro 260s | Owner's Manual (Slim Tower) - Page 23
the screws that secure the bracket to the hard drive. 2. Replace the hard drive into the computer. 3. Replace the screws that secure the hard drive to the computer. 4. Connect the SATA cable and power cable to the hard drive. 5. Replace the cover. 6. Follow the procedures in After Working Inside - Dell Vostro 260s | Owner's Manual (Slim Tower) - Page 24
24 - Dell Vostro 260s | Owner's Manual (Slim Tower) - Page 25
8 Fan Removing The Fan 1. Follow the procedures in Before Working Inside Your Computer. 2. Remove the cover. 3. Disconnect the fan cable from the system board. 4. Remove the screws that secure the fan to the computer. 25 - Dell Vostro 260s | Owner's Manual (Slim Tower) - Page 26
5. Remove the fan from the computer. Installing The Fan 1. Place the fan on the computer. 2. Replace the screws to secure the fan to the computer. 3. Connect the fan cable to the system board. 4. Replace the cover 5. Follow the procedures in After Working Inside Your Computer. 26 - Dell Vostro 260s | Owner's Manual (Slim Tower) - Page 27
9 Power Supply Removing The Power Supply 1. Follow the procedures in Before Working Inside Your Computer. 2. Remove the cover. 3. Remove the front bezel. 4. Remove the optical drive. 5. Remove the hard drive. 6. Disconnect the power cables from the system board. 7. Un-thread the power cables from - Dell Vostro 260s | Owner's Manual (Slim Tower) - Page 28
8. Remove the screws that secure the power supply to the computer. 9. Push-in on the blue release tab beside the power supply, and slide the power supply towards the front of the computer. 28 - Dell Vostro 260s | Owner's Manual (Slim Tower) - Page 29
the power supply out of the computer. Installing The Power Supply 1. Place the power supply into the computer. 2. Slide the power supply towards the back of the computer till it snaps into place. 3. Replace the screws to secure the power supply to the computer. 4. Thread the power cables through - Dell Vostro 260s | Owner's Manual (Slim Tower) - Page 30
30 - Dell Vostro 260s | Owner's Manual (Slim Tower) - Page 31
1. Follow the procedures in Before Working Inside Your Computer. 2. Remove the cover. 3. Disconnect the power-switch cable from the system board. 10 4. Remove the hard drive LED button by pulling it out from the slot. 5. Remove the power button by pressing on the two latches and pulling it out - Dell Vostro 260s | Owner's Manual (Slim Tower) - Page 32
through the front of the computer. 2. Place the hard drive LED button into the slot by pulling it in into it's slot 3. Push the power button into it's slot and press it in till it snaps into place. 4. Connect the power-switch cable to the system board. 5. Replace the cover. 6. Follow the procedures - Dell Vostro 260s | Owner's Manual (Slim Tower) - Page 33
11 Input/Output Panel Removing The I/O Panel 1. Follow the procedures in Before Working Inside Your Computer. 2. Remove the cover. 3. Disconnect the three I/O panel and FlyWire cables from the system board. 4. Un-thread the cables from the metal clips. 33 - Dell Vostro 260s | Owner's Manual (Slim Tower) - Page 34
5. Remove the hard drive LED button by pulling it out from the slot. 6. Remove the power button by pressing on the two latches and pulling it out from the slot. 7. Remove the screw that secures the I/O panel to the computer. 34 - Dell Vostro 260s | Owner's Manual (Slim Tower) - Page 35
8. Slide the I/O panel towards the bottom of the computer and remove the I/O panel from the computer. 9. Release the securing clips using a small flat-headed screwdriver and push up the SD Card Reader. 35 - Dell Vostro 260s | Owner's Manual (Slim Tower) - Page 36
card reader into the I/O panel bracket. 2. Route the cable through the I/O panel slot and then slide the I/O panel towards the top of the computer. 3. Replace the screw that secures the I/O panel. 4. Place the hard drive LED button by pushing it into it's slot. 5. Push the power - Dell Vostro 260s | Owner's Manual (Slim Tower) - Page 37
12 Processor Removing The Processor 1. Follow the procedures in Before Working Inside Your Computer. 2. Remove the cover. 3. Disconnect the heat sink and fan assembly cable from the system board. 4. Loosen the captive-screws that secure the heat sink and fan assembly to the system board. 37 - Dell Vostro 260s | Owner's Manual (Slim Tower) - Page 38
5. Lift the heat sink and fan assembly upward, and remove it from the computer. NOTE: Lay the assembly with the fan facing downward, and with the thermal grease facing upward. 6. Press the release lever down and then move it outward to release it from the retention hook that secures it. 38 - Dell Vostro 260s | Owner's Manual (Slim Tower) - Page 39
7. Lift the processor cover. 8. Lift the processor to remove it from the socket and place it in an antistatic packaging. 39 - Dell Vostro 260s | Owner's Manual (Slim Tower) - Page 40
the heat sink and fan assembly on the processor. 5. Tighten the captive-screws that secure the heat sink and fan assembly to the system board. 6. Connect the heat sink and fan assembly cable to the system board. 7. Replace the cover. 8. Follow the procedures in After Working Inside Your Computer. 40 - Dell Vostro 260s | Owner's Manual (Slim Tower) - Page 41
13 Coin-Cell Battery Removing The Coin-Cell Battery 1. Follow the procedures in Before Working Inside Your Computer. 2. Remove the cover. 3. Press the release latch away from the battery to allow the battery to pop up from the socket. 4. Lift the coin-cell battery out of the computer. 41 - Dell Vostro 260s | Owner's Manual (Slim Tower) - Page 42
Installing The Coin-Cell Battery 1. Place the coin-cell battery in it's socket on the system board. 2. Press the coin-cell battery till it snaps into place. 3. Replace the cover. 4. Follow the procedures in After Working Inside Your Computer. 42 - Dell Vostro 260s | Owner's Manual (Slim Tower) - Page 43
1. Follow the procedures in Before Working Inside Your Computer. 2. Remove the cover. 3. Remove the front bezel. 4. Remove the memory. 5. Remove the optical drive. 6. Remove the hard drive. 7. Remove the expansion card 8. Remove the processor 9. Disconnect and un-thread all the cables connected - Dell Vostro 260s | Owner's Manual (Slim Tower) - Page 44
then slide it towards the back of the computer. 2. Replace the screws to secure the system board to the computer. 3. Thread and connect all the cables connected to the system board. 4. Replace the processor. 5. Replace the expansion card. 6. Replace the hard drive. 7. Replace the optical drive . 44 - Dell Vostro 260s | Owner's Manual (Slim Tower) - Page 45
8. Replace the front panel. 9. Replace the cover. 10. Follow the procedures in After Working Inside Your Computer. 45 - Dell Vostro 260s | Owner's Manual (Slim Tower) - Page 46
46 - Dell Vostro 260s | Owner's Manual (Slim Tower) - Page 47
Wireless Local Area Network (WLAN) Card Removing The WLAN Card 1. Follow the procedures in Before Working Inside Your Computer. 2. Remove the cover. 3. Remove the antennae. 15 4. Pull-up the release tab on the card-retention latch. 47 - Dell Vostro 260s | Owner's Manual (Slim Tower) - Page 48
5. Grasp the card by it's top corners, and ease it out of it's connector. Installing The WLAN Card 1. Insert the card into it's connector on the computer. 2. Push down the release tab on the card-retention latch. 3. Replace the antennae. 4. Replace the cover. 5. Follow the procedures in After - Dell Vostro 260s | Owner's Manual (Slim Tower) - Page 49
module capacity Type Minimum memory Maximum memory two DIMM slots 1 GB, 2 GB, or 4 GB 1333 MHz DDR3 (Non-ECC) 1 GB 8 GB Video Video Type: Integrated • Intel HD Graphics (with Intel Pentium Dual-Core CPU-GPU combo) • Intel HD Graphics 2000 (with Intel Core i3/i5 65W and 95W CPU-GPU combo) 49 - Dell Vostro 260s | Owner's Manual (Slim Tower) - Page 50
GB shared video memory (Microsoft Windows Vista and Windows 7) Integrated 5.1 high-definition audio Realtek 10/100/1000 Mbps Ethernet Intel H61 32 Mb • PCI Express 2.0 • SATA 1.0 and 2.0 • USB 2.0 • 8-in-1 media-card reader (for Vostro 260S) • 19-in-1 media card reader (optional in Vostro 260) • PCI - Dell Vostro 260s | Owner's Manual (Slim Tower) - Page 51
inch drive bays External Connectors Audio: Back panel Front Panel Network USB: Front panel Back panel Video 1.5/3.0/6.0 Gbps 3.0 Gbps 480 Mbps one full-height card up to three full-height cards Vostro 260 two two Vostro 260S one one three connectors two front-panel connectors for headphone and - Dell Vostro 260s | Owner's Manual (Slim Tower) - Page 52
a problem with the system board. white light - blinking white light indicates that the computer is reading data from, or writing data to the hard drive. Power Coin-cell battery Input voltage 3 V CR2032 lithium coin cell • 100 VAC to 127 VAC • 200 VAC to 240 VAC Input frequency Wattage: Vostro 260 - Dell Vostro 260s | Owner's Manual (Slim Tower) - Page 53
Height Width Depth Weight (Minimum) Vostro 260S: Height Width Depth Weight (Minimum) Environmental Temperature: Operating Storage Relative humidity Altitude: Operating Storage Airborne contaminant level 360.00 mm (14.17 inches) 175.00 - Dell Vostro 260s | Owner's Manual (Slim Tower) - Page 54
54 - Dell Vostro 260s | Owner's Manual (Slim Tower) - Page 55
is working by testing it with another device, such as a lamp. Computer fails to complete POST or processor failure. • Remove and then reinstall any cards. • Remove and then reinstall the graphics card, if applicable. • Ensure the power cable is connected to the motherboard and processor. 55 - Dell Vostro 260s | Owner's Manual (Slim Tower) - Page 56
LED Light Status Steady Amber Steady White Possible Cause Troubleshooting Steps Computer is in standby or this is a computer fault • error condition, including the power supply. Only the • +5VSB rail on the power supply is working correctly. • Press the power button to bring the computer - Dell Vostro 260s | Owner's Manual (Slim Tower) - Page 57
Cause • Keyboard controller test failure 4 RAM Read/Write failure 5 RTC Power Fail 6 Video BIOS Test Failure 7 Processor Failure Diagnostic Error Messages Troubleshooting Steps Memory failure COMS battery failure Video card failure Processor Failure Error Messages AUXILIARY DEVICE FAILURE - Dell Vostro 260s | Owner's Manual (Slim Tower) - Page 58
identify the ExpressCard. Reinsert the card or try another card. EXTENDED MEMORY SIZE HAS CHANGED The amount of memory recorded in nonvolatile memory (NVRAM) does not match the memory installed in the computer. Restart the computer. If the error appears again,contact Dell. THE FILE BEING COPIED IS - Dell Vostro 260s | Owner's Manual (Slim Tower) - Page 59
CONFIGURATION INFORMATION-PLEASE RUN SYSTEM SETUP PROGRAM KEYBOARD CLOCK LINE FAILURE KEYBOARD CONTROLLER FAILURE Description boot the computer from a optical drive. Then, shut down the computer, reinstall the hard drive, and restart the computer. If the problem persists, try another drive. Run the - Dell Vostro 260s | Owner's Manual (Slim Tower) - Page 60
may be faulty or improperly seated. Reinstall the memory modules and, if necessary, replace them. MEMORY ALLOCATION ERROR The software you are attempting to run is conflicting with the operating system, another program, or a utility. Shut down the computer, wait 30 seconds, and then restart it - Dell Vostro 260s | Owner's Manual (Slim Tower) - Page 61
Diagnostics. You have too many programs open. Close all windows and open the program that you want to use. Reinstall the hard drive (see your Owner's Manual at support.dell.com). If the problem persists, contact Dell. The optional ROM has failed. Contact Dell. The operating system cannot locate - Dell Vostro 260s | Owner's Manual (Slim Tower) - Page 62
CLOCK STOPPED The reserve battery that supports the system configuration settings may require recharging. Connect your computer to an electrical outlet to charge the battery. If the problem persists, contact Dell. TIME-OF-DAY NOT SET-PLEASE RUN THE SYSTEM SETUP PROGRAM The time or date stored in - Dell Vostro 260s | Owner's Manual (Slim Tower) - Page 63
in resolving this problem, please note this checkpoint and contact Dell Technical Support CMOS checksum error CPU fan failure System fan failure Hard-disk drive failure Keyboard failure No boot device available Description The computer failed to complete the boot routine three consecutive times - Dell Vostro 260s | Owner's Manual (Slim Tower) - Page 64
Description CAUTION - Hard Drive SELF MONITORING SYSTEM has reported that a parameter has exceeded its normal operating range. Dell recommends that you back up your data regularly. A parameter out of range may or may not indicate a potential hard drive problem S.M.A.R.T error, possible hard disk - Dell Vostro 260s | Owner's Manual (Slim Tower) - Page 65
on the right side of Dell Setup window. The field Diagnostics and contains lists features that define the information about each configuration of your option listed in theDell computer, including Diagnostics. In this field installed hardware, power you can view information conservation - Dell Vostro 260s | Owner's Manual (Slim Tower) - Page 66
on any selected item in the System Setup. < Esc > Exit from current view or switch the current view to the Dell Diagnostics page in the System Setup. < Up Arrow > or < Down Arrow > Select to wait until you see the Microsoft Windows desktop. Then, shut down your computer and try again. 66 - Dell Vostro 260s | Owner's Manual (Slim Tower) - Page 67
Date System Time Service Tag Asset Tag Processor Information Processor Type L2 Cache Size L3 Cache Size Memory Information Memory Installed Memory Speed Memory Technology Device Information SATA 0 SATA 1 SATA 2 SATA 3 Displays the computer model number. Displays the BIOS revision. Displays the - Dell Vostro 260s | Owner's Manual (Slim Tower) - Page 68
LAN boot ROM. Default: Disabled USB Controller Enable or disable the USB Default: Enabled controller. USB Storage Boot Function Enable or disable the option Default: Enabled to boot through a USB device Power Management Restore AC Power Loss Specifies how the Default: Power Off computer - Dell Vostro 260s | Owner's Manual (Slim Tower) - Page 69
can further specify the date and time the computer power on. Enable or disable the Default: On NumLock State light during POST. Enable or disable the Default: Enabled Keyboard Error Report to be displayed during POST. Boot Set Boot Priority Hard Disk Drives CD/DVD ROM Drives Specifies - Dell Vostro 260s | Owner's Manual (Slim Tower) - Page 70
Exit This section allows you to save, discard, and load default settings before exiting from System Setup. 70 - Dell Vostro 260s | Owner's Manual (Slim Tower) - Page 71
options. Availability varies by country and product, and some services may not be available in your area. To contact Dell for sales, technical support, or customer service issues: 1. Visit support.dell.com. 2. Select your support category. 3. If you are not a U.S. customer, select your country
-
 1
1 -
 2
2 -
 3
3 -
 4
4 -
 5
5 -
 6
6 -
 7
7 -
8
-
9
-
10
-
11
-
12
-
13
-
14
-
15
-
16
-
17
-
18
-
19
-
20
-
21
-
22
-
23
-
24
-
25
-
26
-
27
-
28
-
29
-
30
-
31
-
32
-
33
-
34
-
35
-
36
-
37
-
38
-
39
-
40
-
41
-
42
-
43
-
44
-
45
-
46
-
47
-
48
-
49
-
50
-
51
-
52
-
53
-
54
-
55
-
56
-
57
-
58
-
59
-
60
-
61
-
62
-
63
-
64
-
65
-
66
-
67
-
68
-
69
-
70
-
71
 |
 |

Dell Vostro 260/260s Slim-Tower
Owner's Manual
Regulatory Model D11D
Regulatory Type D11M001