Dell Vostro 3902 Dell Vostro 3900/3902 Owners Manual - Page 21
Removing the System Board, Installing the System Board
 |
View all Dell Vostro 3902 manuals
Add to My Manuals
Save this manual to your list of manuals |
Page 21 highlights
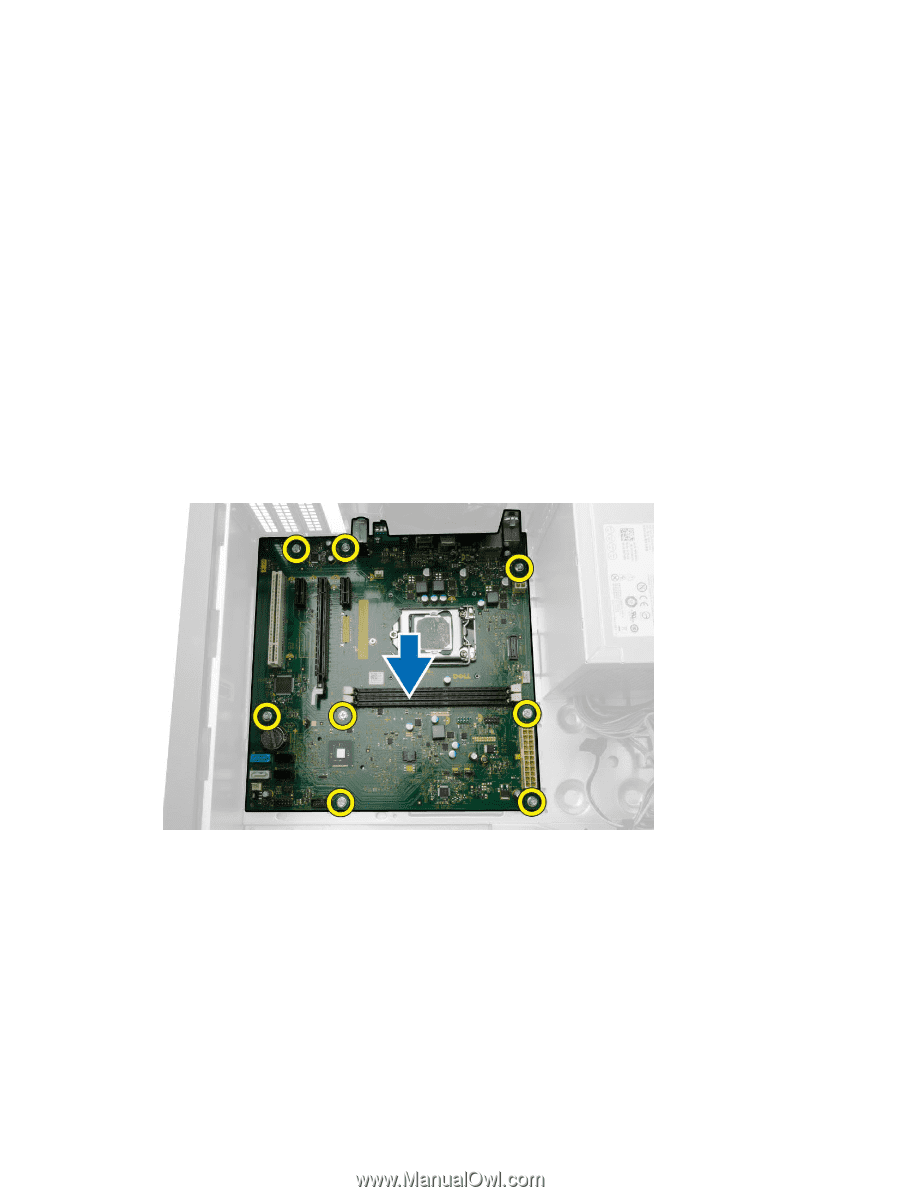
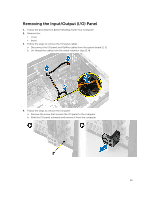
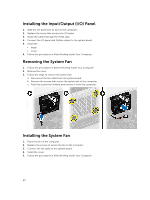
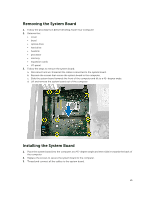
Removing the System Board 1. Follow the procedures in Before Working Inside Your Computer. 2. Remove the: • cover • bezel • optical drive • hard drive • heatsink • processor • memory • expansion cards • I/O panel 3. Follow the steps to remove the system board: a. Disconnect and un-thread all the cables connected to the system board. b. Remove the screws that secure the system board to the computer. c. Slide the system board towards the front of the computer and tilt to a 45-degree angle. d. Lift and remove the system board out of the computer. Installing the System Board 1. Place the system board into the computer at a 45-degree angle and then slide it towards the back of the computer. 2. Replace the screws to secure the system board to the computer. 3. Thread and connect all the cables to the system board. 21
-
 1
1 -
2
-
3
-
4
-
5
-
6
-
7
-
8
-
9
-
10
-
11
-
12
-
13
-
14
-
15
-
 16
16 -
 17
17 -
 18
18 -
 19
19 -
 20
20 -
 21
21 -
 22
22 -
 23
23 -
 24
24 -
 25
25 -
 26
26 -
27
-
28
-
29
-
30
-
31
-
32
-
33
-
34
-
35
-
36
-
37
-
38
 |
 |