Dell W-Series 228 W-IAP228 Instant Access Point Installation Guide - Page 7
Grounding the IAP,
 |
View all Dell W-Series 228 manuals
Add to My Manuals
Save this manual to your list of manuals |
Page 7 highlights
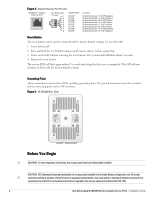
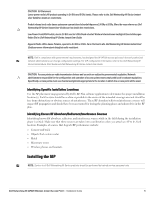
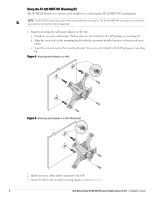
a. Align the IAP with a mounting adapter, placing the IAP so that it's mounting tabs are at an angle of approximately 30 degrees to the adapter. 4. Pushing toward the wall, rotate the IAP clockwise until it clicks into place (see Figure 7). Figure 7 Attaching the IAP to the Mounting Bracket Figure 8 Completed Installation Grounding the IAP After the W-IAP228 access point is mounted, it must be grounded before powering up. The grounding wire should be #8 AWG. 1. Peel the cover of one end of the grounding wire and place the bare grounding wire into the included copper lug, and press firmly with the crimping pliers. 2. Fasten the copper lug to the grounding hole on the IAP with the M4 x8 screw included in the IAP package, as shown in Figure 2. Dell Networking W-IAP228 Wireless Instant Access Point | Installation Guide 7
-
 1
1 -
 2
2 -
 3
3 -
 4
4 -
 5
5 -
 6
6 -
 7
7 -
 8
8 -
 9
9 -
 10
10 -
 11
11 -
 12
12 -
13
-
14
-
15
-
16
 |
 |
