Dell W4201C Owners Manual - Page 38
Dell W4201C - 42" Plasma TV Manual
 |
View all Dell W4201C manuals
Add to My Manuals
Save this manual to your list of manuals |
Page 38 highlights
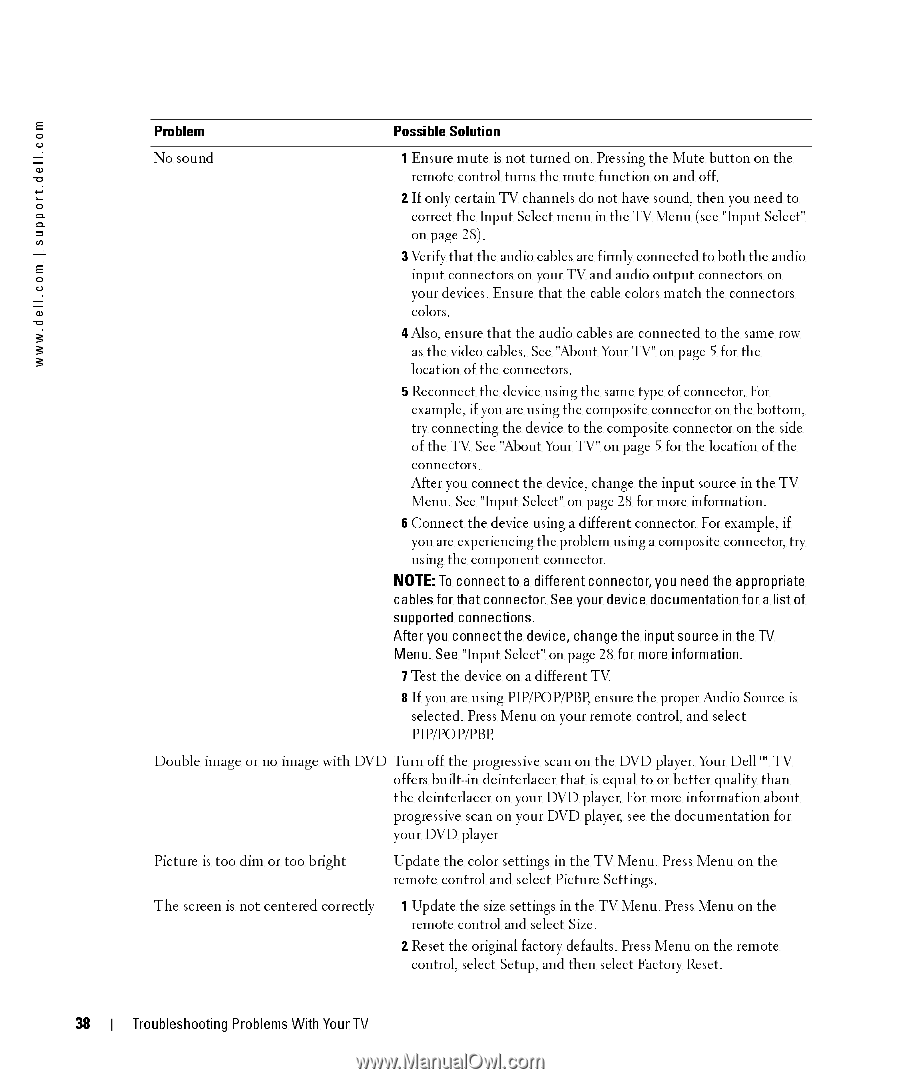
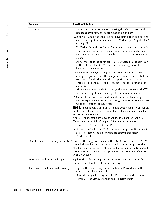
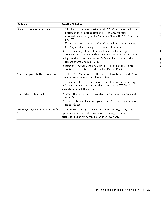
FILE LOCATION: D:\manual\Dell\W4201OM\approval-B\ch5e.fm |support.dell.com .dell.com w w w 38 Problem Possible Solution No sound 1 Ensure mute is not turned on. Pressing the Mute button on the remote control turns the mute function on and off. 2 If only certain TV channels do not have sound, then you need to correct the Input Select menu in the TV Menu (see "Input Select" on page 28). 3 Verify that the audio cables are firmly connected to both the audio input connectors on your TV and audio output connectors on your devices. Ensure that the cable colors match the connectors colors. 4 Also, ensure that the audio cables are connected to the same row as the video cables. See "About Your TV" on page 5 for the location of the connectors. 5 Reconnect the device using the same type of connector. For example, if you are using the composite connector on the bottom, try connecting the device to the composite connector on the side of the TV. See "About Your TV" on page 5 for the location of the connectors. After you connect the device, change the input source in the TV Menu. See "Input Select" on page 28 for more information. 6 Connect the device using a different connector. For example, if you are experiencing the problem using a composite connector, try using the component connector. NOTE: To connect to a different connector, you need the appropriate cables for that connector. See your device documentation for a list of supported connections. After you connect the device, change the input source in the TV Menu. See "Input Select" on page 28 for more information. 7 Test the device on a different TV. 8 If you are using PIP/POP/PBP, ensure the proper Audio Source is selected. Press Menu on your remote control, and select PIP/POP/PBP. Double image or no image with DVD Turn off the progressive scan on the DVD player. Your Dell™ TV offers built-in deinterlacer that is equal to or better quality than the deinterlacer on your DVD player. For more information about progressive scan on your DVD player, see the documentation for your DVD player Picture is too dim or too bright Update the color settings in the TV Menu. Press Menu on the remote control and select Picture Settings. The screen is not centered correctly 1 Update the size settings in the TV Menu. Press Menu on the remote control and select Size. 2 Reset the original factory defaults. Press Menu on the remote control, select Setup, and then select Factory Reset. DELL CONFIDENTIAL - PRELIMINARY 12/28/05 - FOR PROOF ONLY Troubleshooting Problems With Your TV
-
 1
1 -
2
-
3
-
4
-
5
-
6
-
7
-
8
-
9
-
10
-
11
-
12
-
13
-
14
-
15
-
16
-
17
-
18
-
19
-
20
-
21
-
22
-
23
-
24
-
25
-
26
-
27
-
28
-
29
-
30
-
31
-
32
-
 33
33 -
 34
34 -
 35
35 -
 36
36 -
 37
37 -
 38
38 -
 39
39 -
 40
40 -
 41
41 -
 42
42 -
 43
43 -
44
-
45
-
46
-
47
-
48
-
49
-
50
-
51
-
52
-
53
-
54
-
55
-
56
-
57
-
58
-
59
-
60
-
61
-
62
-
63
-
64
-
65
-
66
-
67
-
68
-
69
-
70
-
71
-
72
-
73
-
74
-
75
-
76
-
77
-
78
-
79
-
80
-
81
-
82
-
83
-
84
-
85
-
86
-
87
-
88
-
89
-
90
-
91
-
92
-
93
-
94
-
95
-
96
-
97
-
98
-
99
-
100
-
101
-
102
-
103
-
104
-
105
-
106
-
107
-
108
-
109
-
110
-
111
-
112
-
113
-
114
-
115
-
116
-
117
-
118
-
119
-
120
-
121
-
122
-
123
-
124
-
125
-
126
-
127
-
128
-
129
-
130
-
131
-
132
-
133
-
134
-
135
-
136
-
137
-
138
-
139
-
140
-
141
-
142
-
143
-
144
-
145
-
146
-
147
-
148
-
149
-
150
-
151
-
152
-
153
-
154
-
155
-
156
-
157
-
158
-
159
-
160
-
161
-
162
-
163
-
164
-
165
-
166
-
167
-
168
-
169
-
170
-
171
-
172
-
173
-
174
-
175
-
176
-
177
-
178
-
179
-
180
-
181
-
182
-
183
-
184
-
185
-
186
-
187
-
188
-
189
-
190
-
191
-
192
-
193
-
194
-
195
-
196
-
197
-
198
-
199
-
200
-
201
-
202
-
203
-
204
 |
 |