Dell XPS /Dimension Gen 4 Service Manual - Page 46
Replacing the Drive Door
 |
View all Dell XPS /Dimension Gen 4 manuals
Add to My Manuals
Save this manual to your list of manuals |
Page 46 highlights
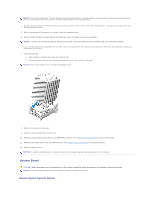
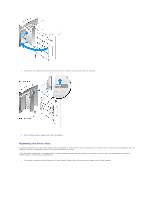
2. Unsnap the top bracket hinge and pull the top of the drive door outward, away from the computer. 3. Lift the bottom bracket hinge away from the computer. Replacing the Drive Door To prevent damage to your computer, the drive door is designed to "break away" from the computer if it is opened too far. If the drive door detaches from the computer without disassembling, perform the removal procedure in reverse. If the drive door is open and it is opened too far, instead of breaking away from the computer in one piece, the drive door may disassemble into several smaller pieces. If the drive door disassembles: 1. If necessary, reattach the door hinges to the door bracket. Ensure that the hinge tabs are away from the door bracket.
-
 1
1 -
2
-
3
-
4
-
5
-
6
-
7
-
8
-
9
-
10
-
11
-
12
-
13
-
14
-
15
-
16
-
17
-
18
-
19
-
20
-
21
-
22
-
23
-
24
-
25
-
26
-
27
-
28
-
29
-
30
-
31
-
32
-
33
-
34
-
35
-
36
-
37
-
38
-
39
-
40
-
 41
41 -
 42
42 -
 43
43 -
 44
44 -
 45
45 -
 46
46 -
 47
47 -
 48
48 -
 49
49 -
 50
50 -
 51
51 -
52
-
53
 |
 |
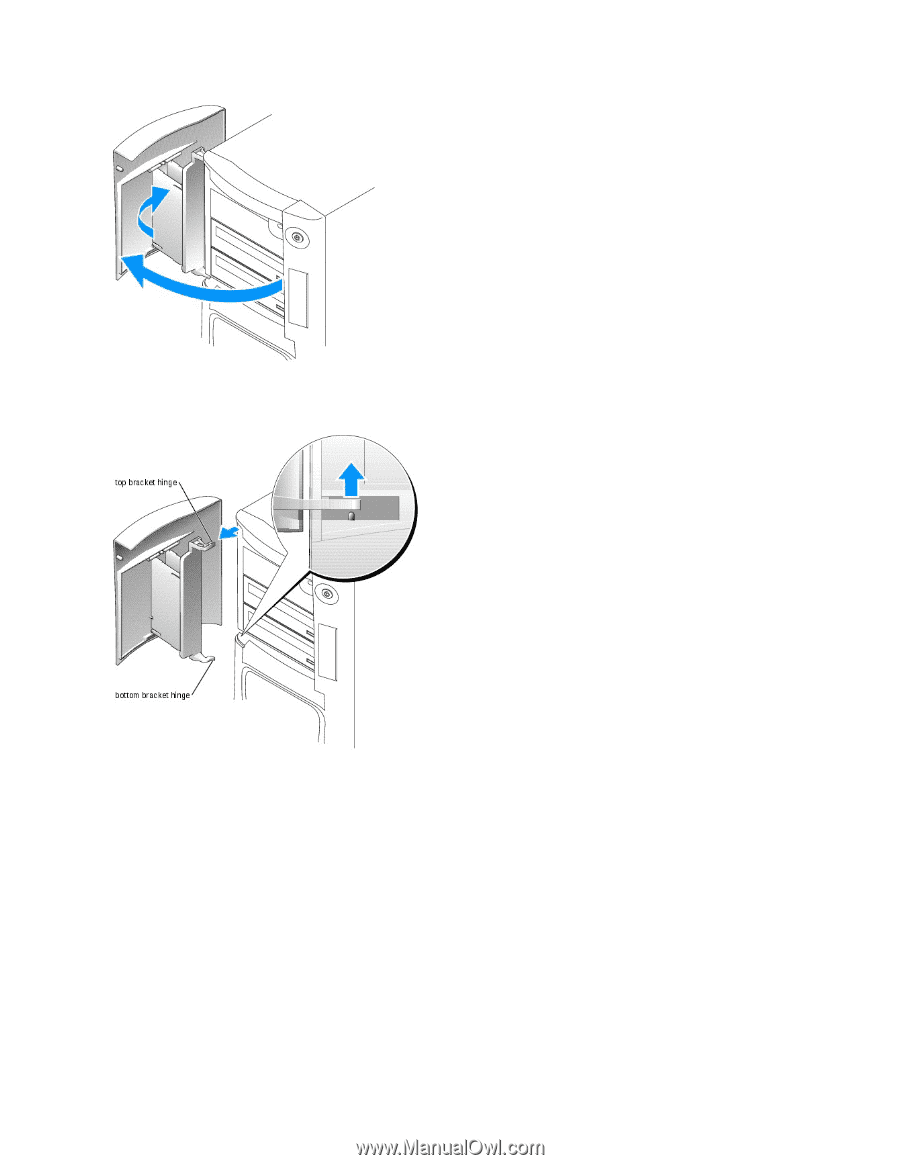
2.
Unsnap the top bracket hinge and pull the top of the drive door outward, away from the computer.
3.
Lift the bottom bracket hinge away from the computer.
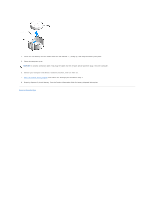
Replacing the Drive Door
To prevent damage to your computer, the drive door is designed to "break away" from the computer if it is opened too far. If the drive door detaches from the
computer without disassembling, perform the removal procedure in reverse.
If the drive door is open and it is opened too far, instead of breaking away from the computer in one piece, the drive door may disassemble into several
smaller pieces. If the drive door disassembles:
1.
If necessary, reattach the door hinges to the door bracket. Ensure that the hinge tabs are away from the door bracket.