Denon AVR-3311 Owners Manual - Page 24
Connecting a CD player, Cables used for connections, AM loop antenna assembly - receiver
 |
View all Denon AVR-3311 manuals
Add to My Manuals
Save this manual to your list of manuals |
Page 24 highlights
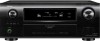
Simple version Basic version Connecting an antenna Connecting a record player n AM loop antenna assembly You can enjoy playing records. 1 Stand Cables used for connections Square hole Audio cable (sold separately) 2 Loop antenna Projecting Audio cable (White) L part (Red) R L R Turntable (MM cartridge) ENGLISH Connecting a CD player • You can enjoy CD sound. • Select the connector to use and connect the device. Cables used for connections Audio cable (sold separately) (White) L L Audio cable (Red) R R CD player "6%*0 "6%*0 065 -3 LR n Using the AM loop antenna "6%*0 065 (/% Suspending on a wall LR LR Suspend directly on a wall without assembling. Standing alone Use the procedure shown left to assemble. Nail, tack, etc. NOTE • Do not connect two FM antennas simultaneously. • Even if an external AM antenna is used, do not disconnect the AM loop antenna. • Make sure the AM loop antenna lead terminals do not touch metal parts of the panel. • If the signal has noise interference, connect the ground terminal (GND) to reduce noise. • If you are unable to receive a good broadcast signal, we recommend installing an outdoor antenna. For details, inquire at the retail store where you purchased the unit. • This unit is compatible with record players with an MM cartridge. When you connect to a record player with an MC cartridge, use a commercially available MC head amp or a step-up transformer. • When you increase the volume without connecting the record player, there may be "booming" noise from the speakers. NOTE The SIGNAL GND terminal of this unit is not a safety ground connection. Connect it to reduce noise when noise is excessive. Note that depending on the record player, connecting the ground line may have the reverse effect of increasing noise. In this case, it is not necessary to connect the ground line. in Set as Necessary Set this to change the digital input connector to which the input source is assigned. "Input Assign" (vpage 69) Advanced version Information 21
-
 1
1 -
2
-
3
-
4
-
5
-
6
-
7
-
8
-
9
-
10
-
11
-
12
-
13
-
14
-
15
-
16
-
17
-
18
-
 19
19 -
 20
20 -
 21
21 -
 22
22 -
 23
23 -
 24
24 -
 25
25 -
 26
26 -
 27
27 -
 28
28 -
 29
29 -
30
-
31
-
32
-
33
-
34
-
35
-
36
-
37
-
38
-
39
-
40
-
41
-
42
-
43
-
44
-
45
-
46
-
47
-
48
-
49
-
50
-
51
-
52
-
53
-
54
-
55
-
56
-
57
-
58
-
59
-
60
-
61
-
62
-
63
-
64
-
65
-
66
-
67
-
68
-
69
-
70
-
71
-
72
-
73
-
74
-
75
-
76
-
77
-
78
-
79
-
80
-
81
-
82
-
83
-
84
-
85
-
86
-
87
-
88
-
89
-
90
-
91
-
92
-
93
-
94
-
95
-
96
-
97
-
98
-
99
-
100
-
101
-
102
-
103
-
104
-
105
-
106
-
107
-
108
-
109
-
110
-
111
-
112
-
113
-
114
-
115
-
116
-
117
-
118
-
119
-
120
-
121
-
122
-
123
-
124
-
125
-
126
-
127
-
128
-
129
-
130
-
131
-
132
-
133
-
134
 |
 |
