Denon DCM 390 Owners Manual - Page 4

Getting Started - not loading discs

Page 4 highlights

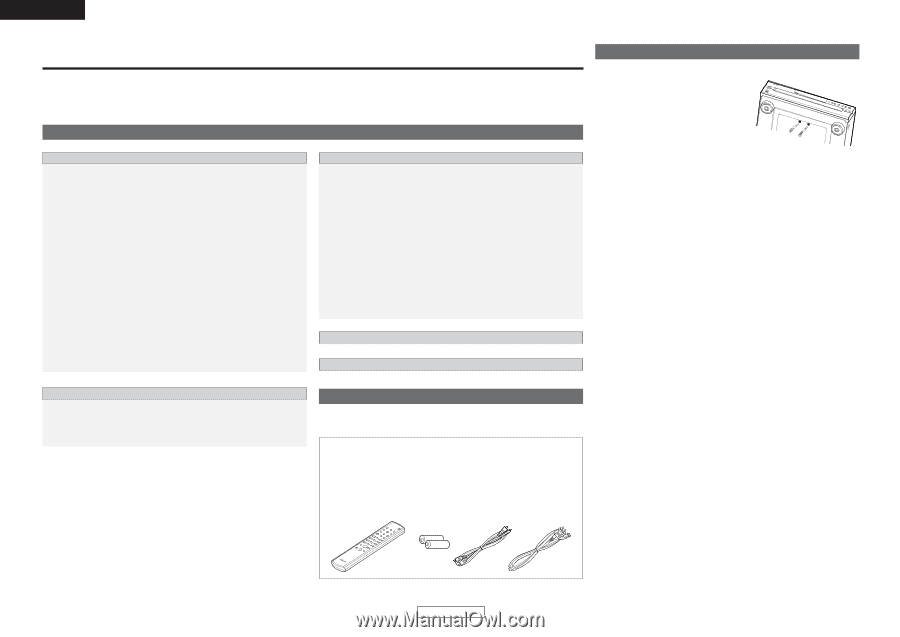
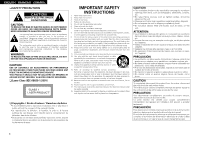
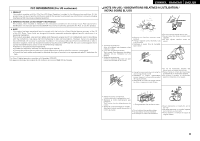
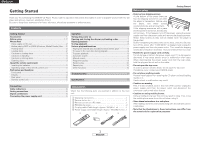
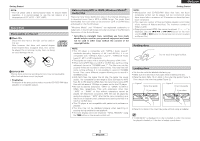
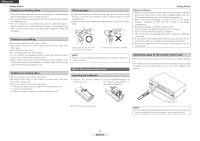
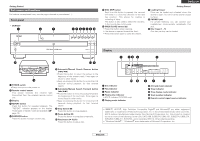
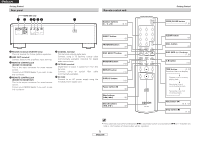
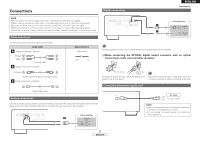
ENGLISH Getting Started Thank you for purchasing this DENON CD Player. Please read the operation instructions thoroughly in order to acquaint yourself with the CD player and achieve maximum satisfaction from it. Be sure to keep these instructions for future reference, should any questions or problems arise. Contents Getting Started Accessories 1 Before using 1, 2 About discs Discs usable on this set 2 Before playing MP3 or WMA (Windows Media® Audio) files 2 Holding discs 2 Loading discs 2 Cautions on loading discs 3 Cautions on handling 3 Cautions on storing discs 3 Cleaning discs 3 About the remote control unit Inserting the batteries 3 Operating range of the remote control unit 3 Part names and functions Front panel 4 Display 4 Rear panel 5 Remote control unit 5 Operation Turning the power on 7 Opening and closing the drawer and loading a disc 7 Starting playback 8 To stop playback 8 Various playback functions Playing the desired disc and desired track [Direct play 8 To move to the next disc during playback 8 To pause playback 8 Automatic search 8 Manual search 9 Programmed play 9 Random play 10 Repeat play 10 Other functions 10 Troubleshooting 11 Specifications 12 Connections Cable indications 6 Analog connections 6 Digital connections 6 Connecting the power supply cord 6 Accessories Check that the following parts are attached in addition to the main unit: q Operating instructions 1 w Service station list 1 e Remote control unit (RC-1033 1 r R03/AAA batteries 2 t Pin-plug cable (Cable length: Approx. 39-3/8 ft 1 m 1 y Power supply cord (Cable length: Approx. 78-47/64 ft 2 m) ...1 e r t y Getting Started Before using • Remove two shipping screws. At the bottom of the player there are two red shipping screws for use when the player is transported. Before using the player, turn these screws counterclockwise and remove them. If the shipping screws are still in place and the power is turned on, the disc tray will not open. If this happens, turn off the power, unplug the power supply cord from the power outlet and remove the shipping screws. Retain these screws as they will be needed when the player is transported. Before transporting the player, take out the discs, close the disc tray, turn off the power after "0 000 00:00" is displayed and unplug the power supply cord from the power outlet. Then install the shipping screws by turning them clockwise. Be sure to fasten them securely. • Handle the power supply cord carefully. Do not damage or deform the power supply cord. If it is damaged or deformed, it may cause electric shock or malfunction when used. When disconnecting the power supply cord from the wall outlet, hold the plug and do not pull on the cable. • Do not open the top cover. In order to prevent electric shock, do not open the top cover. If problems occur, contact your DENON dealer. • Do not place anything inside. Prevent metal objects from entering the CD player and avoid spilling liquids on it. Electric shock or malfunction may result. • Cautions on moving. First, if a disc is loaded, eject it, then turn off the power, unplug the power supply cord from the power outlet and disconnect the connection cables with other devices. • Cautions on using mobile phones. Using a mobile phone near this unit may result in noise. If so, move the mobile phone away from this unit when using it. • Store these instructions in a safe place. After reading, store this instructions along with the warranty card in a safe place. • Note that the illustrations in these instructions may differ from the actual unit for explanation purposes. 1 ENGLISH

  • 1
  • 2
  • 3
  • 4
  • 5
  • 6
  • 7
  • 8
  • 9
  • 10
  • 11
  • 12
  • 13
  • 14
  • 15
  • 16

Getting Started
1
ENGLISH
ENGLISH
Contents
Getting Started
Thank you for purchasing this DENON CD Player. Please read the operation instructions thoroughly in order to acquaint yourself with the CD
player and achieve maximum satisfaction from it.
Be sure to keep these instructions for future reference, should any questions or problems arise.
Accessories
······················································································1
Before using
················································································1, 2
About discs
Discs usable on this set·································································2
Before playing MP3 or WMA (Windows Media® Audio) files ······2
Holding discs··················································································2
Loading discs ·················································································2
Cautions on loading discs ······························································3
Cautions on handling······································································3
Cautions on storing discs·······························································3
Cleaning discs ················································································3
About the remote control unit
Inserting the batteries····································································3
Operating range of the remote control unit···································3
Part names and functions
Front panel ·····················································································4
Display····························································································4
Rear panel ······················································································5
Remote control unit ·······································································5
Getting Started
Troubleshooting
············································································
11
Specifications
················································································
12
Cable indications
············································································6
Analog connections
········································································6
Digital connections
·········································································6
Connecting the power supply cord
··············································6
Connections
Turning the power on
·····································································7
Opening and closing the drawer and loading a disc
··················7
Starting playback
············································································8
To stop playback
·············································································8
Various playback functions
Playing the desired disc and desired track [Direct play] ················8
To move to the next disc during playback ·····································8
To pause playback··········································································8
Automatic search ···········································································8
Manual search················································································9
Programmed play ···········································································9
Random play ················································································10
Repeat play ··················································································10
Other functions ············································································10
Operation
Accessories
Check that the following parts are attached in addition to the main
unit:
q
Operating instructions
.............................................................
1
w
Service station list
....................................................................
1
e
Remote control unit (RC-1033)
................................................
1
r
R03/AAA batteries
...................................................................
2
t
Pin-plug cable (Cable length: Approx. 39-3/8 ft 1 m)
...............
1
y
Power supply cord (Cable length: Approx. 78-47/64 ft 2 m) ...1
r
t
y
e
Before using
• Remove two shipping screws.
At the bottom of the player there are
two red shipping screws for use when
the player is transported.
Before using
the
player,
turn
these
screws
counterclockwise and remove them.
If the shipping screws are still in place
and the power is turned on, the disc tray
will not open.
If this happens, turn off the power, unplug the power
supply cord from the power outlet and remove the shipping screws.
Retain these screws as they will be needed when the player is
transported.
Before transporting the player, take out the discs, close the disc tray,
turn off the power after “0 000 00:00” is displayed and unplug the
power supply cord from the power outlet.
Then install the shipping
screws by turning them clockwise.
Be sure to fasten them securely.
• Handle the power supply cord carefully.
Do not damage or deform the power supply cord. If it is damaged or
deformed, it may cause electric shock or malfunction when used.
When disconnecting the power supply cord from the wall outlet,
hold the plug and do not pull on the cable.
• Do not open the top cover.
In order to prevent electric shock, do not open the top cover.
If problems occur, contact your DENON dealer.
• Do not place anything inside.
Prevent metal objects from entering the CD player and avoid spilling
liquids on it.
Electric shock or malfunction may result.
• Cautions on moving.
First, if a disc is loaded, eject it, then turn off the power, unplug the
power supply cord from the power outlet and disconnect the
connection cables with other devices.
• Cautions on using mobile phones.
Using a mobile phone near this unit may result in noise. If so, move
the mobile phone away from this unit when using it.
• Store these instructions in a safe place.
After reading, store this instructions along with the warranty card in
a safe place.
• Note that the illustrations in these instructions may differ from
the actual unit for explanation purposes.