Denon DND4500 Operating Instructions - Page 9
English - dn d4500
 |
UPC - 081757506458
View all Denon DND4500 manuals
Add to My Manuals
Save this manual to your list of manuals |
Page 9 highlights
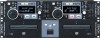
ENGLISH !9 FLIP/B TRIM button • Push this button to switch between the loop mode/hot start mode and stutter mode. • After setting the B point, the B TRIM MODE can be selected. @0 A1, A2 buttons • Push these buttons to set the start point for loop playback (point A-1 or A-2). • Push these buttons to use the stutter and hot start functions. @1 B button • Push this button to set the end point for loop playback (point B). @2 EXIT/RELOOP button • When this button is pushed during a seamless loop, the track resumes back to normal play from the B point. (EXIT) When pushed again, the playback jumps back into your A-B seamless loop. (RELOOP) @3 TITLE button • CD TEXT: When there is CD text data, the CD text data is displayed automatically or when the button is pressed. If no TEXT is available, the display will indicate "No TEXT". • MP3: When an MP3 file has ID-3 tag data, the title, artist name and album name can be selected and displayed each time the button is pressed. @4 MEMO, PRESET button • MEMO: The memo mode starts when this button is pushed once in the CUE mode. • PRESET: When this button is pushed for more than 1 sec, the PRESET mode starts. (3) DN-D4500 Rear panel @5 Analog output jacks 1, 2 (ANALOG OUT 1, 2) • These are unbalanced output jacks. The audio signals from the both players are output from these jacks. @6 Digital output jacks 1, 2 (DIGITAL OUT 1, 2) • Digital data is available from this jack. • Use 75 Ω/ohms pin cord for connection. • We recommend you use braided wire type shielded cable. NOTE: The playback level after analog conversion is set to -6dB bellow the usual level to avoid digital distortion. @7 Fader input jacks 1, 2 (FADER 1, 2) • Use this when your mixer has Fader Start function with 3.5 mm stereo mini cord. @8 Remote control connector (REMOTE) • Connect the supplied 8pin din cable to the RC-D45 control unit. CAUTION: To completely disconnect this product from the mains, disconnect the plug from the wall socket outlet. The mains plug is used to completely interrupt the power supply to the unit and must be within easy access by the user. (4) RC-D45 Rear panel @9 Control connector • Connect the opposite side of supplied 8pin din cable to the DN-D4500 (main unit). NOTE: • Memo's can not be set for MP3 files. (5) Display !0 w i t r uq e yo q Track, minute, second and frame displays • These displays indicate current position information. w Loop mode indicators • DN-D4500 has Loop mode indicators consist of two sets of A (A1, A2), B and two arrows. A and B marks indicate A and B points are set. • Two arrows indicate loop setting mode as follows. Example: A1 B A1 B Both arrows on: Seamless Loop mode A1 B , A1 B Both arrows flashing: Seamless Loop Playing A1 B , A1 B Left arrow on, right flashing: Exit play from Seamless Loop e Time mode indicators • When the TIME/TOTAL button is pushed, the Time mode indicator switches as follows: ELAPSED: Track's elapsed time is displayed. REMAIN: Track's remaining time is displayed. T. + ELAPSED: The total elapsed time of disc or programmed track is displayed. T. + REMAIN: The total remaining time of disc or programmed track is displayed. r MP3 file search mode indicator FILE: FILE indicator appears in display, when in the FILE name search mode. FOLDER: FOLDER indicator appears in display, when in the FILE & FOLDER name search mode. TITLE: TITLE indicator appears in display, when in the TITLE name search mode. ARTIST: ARTIST indicator appears in display, when in the ARTIST name search mode. t Character display • This displays various operational information, text message, etc. y Play mode indicators • When SINGLE indicator lights up, playback will finish at end of current track. • When CONT. indicator lights up, playback continues to the end of the disc. u MEMO indicator • MEMO sign appears in display when there is a memory setting for the currently playing track or the track at which the standby mode is currently set. 9
-
 1
1 -
2
-
3
-
 4
4 -
 5
5 -
 6
6 -
 7
7 -
 8
8 -
 9
9 -
 10
10 -
 11
11 -
 12
12 -
 13
13 -
 14
14 -
15
-
16
-
17
 |
 |
