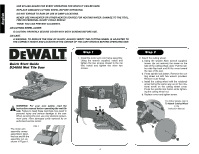
Dewalt D24000 Instruction Manual - Page 7
English, Step 3, Step 4, Steps 5, 6, 7, 8 - cart
 |
View all Dewalt D24000 manuals
Add to My Manuals
Save this manual to your list of manuals |
Page 7 highlights
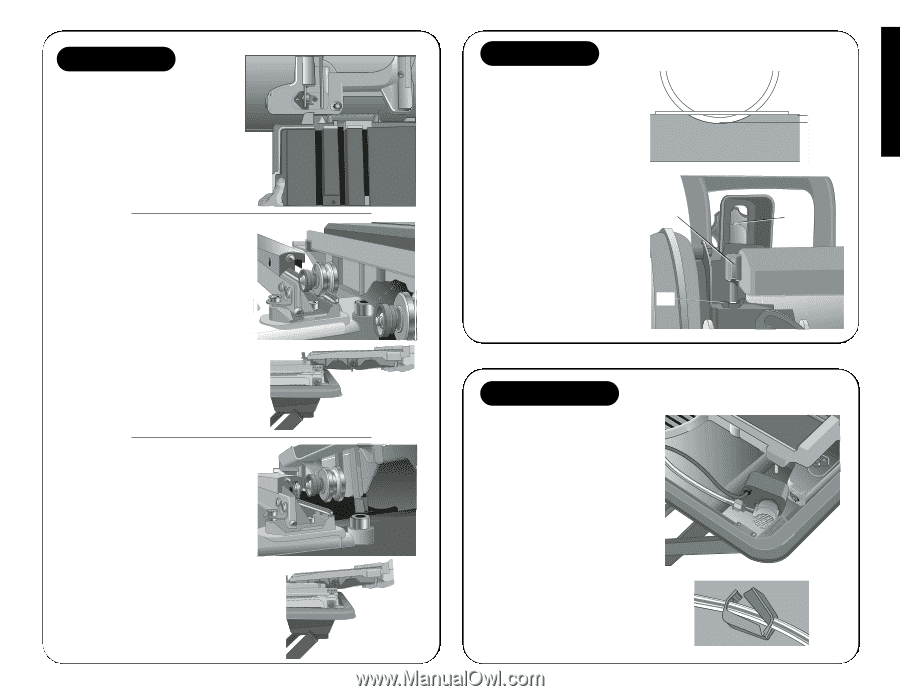
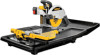
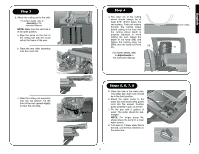
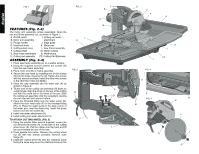
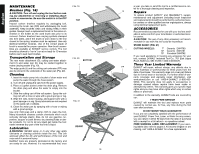
Step 3 3. Attach the cutting cart to the rails. For further details, refer to Assembly in the Instruction Manual. NOTE: Make sure the cart lock is in full open position. a. Align the arrow on the rear of the cutting cart with the round rail on the frame of the saw. b. Place the rear roller assembly onto the round rail. c. Slide the cutting cart assembly onto the rail system. Tilt the front of the cart upward slightly to clear the cart stop. Step 4 4. The outer rim of the cutting wheel should always be at least 3/16" (5mm) below the cart surface. Push cart entirely through the cutting wheel before cutting to be sure that the cutting wheel depth is properly adjusted to avoid cutting the cart. Adjust the depth of cut knob (BB) and tighten the locking wing nut (MM), then the head lock knob BB (D). For further details, refer to Adjustments in the Instruction Manual. MM Steps 5, 6, 7, 8 5. Place the saw in the water pan. The water pan drain hole should be in the front position. 6. Attach the water pump to the water line and insert pump power cord into the socket. Position pump properly in pan, as shown. 7. Fill the pan with 5 gallons of water. The pump should be submerged. NOTE: For longer pump life, always place the pump in a clean water source. 8. Turn saw on. If lower water flow is desired, use the flow restrictor on the water line. 5 3/16" (5MM) D English
-
 1
1 -
 2
2 -
 3
3 -
 4
4 -
 5
5 -
 6
6 -
 7
7 -
 8
8 -
 9
9 -
 10
10 -
 11
11 -
 12
12 -
13
-
14
-
15
-
16
-
17
-
18
-
19
-
20
-
21
-
22
-
23
-
24
-
25
-
26
-
27
-
28
-
29
-
30
-
31
-
32
-
33
-
34
-
35
-
36
-
37
-
38
-
39
-
40
-
41
-
42
 |
 |