Dewalt DWS7085 Instruction Manual - Page 5
Use of Miter Saw Worklight System, MAINTENANCE - manual
 |
View all Dewalt DWS7085 manuals
Add to My Manuals
Save this manual to your list of manuals |
Page 5 highlights
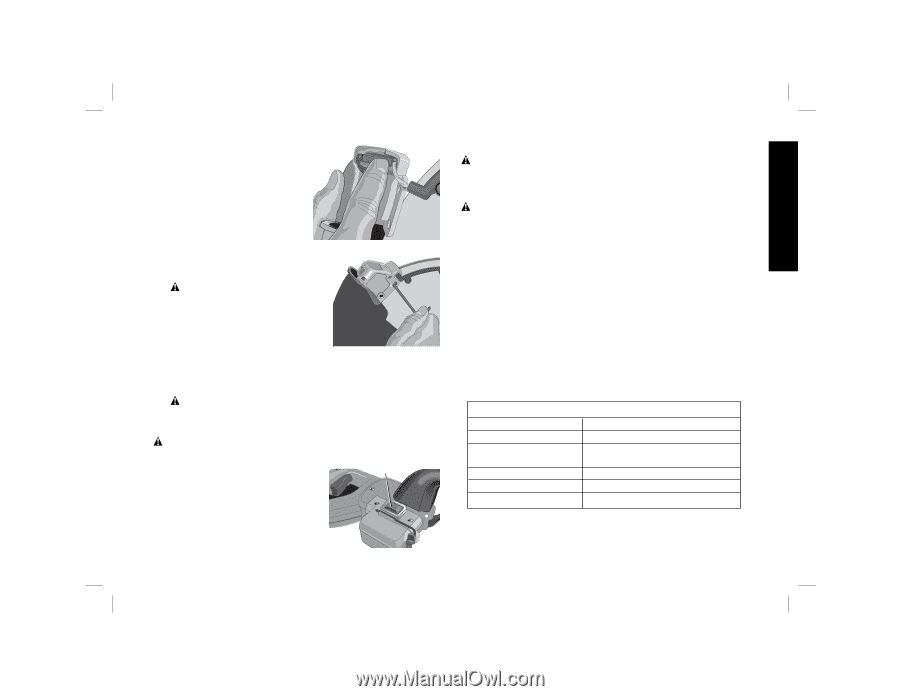
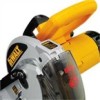
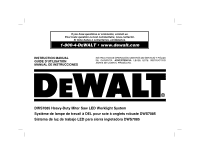
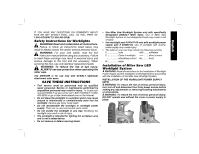
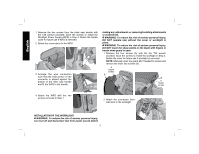
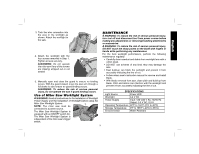
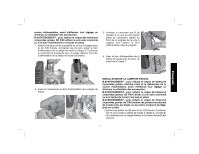
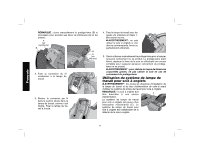
English 3. Tuck the wire connection into the area in the worklight as shown. Attach the worklight to the saw. 4. Attach the worklight with the four screws removed in Step 1. Tighten screws securely. WARNING: Do not operate the miter saw if any of the screws are missing, stripped out or not seated. 5. Manually open and close the guard to ensure no binding occurs. With the guard closed, move the saw arm through a full stroke to also ensure no guard binding occurs. WARNING: To reduce the risk of serious personal injury, Do not operate the saw if guard binding occurs. Use of Miter Saw Worklight System WARNING: Read all instructions for the Installation of Worklight Power Supply and the Installation of Worklight before using the Miter Saw Worklight System. C NOTE: The miter saw must be connected to a power source. The Miter Saw Worklight System is equipped with an ON/OFF switch (C). The Miter Saw Worklight System is independent of the miter saw's trigger switch. MAINTENANCE WARNING: To reduce the risk of serious personal injury, turn tool off and disconnect tool from power source before making any adjustments or removing/installing attachments or accessories. WARNING: To reduce the risk of serious personal injury, DO NOT touch the sharp points on the blade with fingers or hands while performing any maintenance. For the best worklight performance, perform the following maintenance regularly. • Carefully clean sawdust and debris from worklight lens with a cotton swab. • DO NOT use solvents of any kind, they may damage the lens. • Dust build-up can block the worklight and prevent it from accurately indicating the line of cut. • Follow miters saw's instruction manual to remove and install blade. • With blade removed from saw, clean pitch and build-up from blade. Pitch and debris can interfere with the worklight and prevent it from accurately indicating the line of cut. SPECIFICATIONS Light Source Power LED Worklight 3.3 V DC Power Supply Input: 120-240 V AC; 50/60 Hz Output: 3.3 V DC, 0.9 A Operating Temperature 32°F to 104°F (0°C to 40°C) Storage Temperature 0°F to 185°F (-40°C to 85°C) Environmental Water Resistant 3
-
 1
1 -
 2
2 -
 3
3 -
 4
4 -
 5
5 -
 6
6 -
 7
7 -
 8
8 -
 9
9 -
 10
10 -
 11
11 -
12
-
13
-
14
-
15
-
16
-
17
-
18
-
19
-
20
 |
 |