Dymo LabelWriter 4XL Label Printer User Guide 1 - Page 11
Ordering Labels, correctly. See
 |
View all Dymo LabelWriter 4XL Label Printer manuals
Add to My Manuals
Save this manual to your list of manuals |
Page 11 highlights
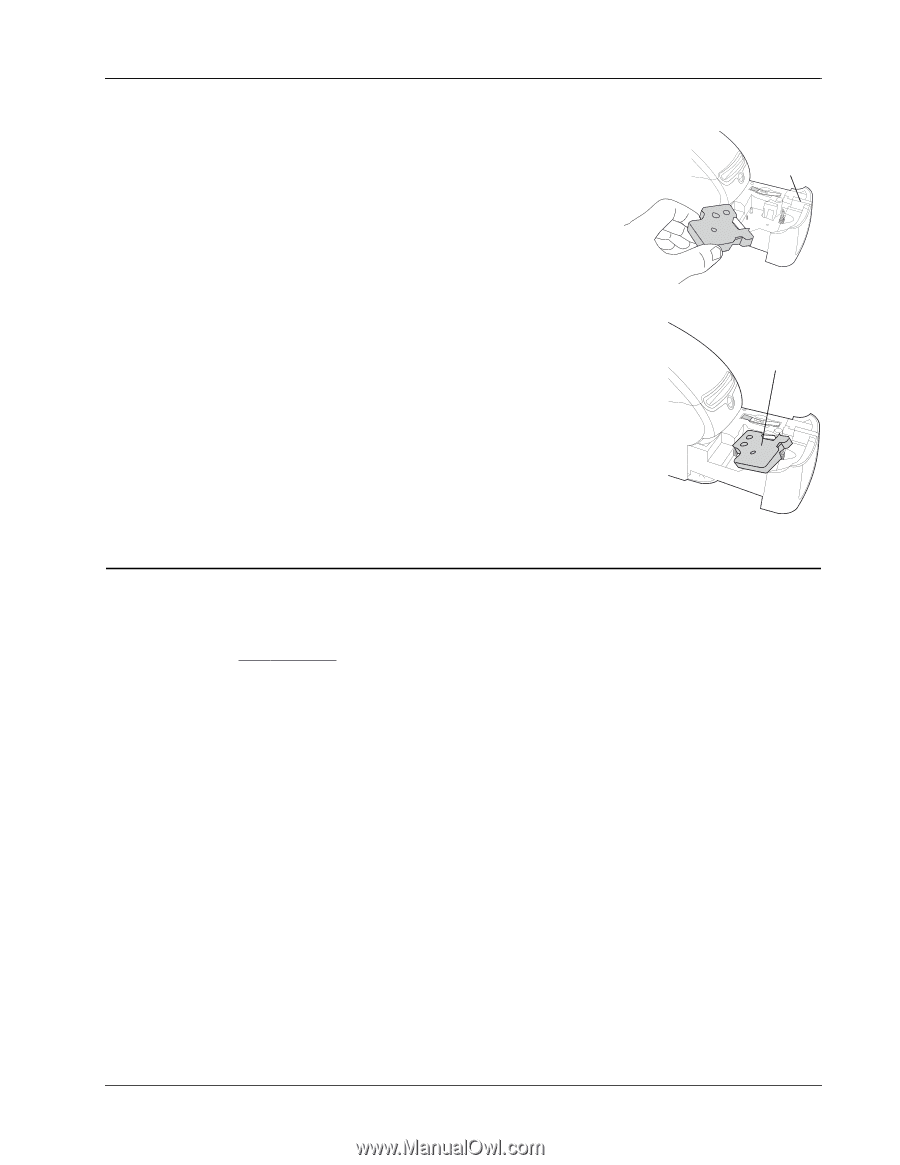
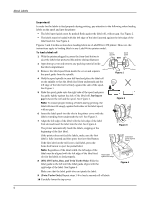
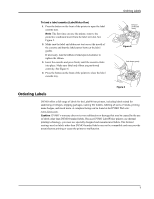
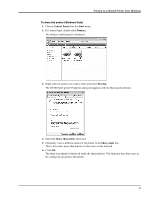
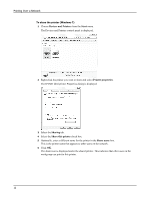
Ordering Labels To load a label cassette (LabelWriter Duo) 1 Press the button on the front of the printer to open the label cassette tray. Note The first time you use the printer, remove the protective cardboard insert from the label exit slot. See Figure 5. 2 Make sure the label and ribbon are taut across the mouth of the cassette and that the label passes between the label guides. If necessary, turn the ribbon rewind spool clockwise to tighten the ribbon. 3 Insert the cassette and press firmly until the cassette clicks into place. Make sure label and ribbon are positioned correctly. See Figure 6. 4 Press the button on the front of the printer to close the label cassette tray. Remove cardboard insert Figure 5 Push down gently Ordering Labels Figure 6 DYMO offers a full range of labels for the LabelWriter printers, including labels suited for addressing envelopes, shipping packages, naming file folders, labeling all sorts of media, printing name badges, and much more. A complete listing can be found at the DYMO Web site: www.dymo.com. Caution DYMO's warranty does not cover malfunction or damage that may be caused by the use of labels other than DYMO-branded labels. Because DYMO LabelWriter printers use thermal printing technology, you must use specially designed and manufactured labels. The thermal coatings used on labels other than DYMO-branded labels may not be compatible and may provide unsatisfactory printing or cause the printer to malfunction. 7
-
 1
1 -
2
-
3
-
4
-
5
-
 6
6 -
 7
7 -
 8
8 -
 9
9 -
 10
10 -
 11
11 -
 12
12 -
 13
13 -
 14
14 -
 15
15 -
 16
16 -
17
-
18
-
19
-
20
-
21
-
22
-
23
-
24
-
25
-
26
-
27
-
28
-
29
 |
 |