Dynex DX-32L100A13 User Manual (English)
Dynex DX-32L100A13 Manual
 |
View all Dynex DX-32L100A13 manuals
Add to My Manuals
Save this manual to your list of manuals |
Dynex DX-32L100A13 manual content summary:
- Dynex DX-32L100A13 | User Manual (English) - Page 1
32" LCD TV DX-32L100A13 USER GUIDE - Dynex DX-32L100A13 | User Manual (English) - Page 2
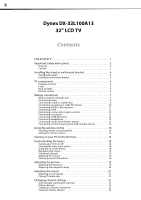
ii Dynex DX-32L100A13 32" LCD TV Contents CHILD SAFETY 1 Important Safety Instructions 2 Warning 2 Caution 3 Installing the stand or wall-mount bracket 4 Installing the stand 4 Installing a wall-mount bracket 4 TV components 4 Package contents 4 Front 5 Back and Side 5 Remote control 6 - Dynex DX-32L100A13 | User Manual (English) - Page 3
to USB mode 31 Browsing photos 31 Viewing your favorite photos 32 Viewing photos in a slideshow 32 Customizing slideshow settings 33 Maintaining 33 Cleaning 33 Servicing 34 Troubleshooting 34 Video and audio 34 Remote control 35 General 35 Specifications 36 Programming universal remote - Dynex DX-32L100A13 | User Manual (English) - Page 4
iv - Dynex DX-32L100A13 | User Manual (English) - Page 5
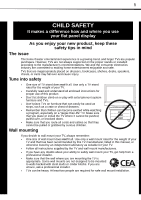
One size of wall mount does not fit all. Use only a wall mount rated for the weight of your TV and that has been recommended by this TV manufacturer, listed in this manual, or otherwise listed by an independent laboratory as suitable for your TV. • Follow all instructions supplied by the TV and wall - Dynex DX-32L100A13 | User Manual (English) - Page 6
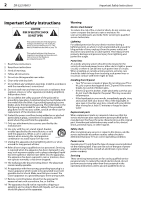
outlet. 17 Remote control batteries should not Power source Operate your TV only from the type of power source indicated on the marking label. If you are not sure of the type of power supplied to your home, consult an electrician or your local power company. Servicing These servicing instructions - Dynex DX-32L100A13 | User Manual (English) - Page 7
Important Safety Instructions DX-32L100A13 3 Caution Damage requiring service Unplug this TV from the power outlet and refer servicing to qualified service personnel under the following conditions: • When the power supply cord or plug is damaged or frayed. • If liquid has been spilled or objects - Dynex DX-32L100A13 | User Manual (English) - Page 8
• Remote control and batteries (2 AAA) • Stand with screws • Quick Setup Guide • Important Information Installing a wall-mount bracket Warning This apparatus is intended to be supported by a UL Listed wall mount bracket. To attach your TV to a wall-mount bracket: 1 Carefully place your TV screen - Dynex DX-32L100A13 | User Manual (English) - Page 9
TV components Front DX-32L100A13 5 Back and Side # Item 1 MENU 2 INPUT 3 VOL+/VOL- 4 CH /CH 5 (Power) 6 Remote sensor 7 Power indicator Description Press to open the on-screen menu. For more information, see "Navigating the menus" on page 19. Press to open the INPUT SOURCE - Dynex DX-32L100A13 | User Manual (English) - Page 10
6 DX-32L100A13 TV components Remote control # Button 9 ZOOM 10 PICTURE 11 SLEEP 12 AUDIO 13 (Power) 14 RECALL 15 GUIDE 16 17 EXIT 18 CH+ / CH- settings" on page 21. Press to turn your TV on or off (Standby mode). When your TV is off, power still flows into it. To disconnect power, unplug the power - Dynex DX-32L100A13 | User Manual (English) - Page 11
Making connections DX-32L100A13 7 Making connections What connection should I use? Your TV has several connection types for connecting devices to your TV. For the best video quality, you should connect a device to the best available connection. Use the following tables to identify cables: - Dynex DX-32L100A13 | User Manual (English) - Page 12
8 DX-32L100A13 Making connections Connecting power To connect the power: • Plug the AC power cord into an AC power outlet. Notes • • • Your TV should only be operated from the power source indicated on the label. Always unplug the AC power cord from the power outlet when you will not be using - Dynex DX-32L100A13 | User Manual (English) - Page 13
Making connections DX-32L100A13 9 Using DVI (same as HDMI but requires an audio connection) Note A DVI device must be connected to the HDMI1 jack. If you connect a DVI device to another HDMI jack, you will not hear any audio. To connect a cable or satellite box using DVI: 1 Turn off your TV and - Dynex DX-32L100A13 | User Manual (English) - Page 14
10 DX-32L100A13 Making connections Using composite video (good) To connect a cable or satellite box using composite video: 1 Turn off your TV and all connected equipment. 2 Connect the incoming cable from the cable wall jack to the cable-in jack on the cable or satellite box. 3 Connect a composite - Dynex DX-32L100A13 | User Manual (English) - Page 15
Making connections DX-32L100A13 11 Connecting a DVD or Blu-ray player Using HDMI To connect a DVD or Blu-ray player using HDMI: 1 Make sure that your TV's power cord is unplugged and the DVD or Blu-ray player is turned off. 2 Connect an HDMI cable (not provided) to one of the HDMI jacks on the - Dynex DX-32L100A13 | User Manual (English) - Page 16
12 DX-32L100A13 Making connections Using composite video (good) To connect a DVD or Blu-ray player using composite video: 1 Make sure that your TV's power cord is unplugged and the composite video device is turned off. 2 Connect a composite cable (provided) to the VIDEO and L and R (audio in) - Dynex DX-32L100A13 | User Manual (English) - Page 17
DX-32L100A13 13 Connecting a camcorder or game console To connect a camcorder or game console: 1 Make sure that your TV's power cord is unplugged and the camcorder or game console is turned off. 2 Connect a composite cable (provided) to the VIDEO and L and R (audio in) jacks on the side of your TV - Dynex DX-32L100A13 | User Manual (English) - Page 18
14 DX-32L100A13 Making connections Using HDMI To connect a computer using HDMI: 1 Make sure that your TV's power cord is unplugged and the computer is turned off. 2 Connect an HDMI cable (not provided) to one of the HDMI jacks on the side of your TV and to the HDMI OUT jack on the computer. - Dynex DX-32L100A13 | User Manual (English) - Page 19
Making connections DX-32L100A13 15 Connecting headphones The TV speakers are muted when headphones are attached. Warning Loud noise can damage your hearing. When using headphones, use the lowest volume setting on your headphones that still lets you hear the sound. To connect headphones: • Connect - Dynex DX-32L100A13 | User Manual (English) - Page 20
16 DX-32L100A13 Using the remote control Connecting a home theater system with multiple devices Notes We recommend that you connect the AV receiver's HDMI OUT jack to one of your TV's HDMI IN jacks. Then, connect the AV receiver's DIGITAL AUDIO INPUT jack to your TV's DIGITAL OUTPUT jack to route - Dynex DX-32L100A13 | User Manual (English) - Page 21
TV for the first time DX-32L100A13 17 Turning on your TV for the first time The first time you turn on your TV, the Setup Wizard opens. The Setup Wizard guides you through setting up basic settings including the menu language, date and time, picture mode, and TV signal source. To set up your TV - Dynex DX-32L100A13 | User Manual (English) - Page 22
Digital Audio/SPDIF Audio Language MTS/SAP Reset Audio Settings Audio Settings Channels USB Standard 50 50 50 PCM English Mono Move Select MENU Back EXIT Exit Settings menu (TV mode) Picture Parental Controls Time Closed Caption Menu Settings Computer Settings Input Label System Info Power - Dynex DX-32L100A13 | User Manual (English) - Page 23
the picture DX-32L100A13 19 picture. Your TV uses less energy when you reduce this backlight. • Custom-(customized picture) Lets you manually customize the picture settings such as brightness, contrast, and sharpness. Note You can also press PICTURE on your remote control to select the picture - Dynex DX-32L100A13 | User Manual (English) - Page 24
Press or to highlight Settings, then press . The Settings menu opens. Picture Parental Controls Time Closed Caption Menu Settings Computer Settings Input Label System Info Power on in Vivid Mode Reset Default Move Select Set various TV options Audio Settings Channels USB MENU Back EXIT Exit - Dynex DX-32L100A13 | User Manual (English) - Page 25
MTS/SAP on the remote control one or more times to select the audio mode. • Reset Audio Settings- Resets all audio settings to factory defaults. 4 Press MENU to return to the previous menu, or press EXIT to close the menu. Playing TV audio only You can turn off the picture on your TV and listen to - Dynex DX-32L100A13 | User Manual (English) - Page 26
opens. Picture Audio Settings Channels USB Choose Your TV Source Antenna Cable Cable/Satellite Box RF CH 0 0 Digital Channels TV signal, select Antenna. • If your cable is connected directly to the TV (using no tuner box), select Cable. • If your cable is connected to your TV through a tuner - Dynex DX-32L100A13 | User Manual (English) - Page 27
Color Tint Sharpness Backlight Advanced Video Reset Picture Settings Move Select Audio Settings Channels USB Energy Savings 65 47 65 0 55 26 MENU Back EXIT Exit Viewing a favorite channel To view a favorite channel: 1 Press FAVORITE on your remote control. The Favorites channel list opens - Dynex DX-32L100A13 | User Manual (English) - Page 28
Info Power on in Vivid Mode Reset Default Move Select Set TV parental controls Audio Settings Channels USB MENU Back EXIT Exit 3 Press ENTER. The Enter Password screen opens. Enter Password Picture Audio Settings Channels USB ____ Move Select MENU Back Enter your 4-digit password - Dynex DX-32L100A13 | User Manual (English) - Page 29
Info Power on in Vivid Mode Reset Default Move Select Set TV parental controls Audio Settings Channels USB MENU Back EXIT Exit 3 Press ENTER. The Enter Password screen opens. Enter Password Picture Audio Settings Channels USB ____ Move Select MENU Back Enter your 4-digit password - Dynex DX-32L100A13 | User Manual (English) - Page 30
Info Power on in Vivid Mode Reset Default Move Select Set TV parental controls Audio Settings Channels USB MENU Back EXIT Exit 3 Press ENTER. The Enter Password screen opens. Enter Password Picture Audio Settings Channels USB ____ Move Select MENU Back Enter your 4-digit password - Dynex DX-32L100A13 | User Manual (English) - Page 31
DX-32L100A13 27 4 Press the number buttons to enter the four-digit password. The Parental Controls menu opens. Picture Audio Button Lock Block Unrated TV System Lock US Canada Change Password RRT Setting Reset RRT Settings No Channels USB CCD on the remote control to turn closed captioning on or - Dynex DX-32L100A13 | User Manual (English) - Page 32
Press or to highlight Settings, then press . The Settings menu opens. Picture Parental Controls Time Closed Caption Menu Settings Computer Settings Input Label System Info Power on in Vivid Mode Reset Default Move Select Set various TV options Audio Settings Channels USB MENU Back EXIT Exit - Dynex DX-32L100A13 | User Manual (English) - Page 33
Press or to highlight Settings, then press . The Settings menu opens. Picture Parental Controls Time Closed Caption Menu Settings Computer Settings Input Label System Info Power on in Vivid Mode Reset Default Move Select Set various TV options Audio Settings Channels USB MENU Back EXIT Exit - Dynex DX-32L100A13 | User Manual (English) - Page 34
Press or to highlight Settings, then press . The Settings menu opens. Picture Parental Controls Time Closed Caption Menu Settings Computer Settings Input Label System Info Power on in Vivid Mode Reset Default Move Select Set various TV options Audio Settings Channels USB MENU Back EXIT Exit - Dynex DX-32L100A13 | User Manual (English) - Page 35
to access the menu. Photos is highlighted. Picture Parental Controls Time Closed Caption Menu Settings Computer Settings Input Label System Info Power on in Vivid Mode Reset Default Move Select Set various TV options Audio Settings Channels USB MENU Back EXIT Exit 3 Press or to highlight - Dynex DX-32L100A13 | User Manual (English) - Page 36
32 DX-32L100A13 Using a USB flash drive When a photo is displayed full screen, a control bar appears at the bottom of the photo. The file name, picture resolution, size, and date are displayed on the bottom of the control bar. If you do not press a button within 10 seconds, the control bar - Dynex DX-32L100A13 | User Manual (English) - Page 37
Maintaining DX-32L100A13 33 When a photo is displayed full screen, a control bar appears at the bottom of the photo. The file name, picture resolution, size, and date are displayed on the bottom of the control bar. If you do not press a button within 10 seconds, the control bar closes. Press any - Dynex DX-32L100A13 | User Manual (English) - Page 38
repair your TV yourself. There are no user-serviceable parts inside. Turn off your TV, unplug the power cord, then contact an authorized service center. Troubleshooting Warning Do not try to repair your TV yourself. Contact authorized service personnel. Video and audio Problem Solution Picture - Dynex DX-32L100A13 | User Manual (English) - Page 39
the User Guide that accompanied your universal remote control and contact the manufacturer if problems persist. General Problem Solution No power "No signal" error message is displayed • Make sure that the power cord is correctly connected to your TV and a power outlet. • Unplug the power cord - Dynex DX-32L100A13 | User Manual (English) - Page 40
If the problem is not solved by using these troubleshooting instructions, turn off your TV, then turn it on again. Specifications Specifications are subject to change without notice. Warranty DX-32L100A13 Parts: 1 year Labor: 1 year Dimensions and weight Screen DX-32L100A13 Without stand: 31 - Dynex DX-32L100A13 | User Manual (English) - Page 41
See the instructions that came with the wall-mount bracket for screw lengths. Programming universal remote controls Programming a different universal remote control You can operate your Dynex TV with a new or existing universal remote control. To program a different universal remote control: 1 See - Dynex DX-32L100A13 | User Manual (English) - Page 42
remote control code. Dynex TV codes for universal remote controls (for all Dynex TVs manufactured after Jan. 1, 2007) Universal remote control makes and models One for All 0054 Phillips 0198, 0490 RCA 135 Sony 068, 069, 078, 096, 100, 164, 168, 229, 026 Set digital device, pursuant to Part - Dynex DX-32L100A13 | User Manual (English) - Page 43
year limited warranty - Dynex Televisions DX-32L100A13 39 One-year limited warranty Dynex Televisions Definitions: Dynex Products ("Dynex") warrants to you, the original purchaser of this new Dynex or power supply • Attempted repair by any person not authorized by Dynex to service the Product - Dynex DX-32L100A13 | User Manual (English) - Page 44
) 305-2204 Distributed by Best Buy Purchasing, LLC 7601 Penn Ave. South, Richfield, MN 55423 U.S.A. © 2012 BBY Solutions, Inc. All rights reserved. DYNEX is a trademark of BBY Solutions, Inc. Registered in some countries. All other products and brand names are trademarks of their respective owners
-
 1
1 -
 2
2 -
 3
3 -
 4
4 -
 5
5 -
 6
6 -
 7
7 -
8
-
9
-
10
-
11
-
12
-
13
-
14
-
15
-
16
-
17
-
18
-
19
-
20
-
21
-
22
-
23
-
24
-
25
-
26
-
27
-
28
-
29
-
30
-
31
-
32
-
33
-
34
-
35
-
36
-
37
-
38
-
39
-
40
-
41
-
42
-
43
-
44
 |
 |

32” LCD TV
DX-32L100A13
USER GUIDE