Dynex DX-40L261A12 User Manual (English)
Dynex DX-40L261A12 Manual
 |
View all Dynex DX-40L261A12 manuals
Add to My Manuals
Save this manual to your list of manuals |
Dynex DX-40L261A12 manual content summary:
- Dynex DX-40L261A12 | User Manual (English) - Page 1
Dynex 40" LCD TV DX-40L261A12 USER GUIDE - Dynex DX-40L261A12 | User Manual (English) - Page 2
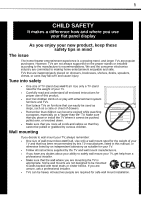
ii Dynex DX-40L261A12 40" LCD TV Contents CHILD SAFETY 1 Important safety instructions 2 Warnings 2 Cautions 3 Installing the stand or wall-mount bracket 4 Installing the stand 4 Installing a wall-mount bracket 4 TV components 5 Package contents 5 Front 5 Back 5 Remote control 6 Making - Dynex DX-40L261A12 | User Manual (English) - Page 3
the clock 27 Setting the sleep timer 28 Adjusting menu settings 28 Selecting the menu language 28 Changing the DPMS setting 29 Restoring settings to the defaults 29 Maintaining 29 Cleaning the TV cabinet 29 Cleaning the TV screen 29 Troubleshooting 30 Video and audio 30 Remote control 31 - Dynex DX-40L261A12 | User Manual (English) - Page 4
iv - Dynex DX-40L261A12 | User Manual (English) - Page 5
of wall mount does not fit all. Use only a wall mount rated for the weight of your TV and that has been recommended by this TV manufacturer, listed in this manual, or otherwise listed by an independent laboratory as suitable for your TV. • Follow all instructions supplied by the TV and wall mount - Dynex DX-40L261A12 | User Manual (English) - Page 6
. Servicing is required when the apparatus has been damaged in any way, such as power-supply cord or plug is damaged, liquid has been spilled or objects have fallen into the apparatus, the apparatus has been exposed to rain or moisture, does not operate normally, or has been dropped. 15 The wall - Dynex DX-40L261A12 | User Manual (English) - Page 7
Important safety instructions DX-40L261A12 3 Cautions Damage requiring service Unplug this TV from the power outlet and refer servicing to qualified service personnel under the following conditions: • When the power supply cord or plug is damaged or frayed. • If liquid has been spilled or objects - Dynex DX-40L261A12 | User Manual (English) - Page 8
stand, then remove the base. 2 Secure the stand to the screen with the four provided screws. Model Screw type Screw length DX-40L261A12 M6 type 12 mm 3 Attach the wall-mount bracket to your TV using the mounting holes on the back of your TV. See the instructions that came with the wall-mount - Dynex DX-40L261A12 | User Manual (English) - Page 9
TV components TV components Package contents Remote control and batteries (2 AAA) Stand with screws Composite video cable Audio cable Power cord Quick Setup Guide Front Back DX-40L261A12 5 # Item 1 MENU 2 INPUT 3 VOLUME+/VOLUME- 4 CHANNEL / CHANNEL 5 (power) 6 Remote sensor 7 Power indicator - Dynex DX-40L261A12 | User Manual (English) - Page 10
6 DX-40L261A12 TV components Remote control # Button 9 ZOOM 10 PICTURE 11 SLEEP 12 AUDIO 13 (power) 14 RECALL 15 GUIDE 16 17 EXIT 18 CH +/CH- 19 FAVORITE # Button 1 INPUT 2 Numbers 3 4 INFO 5 ENTER 6 MENU 7 VOL +/VOL - 8 MUTE Description Press to open the Source List, then press or to cycle - Dynex DX-40L261A12 | User Manual (English) - Page 11
to the AC connector on the back of your TV, then plug the other end into a power outlet. Notes • • Your TV should only be operated from the power source indicated on the label. Always unplug the AC power cord from the power outlet when you will not be using your TV for an extended period of time. - Dynex DX-40L261A12 | User Manual (English) - Page 12
or satellite box From cable TV wall jack (75 ohm) To Cable-in jack on the cable TV or satellite box HDMI cable Side of TV Side of TV 3.5 mm audio cable HDMI cable with HDMI-DVI adapter 4 Turn on your TV, then turn on the cable or satellite box. 5 Go through the setup wizard on page 16. Notes - Dynex DX-40L261A12 | User Manual (English) - Page 13
connect the audio to the digital audio jack to get digital audio output. 5 Turn on your TV, then turn on the cable or satellite box. 6 Go through the setup wizard on page 16. Back of TV Cables are often color-coded to match color-coded jacks. A/V cable COMPONENT IN 4 Turn on your TV, then turn on - Dynex DX-40L261A12 | User Manual (English) - Page 14
TV wall jack. Back of TV COMPONENT IN Coaxial cable 4 Turn on your TV, then turn on the cable or satellite box. 5 Go through the setup wizard on page 16. Notes • • Use a coaxial cable to eliminate interference and noise from radio waves. Do not bundle the coaxial cable with the power cord - Dynex DX-40L261A12 | User Manual (English) - Page 15
DX-40L261A12 11 Connecting a DVD or Blu-ray player Using HDMI (best) To connect a DVD or Blu-ray player using HDMI: 1 Make sure that your TV's power cord is unplugged and the DVD or Blu-ray player is turned off. 2 Connect an HDMI cable (not included) to an HDMI jack on the side of your TV - Dynex DX-40L261A12 | User Manual (English) - Page 16
your TV's power cord is unplugged and the DVD or Blu-ray player is turned off. 2 Connect an AV cable (included) to the AV IN jacks on the back of your TV and to the AV OUT jacks on the DVD or Blu-ray player. Note When you connect the audio using the L and R audio jacks, the audio output - Dynex DX-40L261A12 | User Manual (English) - Page 17
audio output is analog. VCR Side of TV Connecting a camcorder or game console Note If your camcorder or game console has an HDMI connection, we recommend that you use the HDMI connection to get the best quality possible. To connect a camcorder or game console: 1 Make sure that your TV's power cord - Dynex DX-40L261A12 | User Manual (English) - Page 18
14 DX-40L261A12 Making connections Connecting a computer Tip Some computers have an HDMI jack. You can use an HDMI cable to connect the computer for a better picture and sound. Using VGA To connect a computer using VGA: 1 Make sure that your TV's power cord is unplugged and the computer is turned - Dynex DX-40L261A12 | User Manual (English) - Page 19
to the wall jack Connecting a basic home theater system Using digital audio To connect a basic home theater system using digital audio: 1 Make sure that your TV's power cord is unplugged and the home theater system is turned off. 2 Connect a digital coaxial audio cable to the digital output jack on - Dynex DX-40L261A12 | User Manual (English) - Page 20
Point the remote control towards the remote sensor on the front of your TV. Turning on your TV for the first time The first time you turn on your TV, the Setup Wizard opens. The Setup Wizard guides you through setting up basic settings including the menu language, picture mode, TV signal source, and - Dynex DX-40L261A12 | User Manual (English) - Page 21
enter a sub-menu. Video Audio Setup TV Sound Mode Balance Surround Sound Equalizer Digital Audio/SPDIF Auto Volume Contorl Standard 0 PCM Select Adjust Setup menu (TV mode) Back Exit OSD Language Aspect Ratio DPMS Time Setup Caption Parental Reset Default Video Audio Setup TV English Wide - Dynex DX-40L261A12 | User Manual (English) - Page 22
by the broadcaster. Adjusting the picture Adjusting the TV picture To adjust the TV picture: 1 Press MENU. The on-screen menu opens with the Video menu displayed. Picture Mode Brightness Contrast Color Tint Sharpness Color Temperature Advanced Video Video Audio Setup TV Energy Savings 47 56 53 - Dynex DX-40L261A12 | User Manual (English) - Page 23
or press EXIT to close the menu. Adjusting the sound Adjusting sound settings To adjust sound settings: 1 Press MENU. The on-screen menu opens. Picture Mode Brightness Contrast Color Tint Sharpness Color Temperature Advanced Video Video Audio Setup TV Energy Savings 47 56 53 0 4 Cool Select Move - Dynex DX-40L261A12 | User Manual (English) - Page 24
can still tune to a hidden channel by pressing the number buttons for the channel. To hide channels: 1 Press MENU. The on-screen menu opens. Picture Mode Brightness Contrast Color Tint Sharpness Color Temperature Advanced Video Video Audio Setup TV Energy Savings 47 56 53 0 4 Cool 4 Press or to - Dynex DX-40L261A12 | User Manual (English) - Page 25
Setting parental controls DX-40L261A12 21 4 Press or to highlight the channel you want a password. To set or change the password: 1 Press MENU. The on-screen menu opens. Picture Mode Brightness Contrast Color Tint Sharpness Color Temperature Advanced Video Video Audio Setup TV Energy Savings 47 - Dynex DX-40L261A12 | User Manual (English) - Page 26
is turned On, the buttons on the side of your TV are locked and you can only operate your TV using the remote control. To lock control buttons: 1 Press MENU. The on-screen menu opens. Picture Mode Brightness Contrast Color Tint Sharpness Color Temperature Advanced Video Video Audio Setup TV Energy - Dynex DX-40L261A12 | User Manual (English) - Page 27
how to set controls for U.S. TV ratings. You use similar steps for setting U.S. movie and Canadian TV ratings. To set parental control levels: 1 Press MENU. The on-screen menu opens. Picture Mode Brightness Contrast Color Tint Sharpness Color Temperature Advanced Video Video Audio Setup TV Energy - Dynex DX-40L261A12 | User Manual (English) - Page 28
24 DX-40L261A12 U.S. movie (MPAA) ratings None G PG PG-13 R NC-17 X Movie Move Back Exit Setting parental controls 2 Press or to highlight Setup, then press . The Setup menu opens. OSD Language Aspect Ratio DPMS Time Setup Caption Parental Reset Default Video Audio Setup TV English Wide On - Dynex DX-40L261A12 | User Manual (English) - Page 29
or to highlight Setup, then press . The Setup menu opens. Channel Block Program Block Input Block Change Password Clean All Button Lock Video Audio Setup TV Select Enter Back Exit OSD Language Aspect Ratio DPMS Time Setup Caption Parental Reset Default Video Audio Setup TV English Wide On - Dynex DX-40L261A12 | User Manual (English) - Page 30
Picture Mode Brightness Contrast Color Tint Sharpness Color Temperature Advanced Video Video Audio Setup TV Energy Savings 47 56 53 0 4 Cool Select Move Back Exit 2 Press or to highlight Setup, then press . The Setup menu opens. OSD Language Aspect Ratio DPMS Time Setup Caption Parental Reset - Dynex DX-40L261A12 | User Manual (English) - Page 31
ratio To set the aspect ratio: 1 Press MENU. The on-screen menu opens. Adjusting time settings Setting the clock To set the clock: 1 Press MENU. The on-screen menu opens. Picture Mode Brightness Contrast Color Tint Sharpness Color Temperature Advanced Video Video Audio Setup TV Energy Savings - Dynex DX-40L261A12 | User Manual (English) - Page 32
28 DX-40L261A12 Adjusting menu settings 4 Press or to highlight Time Zone, then press or to select your time zone setting. You can select: Alaska, Hawaii, Eastern Time, Indiana, Central Time, Mountain Time, Arizona, or Pacific Time. Time Zone Time Sleep Timer Video Audio Setup TV 2 Press or to - Dynex DX-40L261A12 | User Manual (English) - Page 33
Maintaining DX-40L261A12 29 2 Press or to highlight Setup, then press . The Setup menu opens. OSD Language Aspect Ratio DPMS Time Setup Caption Parental Reset Default Video Audio Setup TV English Wide On Select Enter Back Exit 3 Press or to highlight OSD Language, then press or to select - Dynex DX-40L261A12 | User Manual (English) - Page 34
30 DX-40L261A12 Troubleshooting Troubleshooting Warning Do not try to repair your TV yourself. Contact authorized service personnel. Video and audio Problem Solution Picture does not fill the screen. There are black bars around the picture. No picture (screen is not lit) and no sound. Dark, - Dynex DX-40L261A12 | User Manual (English) - Page 35
15. • Refer to the User Guide that accompanied your universal remote control and contact the manufacturer if problems persist. General Problem Solution No power • Make sure that the power cord is correctly connected to your TV and a power outlet. • Unplug the power cord, wait 60 seconds, then - Dynex DX-40L261A12 | User Manual (English) - Page 36
32 DX-40L261A12 Problem Solution Control buttons do not work TV keeps turning off • Make sure that the Button Lock option is set to Off. See "Locking control buttons" on page 22. • Unplug the power cord, wait a few seconds, then plug the cord back in and turn on your TV. • Make sure that the - Dynex DX-40L261A12 | User Manual (English) - Page 37
Clear-QAM DX-40L261A12 33 Inputs HDMI 1.3 Component video Composite video Shared audio (component and composite) S-Video PC/VGA 3.5mm PC audio input USB Outputs DX-40L261A12 2 (side) E-EDID compliant HDCP compliant 1 (side) 1 (side) No No 1 (side) 1 (side) 1 (side) Support firmware upgrade only - Dynex DX-40L261A12 | User Manual (English) - Page 38
34 DX-40L261A12 Programming universal remote controls Programming universal remote controls Programming a universal remote control You can operate your Dynex TV with a new or existing universal remote control. To program a different universal remote control: 1 See the table below for common codes - Dynex DX-40L261A12 | User Manual (English) - Page 39
connected. • Consult the dealer or an experienced radio/TV technician for help. FCC warning Changes or modifications not expressly approved by the party responsible for compliance with the FCC Rules could void the user's authority to operate this equipment. Cables Connections to this device must be - Dynex DX-40L261A12 | User Manual (English) - Page 40
36 DX-40L261A12 Legal notices - Dynex DX-40L261A12 | User Manual (English) - Page 41
pay all labor and parts charges. This warranty lasts as long as you own your Dynex Product during the Warranty Period. Warranty coverage terminates if you sell or otherwise transfer the Product. How to obtain warranty service? If you purchased the Product at a Best Buy or Future Shop retail store - Dynex DX-40L261A12 | User Manual (English) - Page 42
www.dynexproducts.com US and Canada Market - (800) 305-2204 Distributed by Best Buy Purchasing, LLC 7601 Penn Ave. South, Richfield, MN 55423 U.S.A. © 2011 BBY Solutions, Inc. All rights reserved. DYNEX is a trademark of BBY Solutions, Inc. Registered in some countries. All other products and brand
-
 1
1 -
 2
2 -
 3
3 -
 4
4 -
 5
5 -
 6
6 -
 7
7 -
8
-
9
-
10
-
11
-
12
-
13
-
14
-
15
-
16
-
17
-
18
-
19
-
20
-
21
-
22
-
23
-
24
-
25
-
26
-
27
-
28
-
29
-
30
-
31
-
32
-
33
-
34
-
35
-
36
-
37
-
38
-
39
-
40
-
41
-
42
 |
 |

Dynex 40” LCD TV
DX-40L261A12
USER GUIDE