Dynex DX-CRD12 User Guide - Page 8
Installing the driver
 |
UPC - 600603109041
View all Dynex DX-CRD12 manuals
Add to My Manuals
Save this manual to your list of manuals |
Page 8 highlights
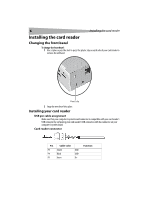
8 Installing the card reader 7 Secure your card reader to the drive bay with the four mounting screws (two screws per side). Screw Screw 8 Connect your card reader's USB connector to a compatible USB connector on your computer's system board. 9 Make sure that you have removed any tools or loose screws from inside your computer, then replace your computer's cover. 10 Reconnect your computer's power cord, then turn on your computer. Installing the driver Windows XP or Windows 2000 Windows® XP and Windows® 2000 have built-in drivers. You do not need to install a driver. After you install your card reader and turn on your computer, Windows installs the correct driver, and four new drive icons appear in the My Computer and Windows Explorer windows. Note: The T-Flash and the MMC/SD slots share the same drive icon.
-
 1
1 -
2
-
 3
3 -
 4
4 -
 5
5 -
 6
6 -
 7
7 -
 8
8 -
 9
9 -
 10
10 -
 11
11 -
 12
12 -
 13
13 -
14
-
15
-
16
-
17
-
18
-
19
-
20
-
21
-
22
-
23
-
24
-
25
-
26
-
27
-
28
-
29
-
30
-
31
-
32
-
33
-
34
-
35
-
36
 |
 |
