Dynex DX-CRD12 User Guide - Page 9
Using your card reader - installing
 |
UPC - 600603109041
View all Dynex DX-CRD12 manuals
Add to My Manuals
Save this manual to your list of manuals |
Page 9 highlights
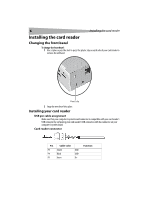
Using your card reader 9 Windows 98SE and Windows ME To install the driver in Windows® 98SE or Windows® ME: 1 Save all files and close all programs. 2 Insert the utility CD into your CD drive. 3 Open the Driver folder, then open the Windows folder. 4 Double-click on the setup.exe file. 5 Click Next, then follow the on-screen instructions to install the driver. 6 After the driver installation is complete, restart your computer. Your card reader is ready to use. Make sure that you insert the correct type card into the appropriate slot. For more information about which cards each slot accepts, see "Front" on page 4. If you want to customize the card reader drive icons in the Windows Explorer and My Computer windows, see "Customizing drive icons" on page 9. Using your card reader Customizing drive icons To make the slots easier to recognize, you can customize the drive icons. To customize the drive icons: 1 Save all files and close all programs. 2 Insert the utility CD into your CD drive. 3 Open the Driver folder, then double-click on the setup.exe file. 4 Click Next to start the installation, and follow any on-screen instructions. 5 After the installation is complete, restart your computer. Windows® displays the new drive icons for the slots instead of the standard Windows drive icons. When Windows detects a card in a slot, the corresponding drive icon turns from grey to a color that indicates the card type. Using a media card To use a media card: 1 Insert a card into the appropriate slot. For more information about which slot to use, see "Front" on page 4. 2 Open the My Computer or Windows Explorer window, then double-click the drive icon for the slot you are using. 3 Use normal Windows procedures for opening, copying, pasting, or deleting files and folders to access files and folders on the inserted card.
-
 1
1 -
2
-
3
-
 4
4 -
 5
5 -
 6
6 -
 7
7 -
 8
8 -
 9
9 -
 10
10 -
 11
11 -
 12
12 -
 13
13 -
 14
14 -
15
-
16
-
17
-
18
-
19
-
20
-
21
-
22
-
23
-
24
-
25
-
26
-
27
-
28
-
29
-
30
-
31
-
32
-
33
-
34
-
35
-
36
 |
 |
