E-Z-GO Express S6 - Electric Owner Manual - Page 45
Portable Charger Installation
 |
View all E-Z-GO Express S6 - Electric manuals
Add to My Manuals
Save this manual to your list of manuals |
Page 45 highlights
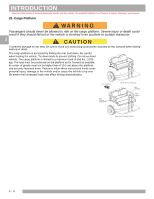
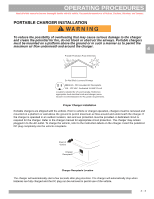
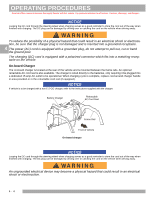
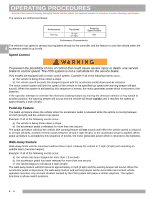
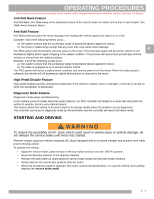
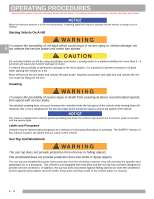
OPERATING PROCEDURES Read all of this manual to become thoroughly familiar with this vehicle. Pay particular attention to all Notices, Cautions, Warnings, and Dangers. PORTABLE CHARGER INSTALLATION To reduce the possibility of overheating that may cause serious damage to the charger and create the potential for fire, do not block or obstruct the airways. Portable chargers must be mounted on a platform above the ground or in such a manner as to permit the maximum air flow underneath and around the charger. 4 Provide Protection From Elements Do Not Block Louvered Airways NEMA 15 - 5R Grounded AC Receptacle 110 - 120 VAC. Dedicated 15 AMP Circuit Locations outside the US and Canada: Reference appropriate local electrical code and charger manufacturer recommendations for AC power requirements Proper Charger Installation Portable chargers are shipped with the vehicle. Prior to vehicle or charger operation, chargers must be removed and mounted on a platform or wall above the ground to permit maximum air flow around and underneath the charger. If the charger is operated in an outdoor location, rain and sun protection must be provided. A dedicated circuit is required for the charger. Refer to the charger manual for appropriate circuit protection. The charger may remain plugged in to the AC outlet. To charge the vehicle, refer to the instruction labels on the charger. Insert the polarized DC plug completely into the vehicle receptacle Front of Vehicle Charger Receptacle Charger Receptacle Location The charger will automatically start a few seconds after plug insertion. The charger will automatically stop when batteries are fully charged and the DC plug can be removed to permit use of the vehicle. 4- 3
-
 1
1 -
2
-
3
-
4
-
5
-
6
-
7
-
8
-
9
-
10
-
11
-
12
-
13
-
14
-
15
-
16
-
17
-
18
-
19
-
20
-
21
-
22
-
23
-
24
-
25
-
26
-
27
-
28
-
29
-
30
-
31
-
32
-
33
-
34
-
35
-
36
-
37
-
38
-
39
-
 40
40 -
 41
41 -
 42
42 -
 43
43 -
 44
44 -
 45
45 -
 46
46 -
 47
47 -
 48
48 -
 49
49 -
 50
50 -
51
-
52
-
53
-
54
-
55
-
56
-
57
-
58
-
59
-
60
-
61
-
62
-
63
-
64
-
65
-
66
-
67
-
68
-
69
-
70
-
71
-
72
-
73
-
74
-
75
-
76
-
77
-
78
 |
 |
