E-Z-GO Freedom RXV - Gas Owner Manual - Page 23
Notice
 |
View all E-Z-GO Freedom RXV - Gas manuals
Add to My Manuals
Save this manual to your list of manuals |
Page 23 highlights
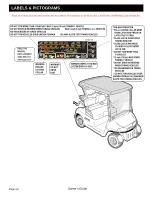
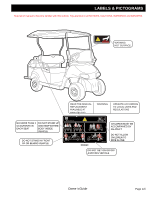
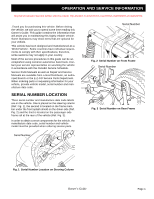
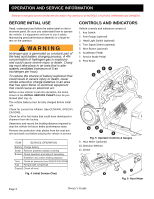
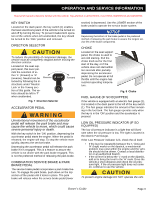
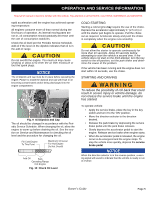
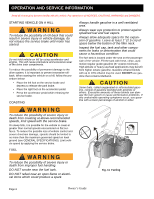
B OPERATION AND SERVICE INFORMATION Read all of manual to become familiar with this vehicle. Pay attention to all NOTICES, CAUTIONS, WARNINGS and DANGERS. KEY SWITCH Located on the dash panel, the key switch (1) enables the basic electrical system of the vehicle to be turned on and off by turning the key. To prevent inadvertent operation of the vehicle when left unattended, the key should be turned to the 'OFF' position and removed. DIRECTION SELECTOR To reduce the possibility of component damage, the vehicle must be completely stopped before moving the direction selector. Located on the seat support panel, this lever permits the selection of either 'F' (forward) or 'R' (reverse). Neutral can be locked by following the instructions under 'Neutral Lock' in the Towing section of this guide. The vehicle should be left in 'F' when unattended. Reverse Forward Fig. 7 Direction Selector ACCELERATOR PEDAL Unintentional movement of the accelerator pedal will release the park brake and may cause the vehicle to move, which could cause severe personal injury or death. With the key switch in the 'ON' position, depressing the accelerator pedal starts the engine. When the pedal is released, the engine will stop. To stop the vehicle more quickly, depress the service brake. Depressing the accelerator pedal will release the park brake if it is engaged. This is a feature to assure the vehicle is not driven with the park brake engaged. This is not the preferred method of releasing the park brake. COMBINATION SERVICE BRAKE & PARK BRAKE PEDAL The service brake pedal incorporates a park brake feature. To engage the park brake, push down on the top section of the pedal until it locks in place. The park brake will release when the service brake pedal (lower B section) is depressed. Use the LOWER section of the brake pedal to operate the service brake system. NOTICE Depressing the bottom of the brake pedal is the preferred method of releasing the park brake to assure the longest service life of the brake components. CHOKE Located on the seat support panel, the choke is used to aid cold starting. Pull the choke knob out for the first start of the day, or if the vehicle does not start within ten seconds after partially depressing the accelerator pedal. Do not operate at full throttle until the engine has reached operating temperature. Fig. 8 Choke FUEL GAUGE (IF SO EQUIPPED) If the vehicle is equipped with an electric fuel gauge (2), it is located in the dash panel to the left of the key switch (1). The fuel gauge indicates the amount of fuel remaining in the fuel tank. The fuel gauge operates only when the key is in the 'ON' position and the accelerator is pressed. LOW OIL PRESSURE INDICATOR (IF SO EQUIPPED) The low oil pressure indicator is a light that will illuminate when the oil pressure is low. The light is located in the electric Fuel Gauge. If the 'Low Pressure' indicator is lit, check the oil level: • If the level is repeatedly between the 'L' (low) and 'H' (high) marks on the dipstick, a mechanical problem may exist within the engine and the vehicle should not be driven. Contact a local distributor or an authorized branch. • If the oil level is below the 'L' mark on the dipstick, add oil to bring the level to the 'H' mark. Drive the vehicle a short distance and check the oil pressure light. If the oil pressure light does not come on, continue to use the vehicle. To prevent engine damage DO NOT operate the vehi- Owner's Guide Page 3
-
 1
1 -
2
-
3
-
4
-
5
-
6
-
7
-
8
-
9
-
10
-
11
-
12
-
13
-
14
-
15
-
16
-
17
-
 18
18 -
 19
19 -
 20
20 -
 21
21 -
 22
22 -
 23
23 -
 24
24 -
 25
25 -
 26
26 -
 27
27 -
 28
28 -
29
-
30
-
31
-
32
-
33
-
34
-
35
-
36
-
37
-
38
-
39
-
40
-
41
-
42
-
43
-
44
-
45
-
46
-
47
-
48
-
49
-
50
-
51
-
52
-
53
-
54
-
55
-
56
-
57
-
58
-
59
-
60
 |
 |
