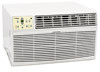
EdgeStar WTC12001W Owner's Manual - Page 9
Installing the Cabinet into the Wall, Installing the Grille
 |
View all EdgeStar WTC12001W manuals
Add to My Manuals
Save this manual to your list of manuals |
Page 9 highlights
NOTE: You may need to drill holes in flange of existing sleeve to match new rear grille. 5 Installation Instructions Installing the Cabinet into the Wall Follow the steps listed below to install the cabinet into the wall 1. Remove existing rear grille as shown on Page 4 of this manual and replace with provided louvered rear panel. 2. Attach (1) 1"x ⅜" x 25" long seal in the center at the top of the sleeve. Remove the backing paper and press into position. 3. Attach (2) 1" x ⅜" x 14" seals to the left and right sides of the sleeve. 4. Attach (2) 1" x ¾" x 14" long seals vertically 4 ½" from the left side of the sleeve .Attach the other 1" x ¾" x 14" long seal 4" from the right side of the sleeve. 5. Center unit and gently slide unit into sleeve. 6. Before sliding all-the-way back, remove 2nd screw from front on left side of unit. 7. Remove the plastic washer from the screw. 8. Screw and attach the other end of the ground wire to the unit as shown in picture. Make sure that the toothed washer is against the cabinet. 9. Slide the unit completely to the rear to ensure a good seal, making sure the ground wire does not become tangled. Installing the Grille This units increased performance characteristics result from having two rear air intakes. It is very important that these installation instructions are followed so your unit can operate a maximum efficiency. If this is an existing sleeve, and there is an existing rear grille, it needs to be replaced by one that has been shipped with the unit in the accessory kit. NOTE: For increased efficiency, utilize the provided louvered rear panel. 1. Remove the existing grille. 2. Place the grille included with the new air conditioner towards the rear of the sleeve. 3. Mark through the hole positions. 4. Drill through the sleeves flanges with a ⅛" drill bit. 5. Attached the new grille with self-threading screws and washers. 6. It is VERY IMPORTANT that the grille is placed exactly as shown below. 7. Most decorative exterior grilles may be left in place as long as the proper interior air direction grille is installed.
-
 1
1 -
2
-
3
-
 4
4 -
 5
5 -
 6
6 -
 7
7 -
 8
8 -
 9
9 -
 10
10 -
 11
11 -
 12
12 -
 13
13 -
 14
14 -
15
-
16
-
17
-
18
-
19
-
20
 |
 |
