Electrolux E23BC69SPS Complete Owners Guide English - Page 8
Installing Shelves select, models, Adjusting Flipper Mullion Height
 |
View all Electrolux E23BC69SPS manuals
Add to My Manuals
Save this manual to your list of manuals |
Page 8 highlights
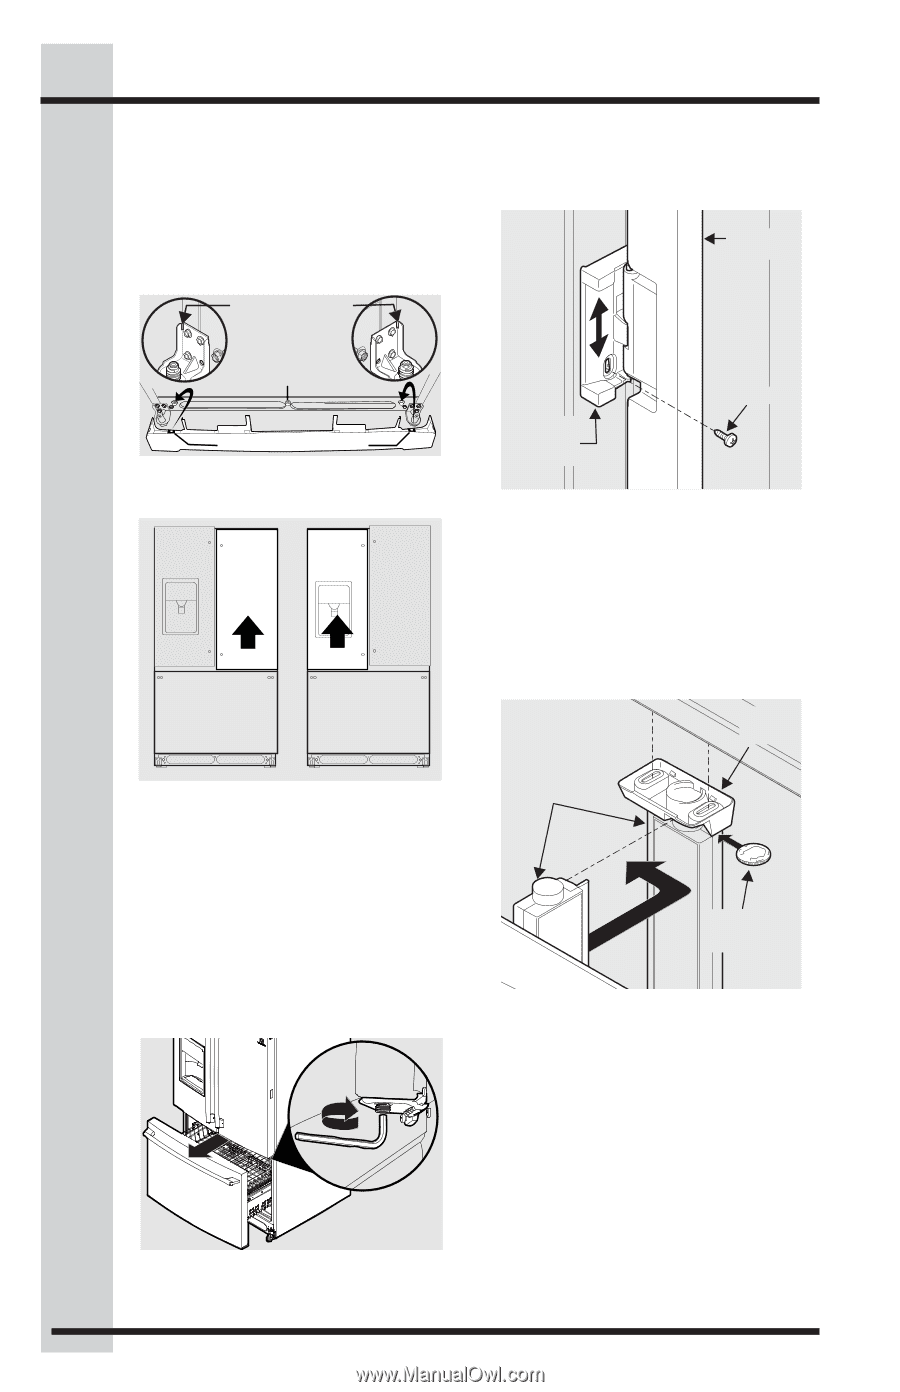
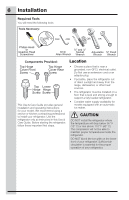
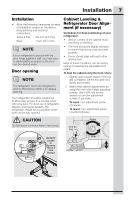
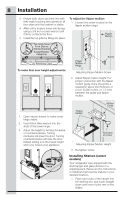
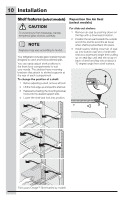
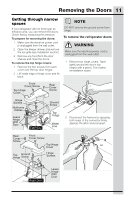
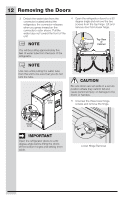
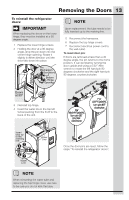
8 Installation 3 Ensure both doors are bind-free with their seals touching the cabinet on all four sides and that cabinet is stable. 4 After unit is leveled, lower anti-tip leg using a 3/8 inch socket wrench until it firmly contacts the floor. 5 Install the toe grille by fitting into place. To adjust the flipper mullion: 1 Loosen the screw located on the flipper mullion hinge. Flipper Mullion Toe Grille Must Fit in Slot on Anti-tip Bracket Screw/Washer Assembly (2) Retaining Clips To make final door height adjustments: Flipper Mullion Hinge Screw Adjusting Flipper Mullion Screw Door Door 2 Adjust flipper mullion height. For proper connection with the flipper mullion guide, there should be a separation about the thickness of a coin (0.060 inches, or 1.5 mm) between the guide and flipper mullion. 1. Open freezer drawer to make lower hinge visible. 2. Insert 6mm Allen wrench into the shaft of the lower hinge. 3. Adjust the height by turning clockwise or counterclockwise. Turning clockwise will lower the door. Turning counterclockwise will raise the door. Default setting is to the lowest height when you receive your appliance. Raise Flipper Mullion Mullion Guide Thickness of a Coin Adjusting Flipper Mullion Height 3 Re-tighten screw. Installing Shelves (select models) Your refrigerator was shipped with the shelf hanger and glass shelves in a shipping pack. Below are the instructions to install and remove the shelves in your desired locations. 1 Place top hooks of the hanger into the desired slot, and lower straight down until lower hooks rest on the ladder.
-
 1
1 -
2
-
 3
3 -
 4
4 -
 5
5 -
 6
6 -
 7
7 -
 8
8 -
 9
9 -
 10
10 -
 11
11 -
 12
12 -
 13
13 -
14
-
15
-
16
-
17
-
18
-
19
-
20
-
21
-
22
-
23
-
24
-
25
-
26
-
27
-
28
-
29
-
30
-
31
-
32
-
33
-
34
-
35
-
36
-
37
-
38
-
39
-
40
-
41
-
42
-
43
 |
 |