Electrolux E30WV60PPS Complete Owner's Guide (English) - Page 5
List of Materials, Electrical Requirements
 |
View all Electrolux E30WV60PPS manuals
Add to My Manuals
Save this manual to your list of manuals |
Page 5 highlights
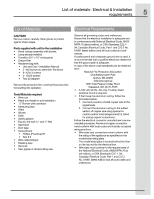
List of materials- Electrical & Installation requirements 5 List of Materials CAUTION! Remove carton carefully. Wear gloves to protect against sharp edges. Parts supplied with unit for the installation •• Hood canopy assembly with blower. •• Lamp already installed. •• Transition (31⁄4" x 10" rectangular) •• Grease filter. •• Hardware bag with: •• Use and Care / Installation Manual •• 3- 4x8 screws (to assemble Transition) •• 6- 4,5x13 screws •• 4- 10x50 screws •• Torx 20 Adapter Remove the protective film covering the product before putting into operation. Tools/Materials required •• Wire nuts •• Metal duct length to suit installation •• 1⁄2" Romex wire connector •• Measuring tape •• Pliers •• Gloves •• Knife •• Safety glasses •• Electric drill with 5⁄16" and 3⁄8" Bits •• Spirit level •• Duct tape •• Screwdrivers: •• Phillips (Posidrive) #2 •• Torx # 2 •• Wire cutter/stripper •• Masking tape •• Hammer •• Saw, jigsaw or reciprocating saw Electrical Requirements Observe all governing codes and ordinances. Ensure that the electrical installation is adequate and in conformance with National Electrical Code, ANSI/ NFPA 70 (latest edition), or CSA Standards C22.194, Canadian Electrical Code, Part 1 and C22.2 No. 0-M91 (latest edition) and all local codes and ordinances. If codes permit and a separate ground wire is used, it is recommended that a qualified electrician determine that the ground path is adequate. A copy of the above code standards can be obtained from: National Fire Protection Association One Batterymarch Park Quincy, MA 02269 CSA International 8501 East Pleasant Valley Road Cleveland, OH 44131-5575 •• A 120 volt, 60 Hz., AC only, 15-amp, fused electrical circuit is required. •• If the house has aluminum wiring, follow the procedure below: 1. Connect a section of solid copper wire to the pigtail leads. 2. Connect the aluminum wiring to the added section of copper wire using special co nectors and/or tools designed and UL listed for joining copper to aluminum. Follow the electrical connector manufacturer's recommended procedure. Aluminum/copper connection must conform with local codes and industry accepted wiring practices. •• Wire sizes and connections must conform with the rating of the appliance as specified on the model/serial rating plate. The model/serial plate is located behind the filter on the top wall by the electrical box. •• Wire sizes must conform to the requirements of the National Electrical Code, ANSI/NFPA 70 (la est edition), or CSA Standards C22. 1-94, Canadian Electrical Code, Part 1 and C22.2 No. 0-M91 (latest edition) and all local codes and ordinances.
-
 1
1 -
 2
2 -
 3
3 -
 4
4 -
 5
5 -
 6
6 -
 7
7 -
 8
8 -
 9
9 -
 10
10 -
 11
11 -
12
 |
 |
