Electrolux RH36WC40GS Complete Owner's Guide (English) - Page 9
If it is intended to use the hood in the recirculating
 |
UPC - 012505558726
View all Electrolux RH36WC40GS manuals
Add to My Manuals
Save this manual to your list of manuals |
Page 9 highlights
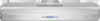
Installing the hood 9 Step 4 Remove the junction box cover. J-Box Cover Step 5 Remove the duct knockouts using a flat blade screwdriver and a small hammer. Use the screwdriver by knocking out the pannel in similar fashion to a scalpel. Take care of sharp edges. Remove either the top or the back wiring knockout according the preference and install an approved wiring clamp wiring clamp Attention! If it is intended to use the hood in the recirculating version do not remove any duct knockouts and order the necessaruy charcoal filter from your supplier. Rectangular R1 vertical discharge R2 Round vertical discharge R1 Rectangular horizontal discharge R1= Remove rectangular duct knockout only. R2 = Remove semicircular and rectangular duct knockouts.
-
 1
1 -
2
-
3
-
 4
4 -
 5
5 -
 6
6 -
 7
7 -
 8
8 -
 9
9 -
 10
10 -
 11
11 -
 12
12 -
 13
13 -
 14
14 -
15
-
16
-
17
-
18
-
19
 |
 |
