Epson 11880 Printer Guide - Page 114
Choosing Paper Configuration Options, if you want to have the time, date, and other
 |
UPC - 010343867024
View all Epson 11880 manuals
Add to My Manuals
Save this manual to your list of manuals |
Page 114 highlights
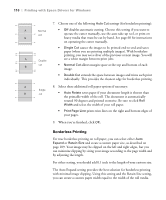
114 | Printing with Epson Drivers for Windows 3. Click Reduce/Enlarge if you want to have the driver resize your image. You can select Fit to Page or select Custom and enter a scaling percentage or Fit to Roll Paper Width. 4. If you are enlarging your image beyond the limits of your application program, make sure Optimize Enlargement is selected. The driver will increase the image size up to 650% and decrease the output resolution to stay within the pixel limitations. Depending on the resolution of the original image and the print size, you may see reduced quality in the print. 5. Click Print Bckg Color if you want to print color on the background of the page, then select the color you want to use. 6. Click Job Settings if you want to have the time, date, and other information about your print job printed at the top or bottom of the page. Click Details, then select the settings you want to use. 7. Click OK or Apply when you're finished setting Page Layout options. Note: You may need to change the Color Density setting if your custom profile was created to optimize D-max and color gamut. Choosing Paper Configuration Options 1. If you are using non-Epson media and you need to fine-tune its performance, click the Paper Config button. You see the following: 4-114
-
 1
1 -
2
-
3
-
4
-
5
-
6
-
7
-
8
-
9
-
10
-
11
-
12
-
13
-
14
-
15
-
16
-
17
-
18
-
19
-
20
-
21
-
22
-
23
-
24
-
25
-
26
-
27
-
28
-
29
-
30
-
31
-
32
-
33
-
34
-
35
-
36
-
37
-
38
-
39
-
40
-
41
-
42
-
43
-
44
-
45
-
46
-
47
-
48
-
49
-
50
-
51
-
52
-
53
-
54
-
55
-
56
-
57
-
58
-
59
-
60
-
61
-
62
-
63
-
64
-
65
-
66
-
67
-
68
-
69
-
70
-
71
-
72
-
73
-
74
-
75
-
76
-
77
-
78
-
79
-
80
-
81
-
82
-
83
-
84
-
85
-
86
-
87
-
88
-
89
-
90
-
91
-
92
-
93
-
94
-
95
-
96
-
97
-
98
-
99
-
100
-
101
-
102
-
103
-
104
-
105
-
106
-
107
-
108
-
 109
109 -
 110
110 -
 111
111 -
 112
112 -
 113
113 -
 114
114 -
 115
115 -
 116
116 -
 117
117 -
 118
118 -
 119
119 -
120
-
121
-
122
-
123
-
124
-
125
-
126
-
127
-
128
-
129
-
130
-
131
-
132
-
133
-
134
-
135
-
136
-
137
-
138
-
139
-
140
-
141
-
142
-
143
-
144
-
145
-
146
-
147
-
148
-
149
-
150
-
151
-
152
-
153
-
154
-
155
-
156
-
157
-
158
-
159
-
160
-
161
-
162
-
163
-
164
-
165
-
166
-
167
-
168
-
169
-
170
-
171
-
172
-
173
-
174
-
175
-
176
 |
 |
