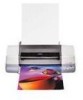
Epson 1280 Start Here Card - Page 5
Print a Photo Print a Photo - stylus photo problems
 |
UPC - 010343844230
View all Epson 1280 manuals
Add to My Manuals
Save this manual to your list of manuals |
Page 5 highlights
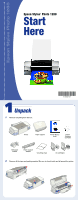
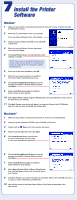
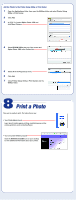
Add the Printer to the Printer Setup Utility or Print Center 1 Open the Applications folder, then open the Utilities folder and select Printer Setup Utility or Print Center. 2 Click Add. 3 In OS X 10.4, select Stylus Photo 1280 and click More Printers. 4 Select EPSON USB at the top of the screen and Stylus Photo 1280 in the Product list. 5 Select All in the Page Seutp menu. 6 Click Add. 7 Close Printer Setup Utility or Print Center and the Utilites folder. 8 Print a Photo Now you're ready to print. For instructions, see: • Your Printer Basics book Learn about loading paper, printing, maintaining your printer, solving problems, and contacting Epson. • Your on-screen Reference Guide Click the Reference Guide icon on your desktop to view additional information about your printer.
-
 1
1 -
 2
2 -
 3
3 -
 4
4 -
 5
5 -
 6
6
 |
 |
