Epson 3170 Start Here Card - Page 3
Starting a Scan, Selecting the Scanning Mode, Restoring Color in Photos, Smart Panel, EPSON Scan - windows 7
 |
UPC - 010343846630
View all Epson 3170 manuals
Add to My Manuals
Save this manual to your list of manuals |
Page 3 highlights
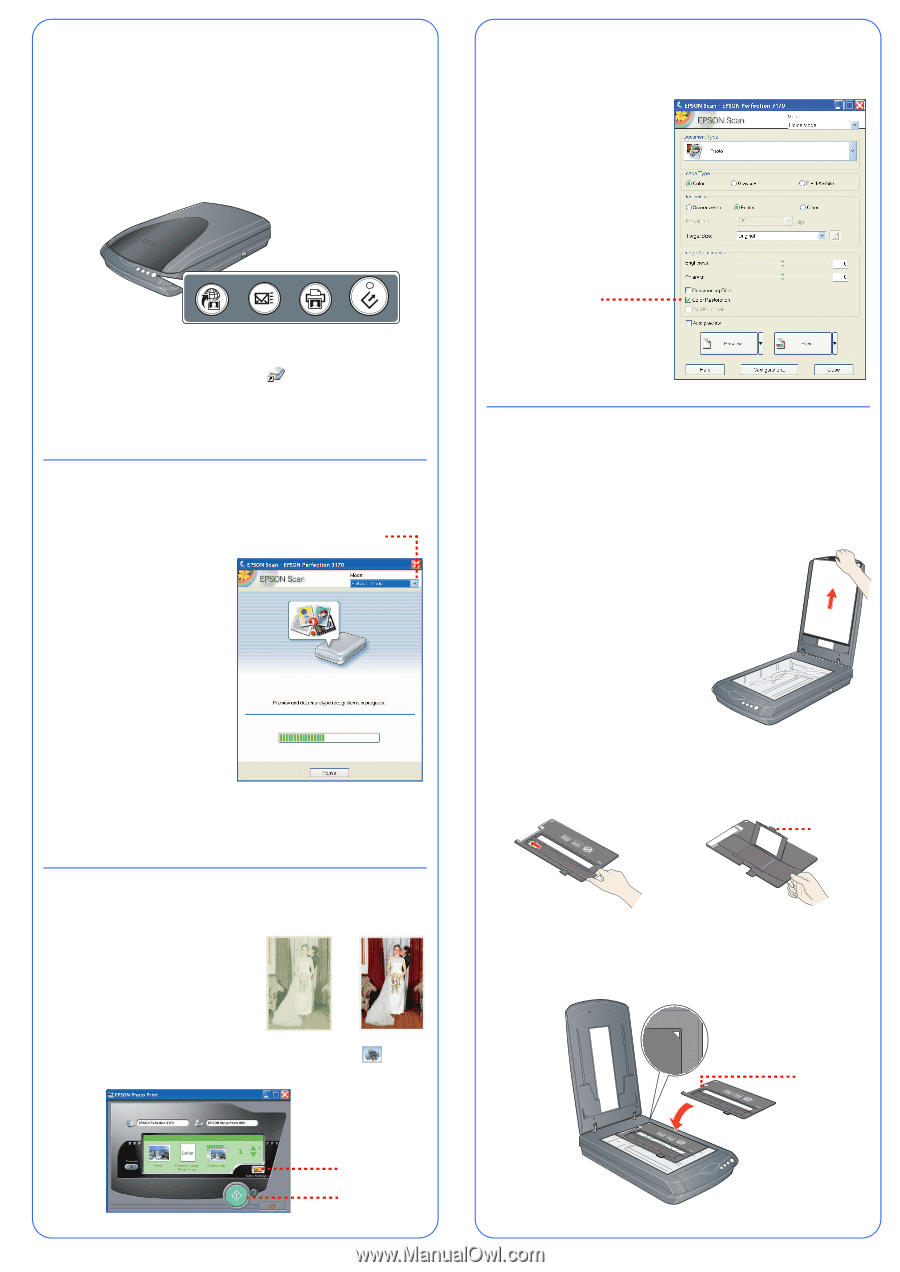
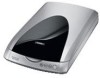
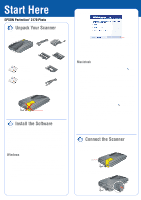
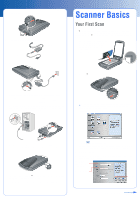
Starting a Scan You can start a scan in several different ways: • You can use the scanner buttons. Press the button for the type of scan you want. Smart Panel automatically opens and scans your documents. Then follow the easy on-screen instructions to finish your task. Note: If you are using Windows XP, you will have to select EPSON Smart Panel and Always use this program for this action the first time you press each of the buttons. Scan to Web Scan to E-mail Copy Start • You can start Smart Panel by clicking the use it to perform various types of scans. icon on your desktop, and • You can start EPSON Scan from Adobe Photoshop Elements or any other TWAIN-compliant program. You can also start the EPSON Scan program directly from your computer. Selecting the Scanning Mode EPSON Scan has four scanning modes: • Full Auto Mode for automatic control of scan settings. • Home Mode for scanning film and more control over scan settings, including Color Restoration. • Office Mode for scanning text and multiple pages (available only if the optional automatic document feeder is installed). • Professional Mode for full control over all scan settings. Choose your scanning mode To change the scanning mode, choose the mode you want to use from the list box at the top right of the window. To change settings in Full Auto Mode, click the Pause button, then click Options. If you're using Home, Professional, or Office Mode, the options window automatically appears. Then select the settings you want to use for your scan. Note: The selected mode and settings remain in effect until they are changed. Restoring Color in Photos If you have faded photos or negatives, you can use the Color Restoration setting in your software to improve the color of your scan. You can select this setting in Smart Panel or in EPSON Scan. Smart Panel To select the Color Restoration setting, open Smart Panel and select Photo. You see the screen below. Click the Color Restoration icon. RePrint EPSON Scan Color Restoration is available in Home and Professional Modes. 1 To select Color Restoration, start EPSON Scan. You see a screen similar to this. 2 Click the Preview button at the bottom of the screen. 3 Select the Color Restoration checkbox. (If you're using Professional Mode, you may need to scroll to the bottom of the screen.) Select Color Restoration Scanning Film The scanner cover has a built-in film adapter. To scan film or negative strips, slides, or transparencies, you need to remove the document mat from the scanner cover and insert the film in a holder. The scanner comes with 3 different film holders: one for 35 mm film or negative strips, one for 35 mm slides, and one for medium-format (120/220) transparencies. 1 Make sure the film adapter cable is connected to the scanner (see step 3 in "Connect the Scanner"). If you need to connect the cable, first turn the scanner off. Then turn it back on again after you connect the cable. 2 Lift the scanner cover all the way up and slide the reflective document mat up and off of the scanner cover. 3 Follow the instructions for the type of film you are scanning: If you are scanning 35 mm film or negative strips or medium-format (120/ 220) transparencies, slide the film into the corresponding holder, with the film's shiny side facing down. Cover tab 35 mm film or negative strips Medium-format transparencies: Slide the film into the holder as shown. Then lower the cover and press the tab to lock it in place. Place the film holder on the scanner as shown. Make sure the white triangle on the holder points to the upper-right corner of the scanner. Make sure this calibration space is uncovered Click Color Restoration Click here to scan and print
-
 1
1 -
 2
2 -
 3
3 -
 4
4
 |
 |