Epson 4180 Start Here Card - Page 5
Using the Scanner Buttons, Restoring Color in Photos
 |
UPC - 010343850880
View all Epson 4180 manuals
Add to My Manuals
Save this manual to your list of manuals |
Page 5 highlights
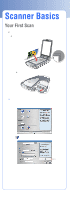
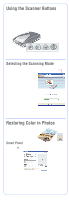
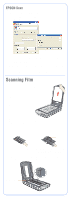
Using the Scanner Buttons The scanner buttons make scanning easy. Just place your document face down on the scanner and press the button for the type of scan you want. Smart Panel automatically opens and scans your documents. Then follow the easy on-screen instructions to finish your task. Note: If you are using Windows XP, you will have to select EPSON Smart Panel and Always use this program for this action the first time you press each of the buttons. Scan and save Scan to Copy E-mail Start Selecting the Scanning Mode EPSON Scan has four scanning modes: • Full Auto Mode for automatic control of scan settings. • Home Mode for more control over scan settings, including Color Restoration. • Office Mode for scanning text and multiple pages (available only if the optional automatic document feeder is installed). • Professional Mode for full control over all scan settings. Choose your scanning mode To change the scanning mode, choose the mode you want to use from the Mode list box. To change settings in Full Auto Mode, click the Pause button, then click Options. If you're using Home, Professional, or Office Mode, the options window automatically appears. Then select the settings you want to use for your scan. Note: The selected mode and settings remain in effect until they are changed. Restoring Color in Photos If you have faded photos, slides, or negatives, you can use the Color Restoration setting in your software to bring them back to life. You can select this setting in Smart Panel or in EPSON Scan. Smart Panel 1 Press the { Copy button on the scanner. The Copy Center opens. 2 Select your printer. Then select Photo for the Source Type. Select the Type and Size of the paper loaded in your printer and the Copy Size you want. 3 Select Color Restoration, then click the Copy button on the screen. Your photo is copied, restored, and printed. If you need more information, click the Help button.
-
 1
1 -
 2
2 -
 3
3 -
 4
4 -
 5
5 -
 6
6 -
 7
7 -
 8
8
 |
 |
