Epson 680Pro Product Information Guide - Page 13
Installing or Replacing the Ribbon Cartridge, Cartridges S015016. - lq ribbon
 |
UPC - 010343832138
View all Epson 680Pro manuals
Add to My Manuals
Save this manual to your list of manuals |
Page 13 highlights
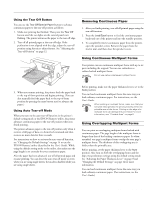
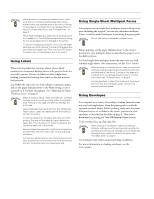
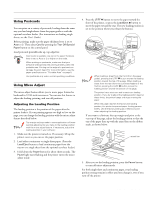
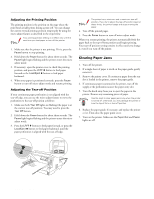
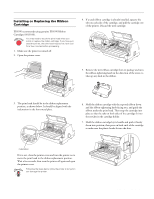
Installing or Replacing the Ribbon Cartridge EPSON recommends using genuine EPSON Ribbon Cartridges (S015016). You may need to touch the print head when you install or replace the ribbon cartridge. If you have just used the printer, the print head may be hot; let it cool for a few minutes before proceeding. 1. Make sure the printer is turned off. 2. Open the printer cover. EPSON LQ-680Pro 4. If a used ribbon cartridge is already installed, squeeze the tabs on each side of the cartridge, and pull the cartridge out of the printer. Discard the used cartridge. 5. Remove the new ribbon cartridge from its package and turn the ribbon-tightening knob in the direction of the arrow to take up any slack in the ribbon. 3. The print head should be in the ribbon replacement position, as shown below. It should be aligned with the indentation in the front metal plate. 6. Hold the ribbon cartridge with the exposed ribbon down and the ribbon-tightening knob facing you, and guide the ribbon under the print head. Then snap the cartridge into place so that the tabs on both sides of the cartridge fit into the notches in the cartridge holder. 7. Hold the ribbon cartridge by its handle and push it firmly down into position; then press on both ends of the cartridge to make sure the plastic hooks fit into the slots. indentation If it is not, close the printer cover and turn the printer on to move the print head to the ribbon replacement position. Wait a few seconds, then turn the printer off again and open the printer cover. Following the steps below while the printer is turned on can damage the printer. 11/00 EPSON LQ-680Pro - 13
-
 1
1 -
2
-
3
-
4
-
5
-
6
-
7
-
 8
8 -
 9
9 -
 10
10 -
 11
11 -
 12
12 -
 13
13 -
 14
14 -
 15
15 -
 16
16
 |
 |
