Epson 710C Product Information Guide - Page 5
Using the Buttons, Cleaning the Lens, Cleaning the Projector, Product Information Guide - remote control
 |
UPC - 010343821538
View all Epson 710C manuals
Add to My Manuals
Save this manual to your list of manuals |
Page 5 highlights
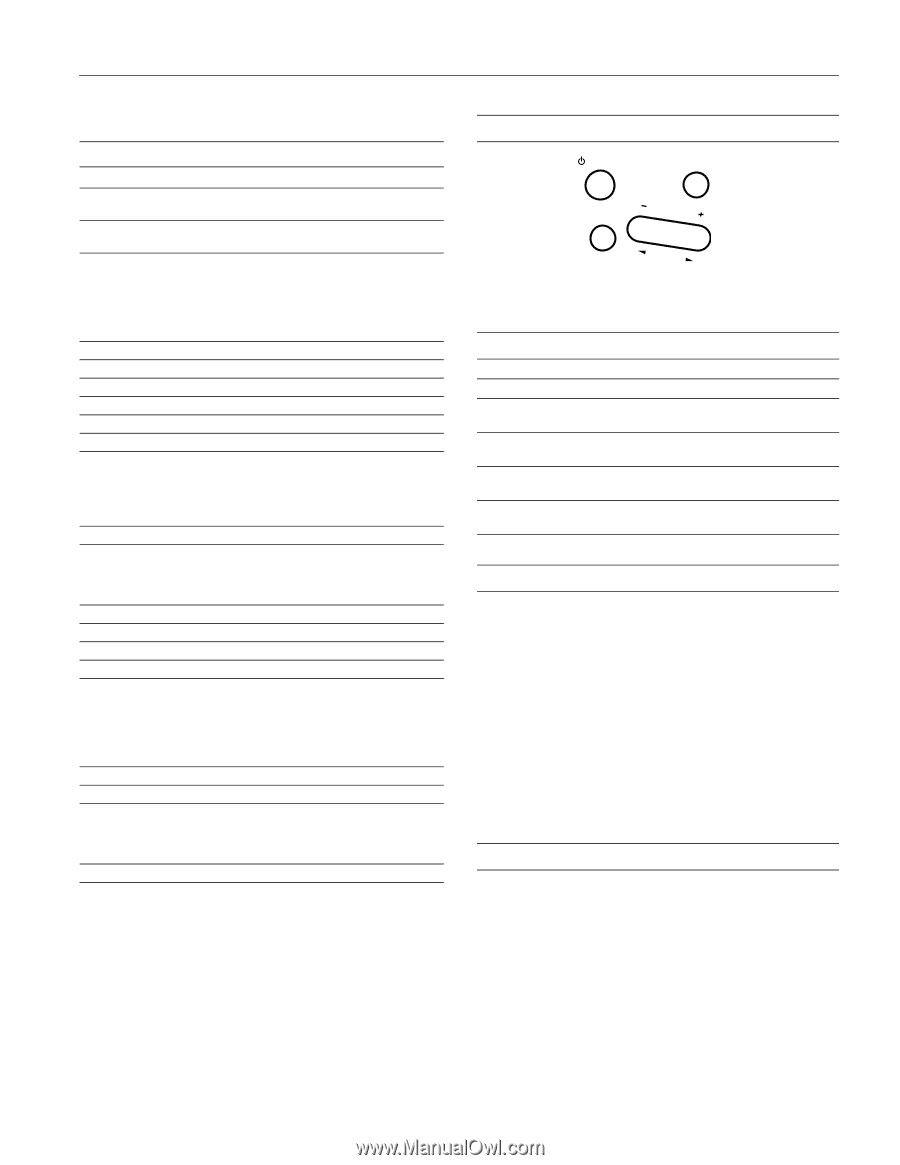
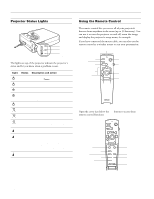
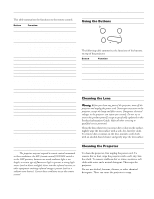
EPSON PowerLite 500c/700c/710c Projector This table summarizes the functions on the remote control. Button Function Power Starts or stops the projector. Freeze Keeps the current computer or video image on the screen. A/V mute Turns off the audio and video, displaying the black, blue or user logo background. E-Zoom Enlarges or reduces the image size from 1x to 4x (in 24 steps). Pressing the right side of the button enlarges the image, pressing the left side of the button reduces the image. To display a portion of an enlarged image which is outside the display area, press the Enter button and scroll the image to the desired location. R/C ON/OFF Turns the remote control on or off. button 1 Places an arrow or cursor stamp on the screen. button 2 Draws a box. button 3 Draws a horizontal or vertical line (marker tool). button 4 Draws a freehand line. button 5 Erases drawing effects. Enter Use the Enter button to navigate the menus or use the (pointer button) remote as a mouse pointer when the projector is connected to the computer with the mouse cable. When the image source is Computer, the Enter button acts as a mouse left-click. Illumination Illuminates all buttons on the remote control. Esc Stops the current function. Pressing Esc while viewing a menu or the online help displays the previous screen or menu. When the image source is Computer, the Esc button acts as a mouse right-click. Menu Displays or hides the menu. Comp Switches to Computer image. S-Video Switches to S-Video image. Auto Optimizes the computer image. P in P Displays a video or S-video image in a subscreen on the main display. Use the Enter button to reposition the Picture in Picture (P in P) screen, or the E-Zoom button to enlarge or reduce the image. Changes made to the P in P screen location and size are automatically carried over to the next P in P session. Help Displays the online help menu. Video Switches to Video image. Resize Switches the display dot mode and resize mode for VGA, UXGA, SVGA, and SXGA input. You cannot resize the image if the input resolution matches the output resolution of the projector. - Volume + Adjusts the volume. Note: The projector may not respond to remote control commands in these conditions: the R/C (remote control) ON/OFF switch is in the OFF position; batteries are weak; ambient light is too bright; a certain type of fluorescent light is present; a strong light source (such as direct sunlight) shines into the infrared receiver; or other equipment emitting infrared energy is present (such as a radiant room heater). Correct these conditions to use the remote control. Using the Buttons Power Help Source Keystone Enter Select The following table summarizes the functions of the buttons on top of the projector: Button Power Help Source Enter - Keystone + Select Function Starts or stops projection. Displays the online help menu. Switches between Computer, Video, and S-video sources. Selects a menu option when the Help menu is displayed. Adjusts a trapezoid distorted image to normal, correction up to a ±15° tilt. Scrolls through options when the Help menu is displayed. Cleaning the Lens Warning: Before you clean any part of the projector, turn off the projector and unplug the power cord. Never open any cover on the projector, except the lamp and filter covers. Dangerous electrical voltages in the projector can injure you severely. Do not try to service this product yourself, except as specifically explained in this Product Information Guide. Refer all other servicing to qualified service personnel. Clean the lens whenever you notice dirt or dust on the surface. Lightly wipe the lens surface with a soft, dry, lint-free cloth. To remove dirt or smears on the lens, moisten a soft cloth with an alcohol-based cleaner and gently wipe the lens surface. Cleaning the Projector To clean the projector, first unplug the power cord. To remove dirt or dust, wipe the projector with a soft, dry, lintfree cloth. To remove stubborn dirt or stains, moisten a soft cloth with water and a neutral detergent. Then wipe the projector. Do not use alcohol, benzene, thinner, or other chemical detergents. These can cause the projector to warp. 1/00 EPSON PowerLite 500c/700c/710c Projector - 5
-
 1
1 -
 2
2 -
 3
3 -
 4
4 -
 5
5 -
 6
6 -
 7
7
 |
 |