Epson ActionPrinter 3250 Product Information Guide - Page 6
Using Continuous Paper with Optional Push Tractor, Installing the push tractor
 |
View all Epson ActionPrinter 3250 manuals
Add to My Manuals
Save this manual to your list of manuals |
Page 6 highlights
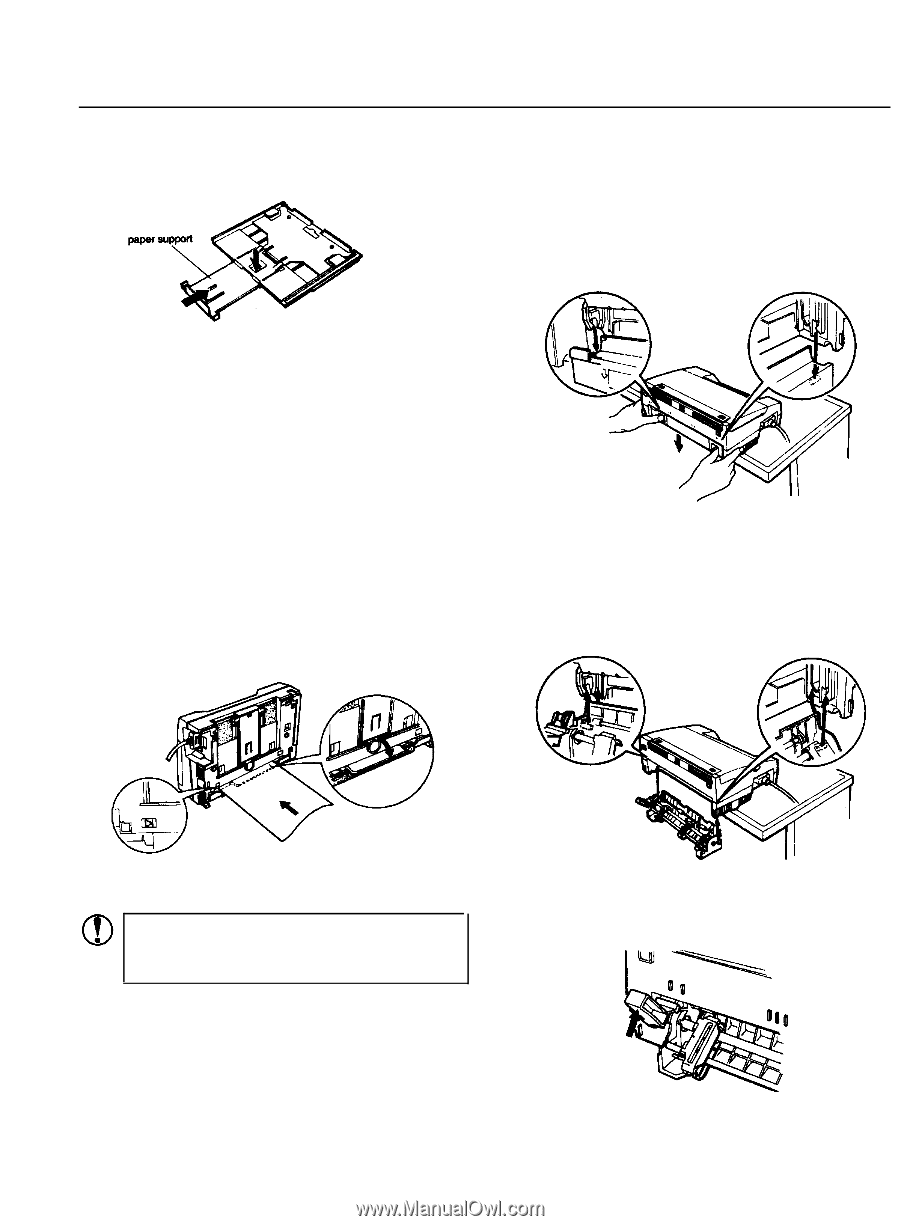
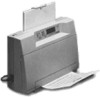
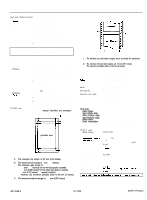
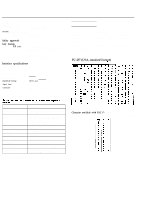
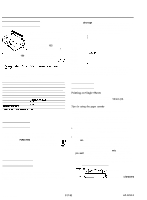
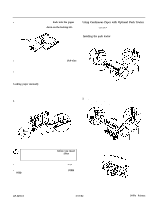
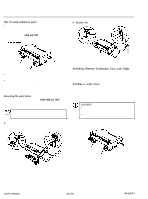
ActionPrinter 3250 l When you want to push the paper support back into the paper cassette, first remove paper from the paper cassette. Then push the paper support in while pushing down on the locking tab. Using Continuous Paper with Optional Push Tractor You can use the Optional push tractor to print on continuous paper from 101 mm (4 inches) to 254 mm (10 inches) wide. Installing the push tractor 1. Make sure the printer is turned off and is in the flat position. Remove the paper guide. l The default page length for the paper cassette is 65 lines (A4-size paper) or 61 lines (letter-size paper). You can change it using your application software or printer commands, if necessary. l You can switch to manual insertion or to the optional push tractor without removing the paper cassette. Loading paper manually You can load single sheets of paper from the rear manual insertion slot. (If you've installed the optional push tractor, remove it before loading paper manually.) 1. Place the printer in the upright position and turn it on. 2. Next, lower the flap on the rear slot. Then insert a single sheet into the slot, aligning the paper edge with the arrow mark on the printer case. The page loads automatically. When the printer receives data, it begins printing. 2. Make sure the paper-release lever is lowered to the single-sheet position. 3. Hold the tractor as shown and fit the edges of both sides into the slots at the back of the printer. Then lift it straight up until you hear the unit snap into place. Be sure to raise the flap when not using manual insertion. CAUTION: Be sure to turn on the printer before you insert the page into the slot. If you turn on the printer after paper insertion, the printer prints on the platen without loading the paper. l You can adjust the top-of-form position in the same way that you do for paper loaded from the cassette. l When you want to switch to the paper cassette, press the FORM FEED button without inserting a page into the rear slot. The printer loads a page from the cassette. 4. Raise the paper-release lever to the continuous-paper position. AP-3250-6 3/17/92 24-Pin Printers
-
 1
1 -
 2
2 -
 3
3 -
 4
4 -
 5
5 -
 6
6 -
 7
7 -
 8
8 -
 9
9
 |
 |