Epson C823781 EPSON Software Installation Instructions - Page 9
Connecting the Print Server, connector and secure it with the wire clips.
 |
UPC - 010343822221
View all Epson C823781 manuals
Add to My Manuals
Save this manual to your list of manuals |
Page 9 highlights
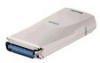
Connecting the Print Server Follow the steps below to connect the print server to the network. 1. Make sure the printer is turned off. 2. Plug the print server into the printer's parallel interface connector and secure it with the wire clips. 3. Connect the network cable to the print server, and connect the other end to the network. Note: ❏ Use a Category 5 twisted-pair cable to connect the print server to the network. ❏ The print server will automatically use DHCP to obtain an IP address. If it cannot get an IP address this way, it will use the private IP address of 192.168.192.168. Software Installation Guide 9
-
 1
1 -
2
-
3
-
 4
4 -
 5
5 -
 6
6 -
 7
7 -
 8
8 -
 9
9 -
 10
10 -
 11
11 -
 12
12 -
 13
13 -
 14
14 -
15
-
16
-
17
-
18
-
19
-
20
-
21
-
22
-
23
-
24
-
25
-
26
-
27
-
28
 |
 |

Software Installation Guide
9
Connecting the Print Server
Follow the steps below to connect the print server to the network.
1.
Make sure the printer is turned off.
2.
Plug the print server into the printer’s parallel interface
connector and secure it with the wire clips.
3.
Connect the network cable to the print server, and connect the
other end to the network.
Note:
❏
Use a Category 5 twisted-pair cable to connect the print server
to the network.
❏
The print server will automatically use DHCP to obtain an IP
address. If it cannot get an IP address this way, it will use the
private IP address of 192.168.192.168.